This post contains affiliate links. Please see our disclosure policy.
Trimming a massive, “prehistoric” rack of pork into a clean, uniform St. Louis cut is one of the first “pro” skills any pitmaster should master. There is something incredibly satisfying about taking a full slab and carving out that perfect rectangle yourself. Not only does it look better on the platter, but it ensures an even cook across the entire rack on your Big Green Egg.
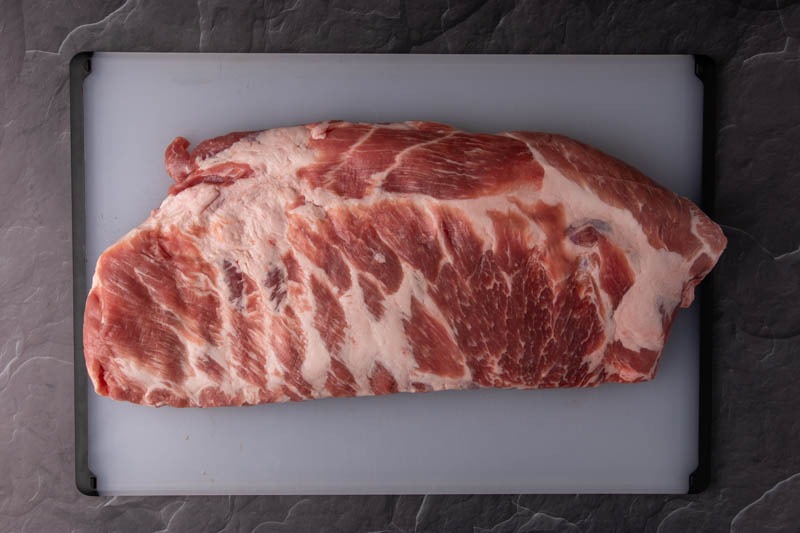
But before we pick up the knife, let’s talk about what spare ribs actually are. Spare ribs are taken from the belly of the pig and are much longer than their counterparts, the baby back ribs. Since they come from the belly, the same area where we get bacon, the meat is marbled with the kind of fat that equates to deep, rich flavor. While there might be less meat on top of the bone compared to baby backs, the fat rendering makes them the superior choice for many BBQ purists.
A St. Louis style spare rib is simply a full rack that has been cleaned up by removing the breastbone and excess cartilage. This creates a perfectly rectangular shape, which is why it is the gold standard for KCBS competitions. Learning how to find that natural break and trim with confidence is a game changer for your backyard consistency. So, sit back, grab an ice-cold beer, and let’s dive into the essential steps for How to Trim St. Louis Style Spare Ribs.
Table of Contents
Get My NEW Book
The Ultimate Big Green Egg Cookbook

The Anatomy of a Full Rack
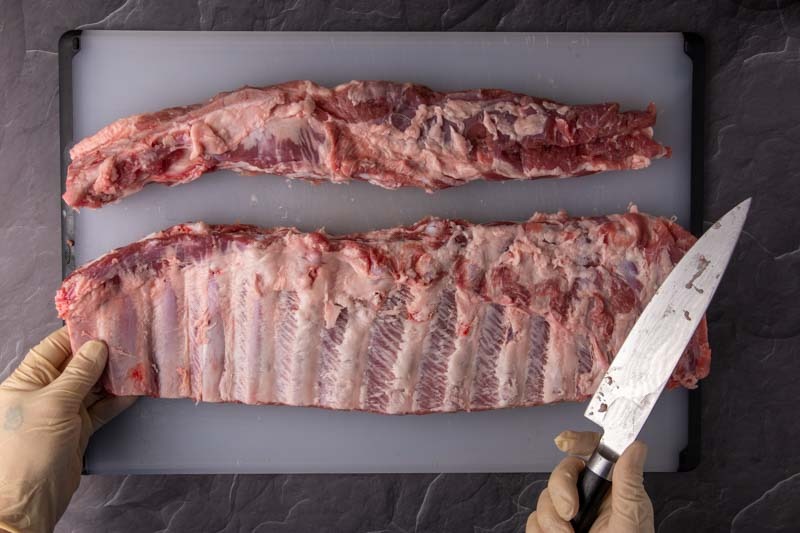
As discussed above, spare ribs fully intact look nothing like the St. Louis ribs you are used to seeing at KCBS competitions. When you pull a full slab out of the cryovac, you’ll notice the breastbone and excess cartilage are still in place. This makes the rack look much larger, but it lacks a uniform shape.
This “extra” material, often called the brisket bone, contains a network of cartilage and connective tissue that takes much longer to render than the ribs themselves. If you leave the rack whole, the thin ends will overcook before the thick breastbone is even tender. To get that clean, professional look and a perfectly even cook on the Big Green Egg, we need to find the “natural break” and square things up.
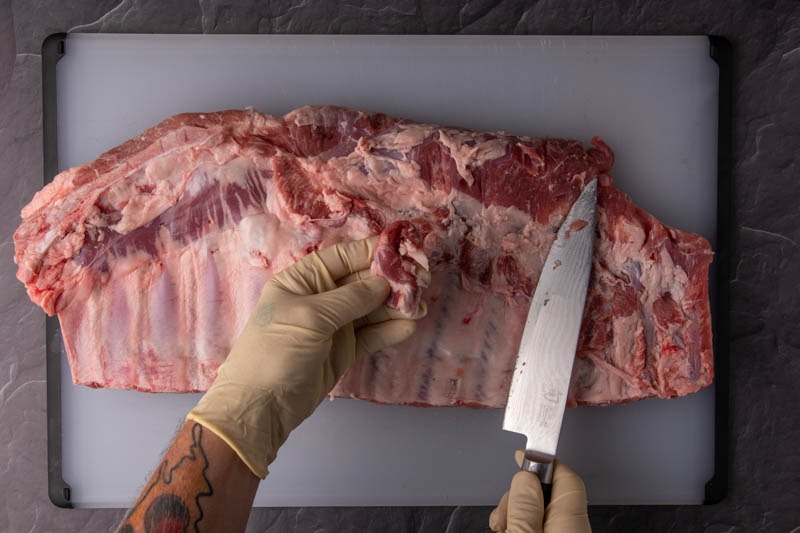
Step 1: The Skirt and the Flap
Before we tackle the main shape of the rack, we need to clean up the underside.
The Trim: Use a sharp, flexible boning knife to slice this off flush with the rack. Don’t throw this away! It’s a great little snack to grill alongside the ribs for the “pitmaster’s tax.”
The Skirt Meat: Flip the ribs bone-side up. You will see a thin strip of meat running along the center of the rack. This is the “skirt.” It sits on top of the membrane and will almost certainly burn if left attached.
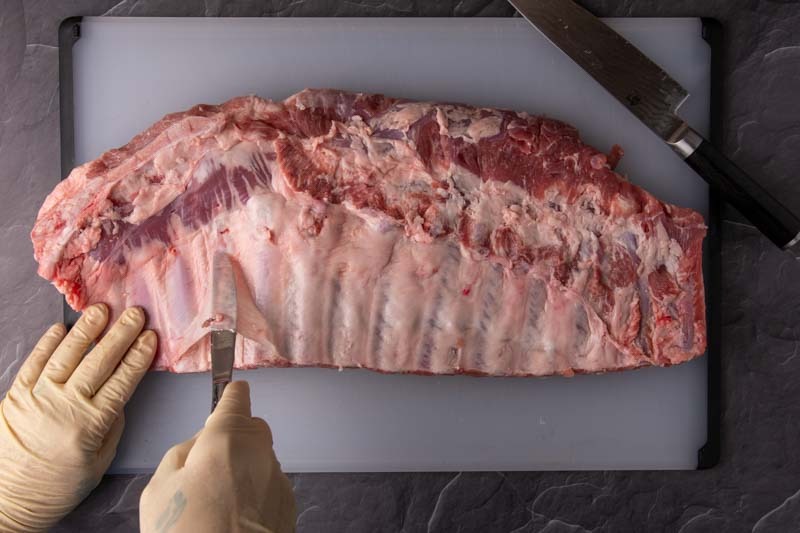
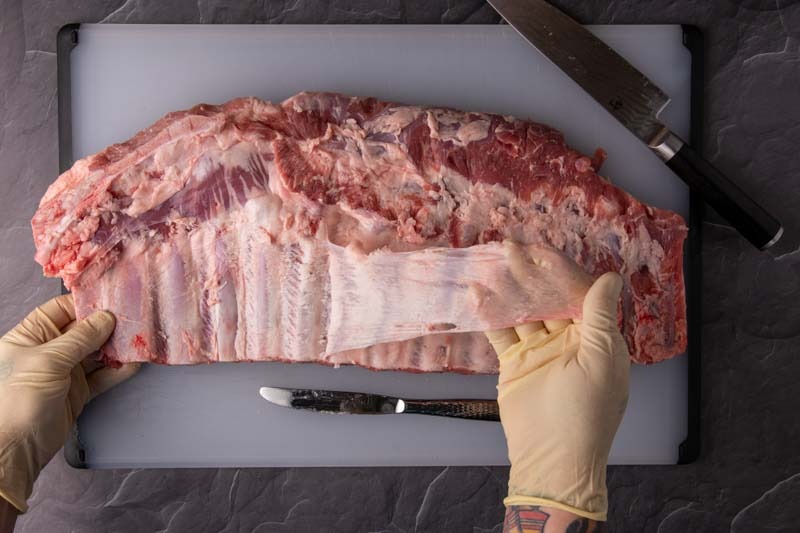
Step 2: Removing the Membrane
With the rack squared away, it’s time for a crucial step that separates the amateurs from the pros: removing the membrane (also known as the silverskin).
Keep the bone side facing up towards you and look for that thin, white, translucent film covering the entire bone section of the rack. This membrane is essentially a waterproof barrier; if you leave it on, it acts as a shield that prevents your rub and that beautiful Apple wood smoke from actually penetrating the meat. Plus, when left on, it becomes tough and “leathery” after cooking.
The Pull: Get a firm grip on that flap and pull straight up and away from the rack. If you’re lucky, it will come off in one clean sheet. If it tears, just repeat the process until the bones are completely exposed and ready to take on flavor.
The Butter Knife Trick: Don’t use your sharp boning knife for this. Instead, take a blunt butter knife and slide it under the membrane against the third bone in. Give it a little wiggle to loosen the film from the bone.
The Grip: Once you have a small flap lifted, grab a paper towel. This is the secret to a professional trim; the paper towel gives you the traction you need on an otherwise slippery surface.
Step 3: Removing the Rib Tips
The final step in achieving that competition-ready shape is to remove the rib tips. This is the thick area of meat located above the ribs that is loaded with cartilage and connective tissue. While flavorful, these tips cook at a different rate than the uniform bones below, so they have to go.
- Finding the “Hinge”: To find the exact spot to cut, try to fold the ribs onto themselves lengthwise, almost like you are closing a book. The solid rib bones won’t bend, but the rib tip section will.
- The Cut: That “hinge” where the rack begins to bend is your line. It isn’t always a perfectly straight line, but the rule is simple: if the section bends, it’s coming off. Follow that natural separation with your knife and cut away until you have nothing left but a clean, rectangular rack.
Buddha’s Pro-Tip: Do not throw those trimmings away! Keep the rib tips and cook them alongside your main rack. They are a fantastic “pitmaster’s treat” to snack on while you’re waiting for the main event to finish, or they can be chopped up and served as a savory appetizer for your guests.
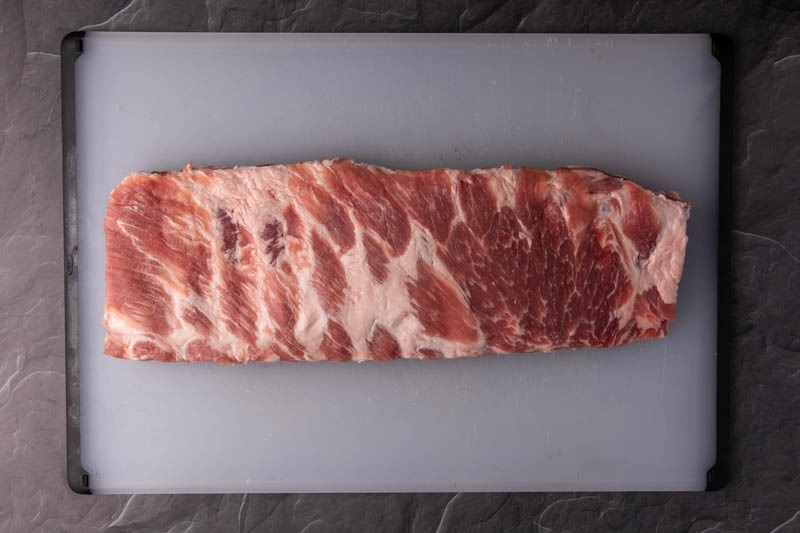
The Finish Line
With the skirt removed, the rack squared, the membrane pulled, and the tips separated, you are officially ready to hit the smoke. You’ve transformed a “prehistoric” slab into a masterpiece of BBQ engineering.
The Next Step: Put Your Skills to the Test
Now that you have mastered the St. Louis trim, you have the perfect canvas for flavor. A uniform rack means you can finally stop worrying about burnt ends and start focusing on the profile. Whether you want to go traditional or try something a bit more “out there,” these are my favorite ways to put a perfectly trimmed rack to use on the Big Green Egg.
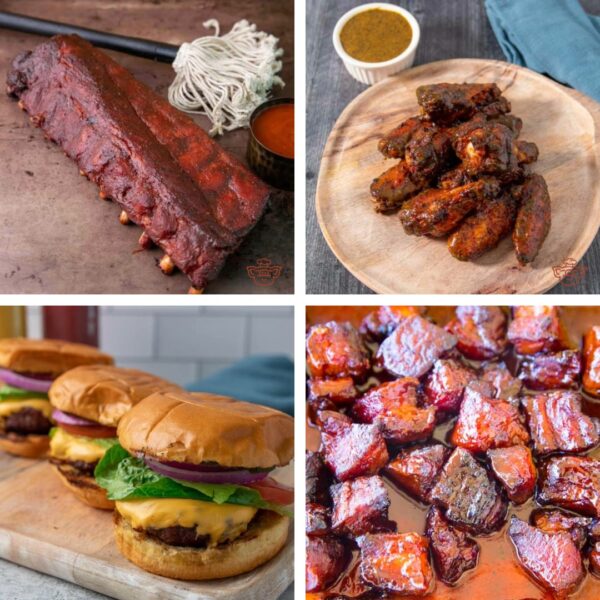
My Top Spare Rib Picks:
- Big Green Egg Hot and Fast Spare Ribs: For when you want competition-quality results without the 6-hour wait.
- Smoked Korean Spare Ribs on the Big Green Egg: A savory, sweet, and funky pivot from traditional BBQ that really lets the fat of the spare rib shine.
- Smoked Spare Ribs: A classic Texas-style profile that relies on a killer rub and a clean smoke ring.
- St. Louis Ribs Dizzy Pig Style: Using one of my favorite local rub companies to create a deeply crusty, flavorful bark.
- Big Green Egg Ribs and Chicken: The ultimate “Sunday Funday” cook where you maximize your Egg’s real estate by cooking two proteins at once.
The “So What?” — Why the Trim Matters
At the end of the day, BBQ is about control. By taking the extra ten minutes to perform a proper St. Louis trim, you are taking control of the heat, the airflow, and the final presentation. You’ve moved past just “throwing meat on the grill” and started Grilling by Feel. Your guests will notice the difference in the very first bite and they’ll definitely notice that perfectly rectangular, photo-ready slab.
How to Trim St. Louis Style Spare Ribs
Ingredients
- 1 full rack of spare ribs
Instructions
- Remove the skirt: Flip the ribs so the bone side is facing up towards you. The skirt is a strip of meat the runs along the membrane line on the bone side. If you do not trim this piece, it will take longer for this end to cook as it is twice as thick. Take a knife and run it under the skirt to remove. You can save this for stock if you want to. Once you have trimmed the skirt ensure ribs are even and if not trim more until they are.
- Remove the membrane: Keeping the bone side up towards you, find the membrane. The membrane is a white film over the bone section of the rack. This membrane is a waterproof film and keeps out flavor from the rub and smoke. Take a butter knife, lift up the membrane on the 3rd bone in, then take a paper towel and get a good grip on the membrane. Pull straight up and away from the rack of ribs.
- Removing the rib tips: This is an area of meat above the ribs that contains cartilage and connective tissue. To find this area try to fold the ribs on to themselves lengthwise like closing a book. Ribs don’t bend but the rib tip section does and that is the part you want to cut off. It isn’t necessarily a straight line but remember if the section bends, it’s coming off. Just find that line separating the ribs from the rib tips and cut away until you have just the ribs remaining. Now you are ready to smoke the ribs.
Nutrition information is automatically calculated, so should only be used as an approximation.