This post contains affiliate links. Please see our disclosure policy.
There are days for low-and-slow briskets, and then there are days when you want the smoke and flavor of the Big Green Egg without the six-hour commitment. This recipe for Grilled BBQ Shrimp on the Big Green Egg: The 10-Minute Recipe is your ultimate “ace in the hole” for a fast weeknight dinner or an emergency appetizer when friends drop by unexpectedly.
Shrimp are the undisputed fast-food of the BBQ world, but because they cook in a flash, there is zero room for error. The goal is a perfect balance: a caramelized, slightly charred exterior and a tender, juicy interior that hasn’t turned rubbery. By leveraging the high-heat roasting environment of the Egg, we can achieve a level of flavor that a kitchen stovetop simply can’t touch.
Whether you are tossing these in a bold BBQ rub or glazing them with something sweet and spicy, this method is all about speed, heat, and precision. So, grab a cold drink, stabilize your grates, and let’s get to work as this cook will be done before you can finish your first beer.
Table of Contents
Get My NEW Book
The Ultimate Big Green Egg Cookbook

Why This Method Works
Cooking shrimp over direct charcoal heat at 350°F allows the natural sugars in the BBQ sauce to tack up and glaze the shrimp instantly. Because we are using the 10-Minute Recipe approach, we aren’t just cooking the shrimp; we are flash-searing them to lock in moisture.
Step 1: Seasoning and The 30-Minute Marinade
The secret to a 10-minute recipe is doing the heavy lifting during the prep. For this cook, I am using a pound of Lobster Anywhere Black Tiger Shrimp. I love these because they are meaty, sustainable, and hold up exceptionally well to high heat without shrinking into nothing.
The Flavor Profile
To build the “BBQ” in BBQ shrimp, I am using a two-step layer of flavor:
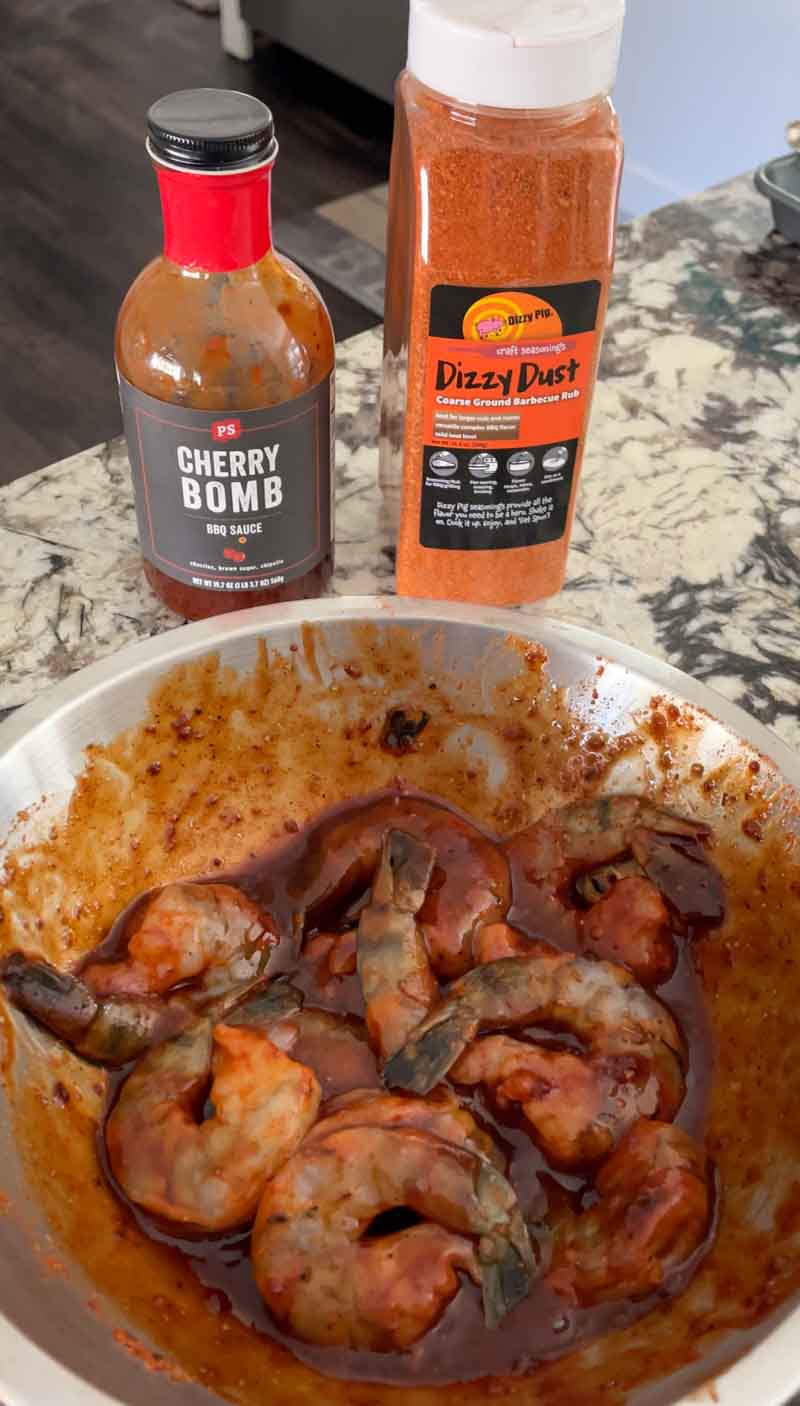
- The Rub: I started by coating the thawed shrimp generously with Dizzy Pig Seasonings Dizzy Dust. This is an all-purpose powerhouse that provides a nice crust.
- The Glaze: Once rubbed, I poured half a bottle of PS Seasonings Cherry Bomb BBQ Sauce over the shrimp in a large bowl. The cherry and habanero notes in this sauce provide a sweet-heat finish that caramelizes beautifully over charcoal.
Pro-Tip: Let the shrimp sit in this mixture for 30 minutes. This gives the salt in the rub time to penetrate the meat and the sauce time to “tack” onto the surface.
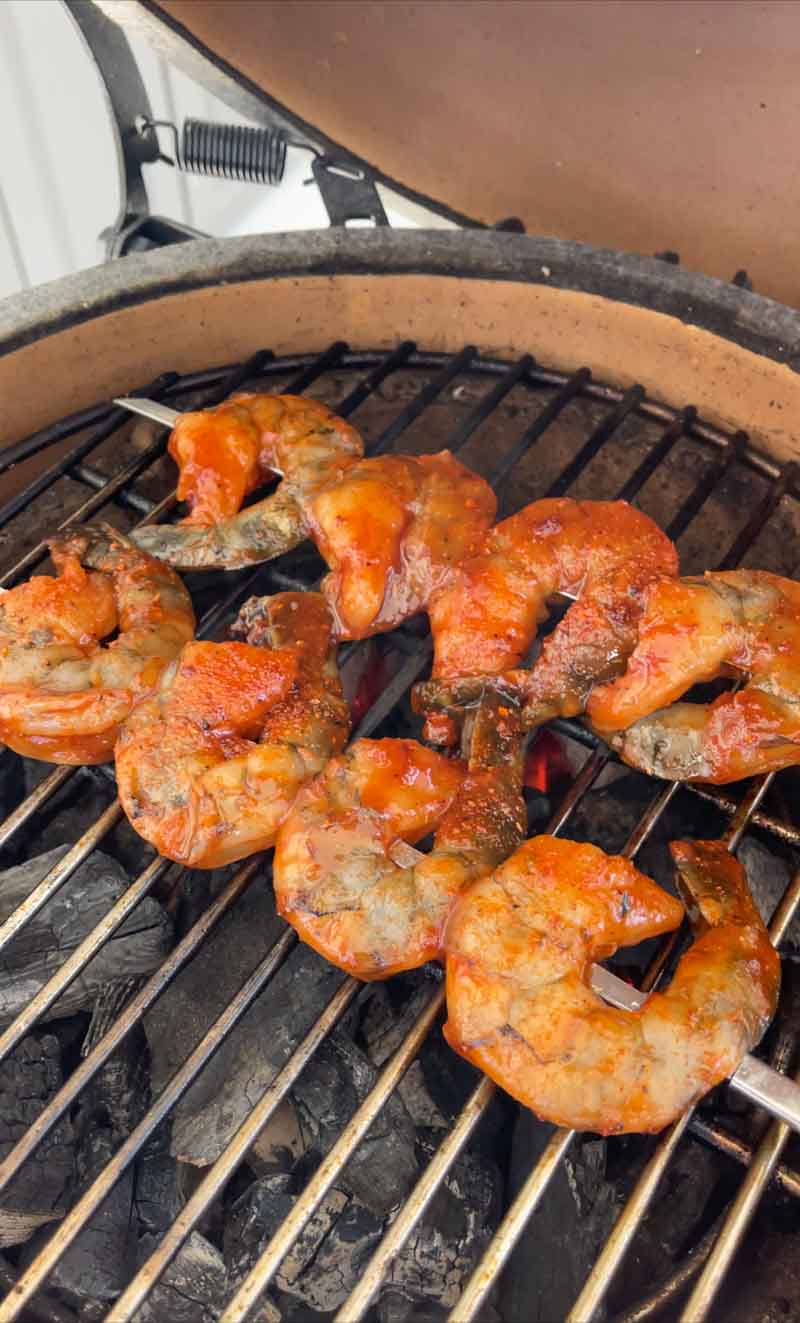
Step 2: The Skewer Setup
Once your shrimp have had their 30-minute bath in the Cherry Bomb and Dizzy Dust, it’s time to get them ready for the grates. Skewering the shrimp is a small step that makes a massive difference in the quality of the final cook.
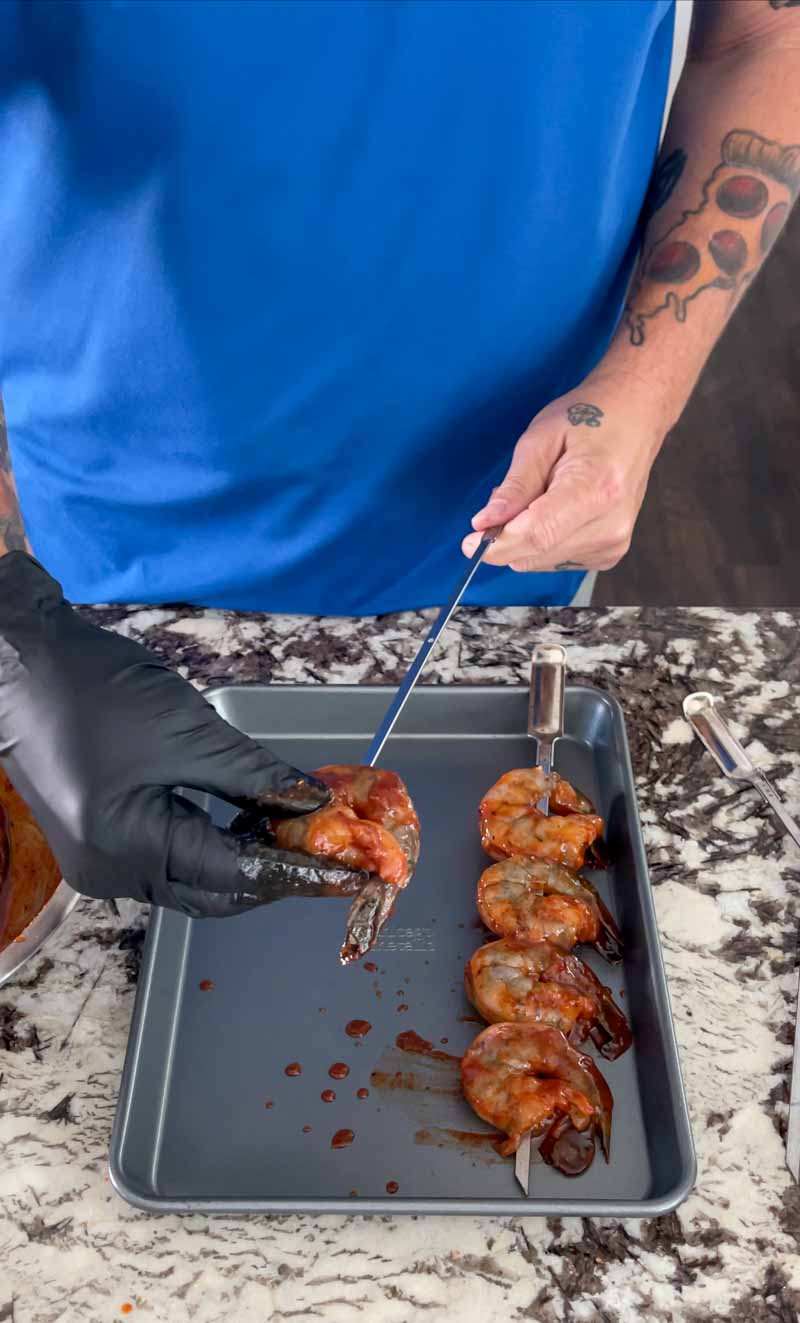
- The Assembly: Skewer the shrimp evenly to ensure they cook at the same rate. For this batch, I found that 4 shrimp per skewer was the “Goldilocks” zone. It provides enough weight to keep the skewer stable on the grates without overcrowding the meat.
- The Technique: Pierce the shrimp through the thickest part of the head-end and again through the tail. This “double-pierce” prevents the shrimp from spinning when you go to flip them, giving you total control over the sear.
- The Spacing: Leave a tiny bit of breathing room between each shrimp. If they are packed too tightly, the heat can’t reach the sides, and you’ll end up with rubbery edges instead of a uniform crust.
Pro-Tip: Metal vs. Wood
- Stainless Steel Skewers: These are my go-to. They hold heat, helping cook the shrimp from the inside out, and you don’t have to worry about them burning.
- Bamboo Skewers: If you are using wood, make sure you soak them in water for at least 30 minutes prior to skewering. Since we are cooking Direct at 350°F, un-soaked wood will turn into kindling before the shrimp are done!
The “So What?” — Why Skewers?
You might be tempted to just toss the shrimp directly on the grates, but skewers turn a frantic “save the shrimp from the coals” mission into an organized, easy cook. By grouping them together, you can flip 4 at a time with a single motion, ensuring that no shrimp is left behind to overcook while you’re fumbling with tongs.
Step 3: The Secret Weapon — The Reserved Glaze
Before you head out to the Big Green Egg, there is one crucial step that separates “good” BBQ shrimp from “legendary” BBQ shrimp.
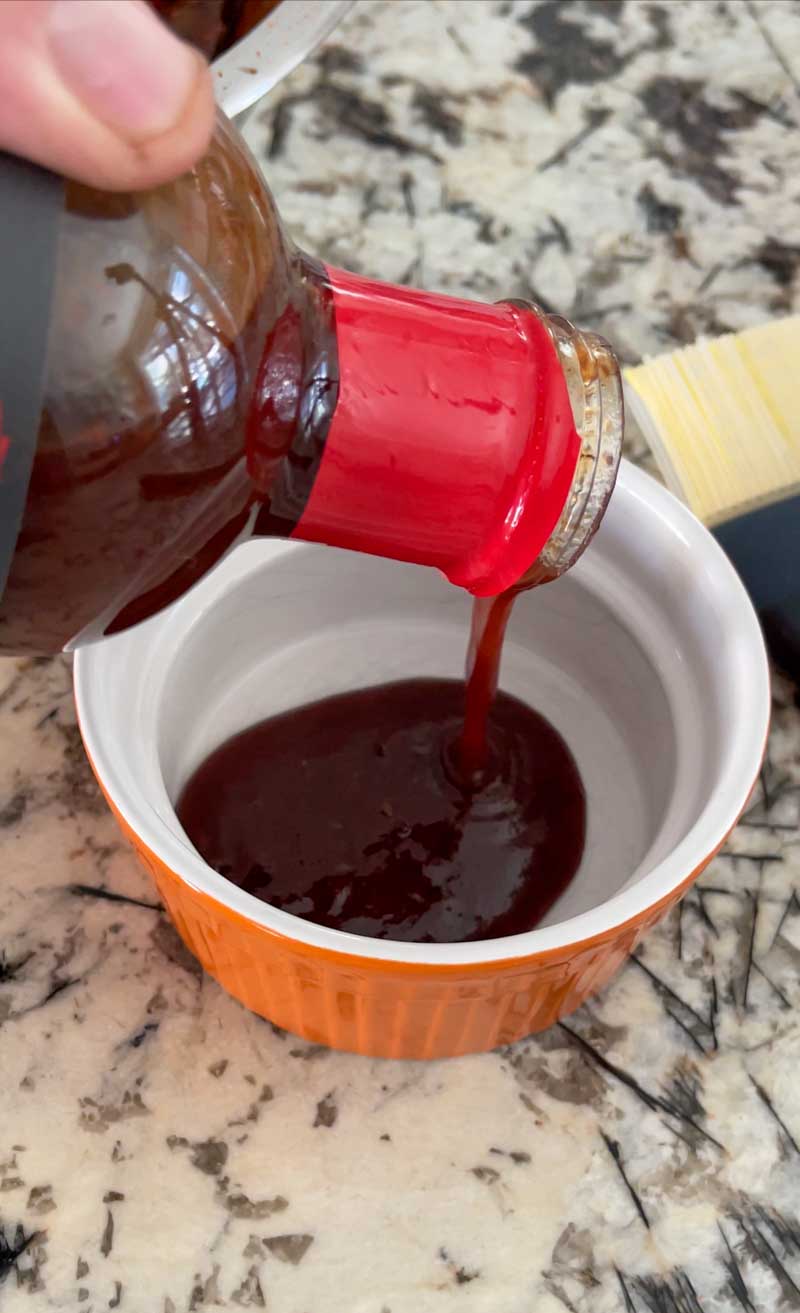
Take a portion of that PS Seasonings Cherry Bomb BBQ Sauce and pour it into a small, separate container to use as a dedicated glaze. Do not use the liquid left over in the marinating bowl. That raw marinade has been in contact with uncooked seafood, so you want a fresh, clean sauce for the final touch.
Why Double-Glazing Matters
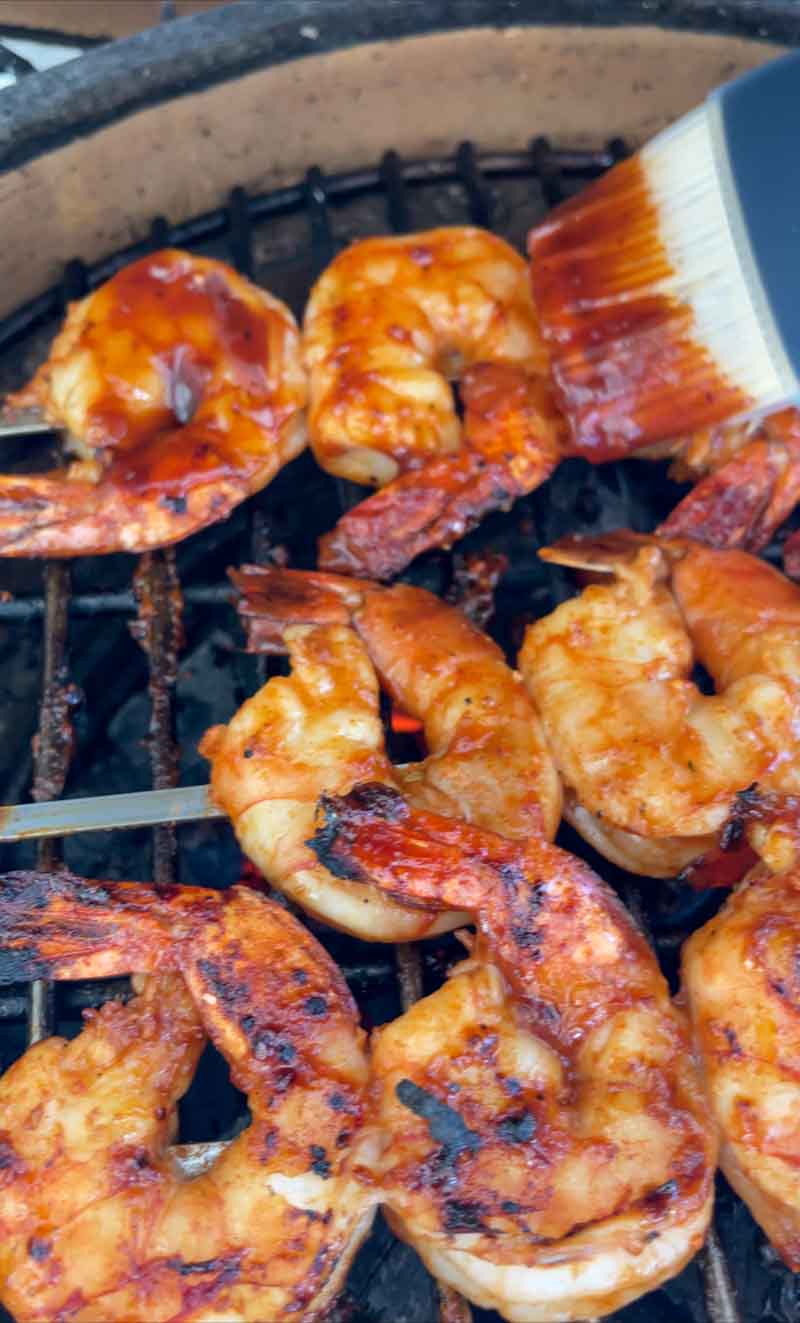
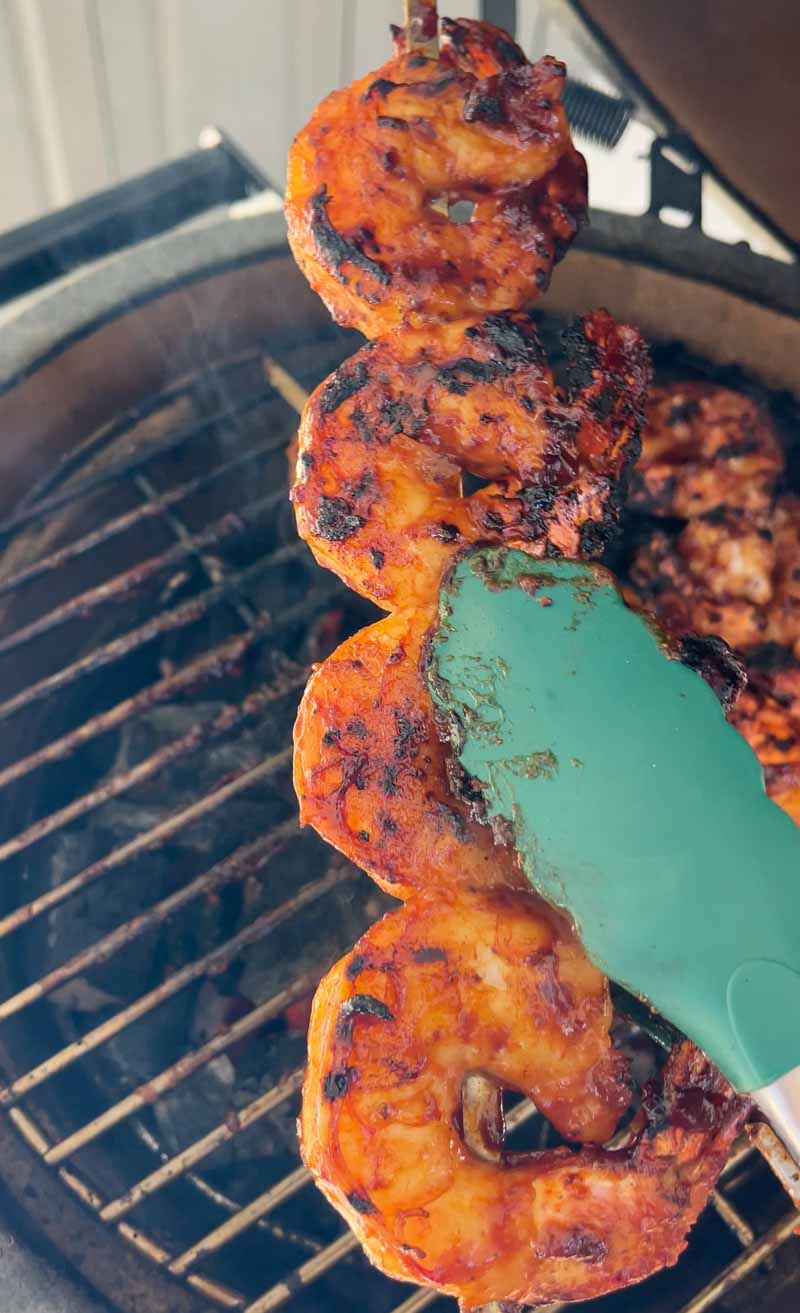
As the shrimp hit the 350°F heat, the initial layer of sauce will begin to set and “tack up” against the shell and meat. By having a reserved container of sauce and a silicone basting brush handy, you can apply a fresh coat during the final two minutes of the cook.
This second layer does three things:
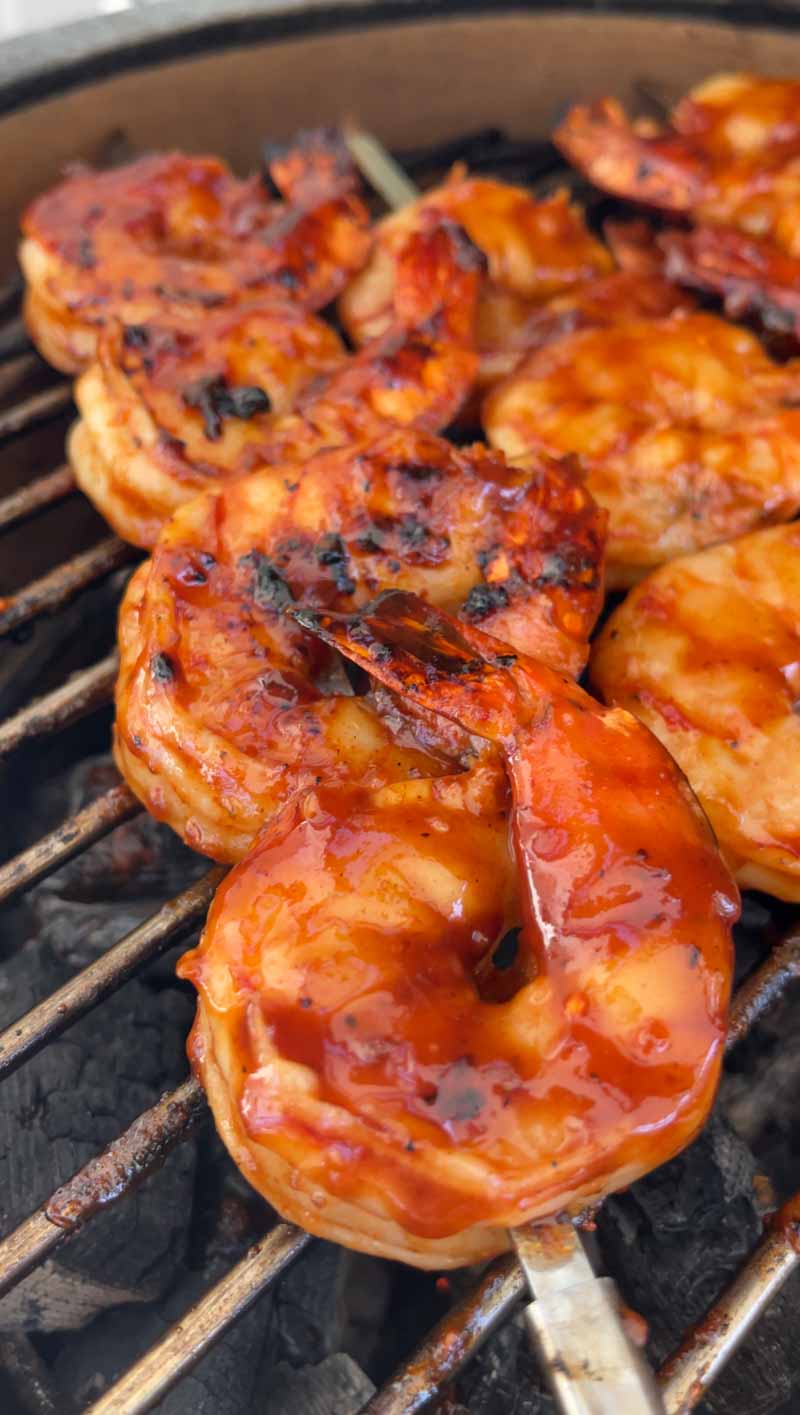
- The Shine: It gives the shrimp a gorgeous, lacquered finish that looks incredible on the plate.
- The Texture: It builds a sticky, caramelized “bark” that traps the moisture inside the shrimp.
- The Flavor Pop: It ensures the bright cherry and habanero notes are front-and-center, rather than just being a background note from the initial soak.
The “Grilling by Feel” Move
Keep your reserved sauce container near the Big Green Egg, but away from the direct heat of the dome. You want the sauce to be easy to brush on, but not boiling. A quick swipe of glaze right after the flip is the easiest way to ensure every bite is packed with that sweet-and-spicy Cherry Bomb punch.
Step 4: The Cook — Direct, Fast, and Flavorful
With the Egg stabilized at 350°F, it is time for the main event. For this cook, I am using the Big Green Egg MiniMax. It is the perfect size for a pound of shrimp, as the concentrated heat and proximity to the coals create an incredible sear in a very short window.
- The Placement: Lay the skewers directly over the hot coals. You should hear an immediate sizzle. This is the Dizzy Dust and the sugars in the Cherry Bomb sauce starting to work their magic.
- The First Side: Let the shrimp cook undisturbed for 3 to 4 minutes. During this time, the bottom side will develop those signature grill marks and the sauce will begin to caramelize.
- The Glaze (Round 1): While the first side is searing, use your silicone brush to apply a fresh layer of the reserved BBQ sauce to the top. Don’t be shy—this is where that deep, lacquered finish comes from.
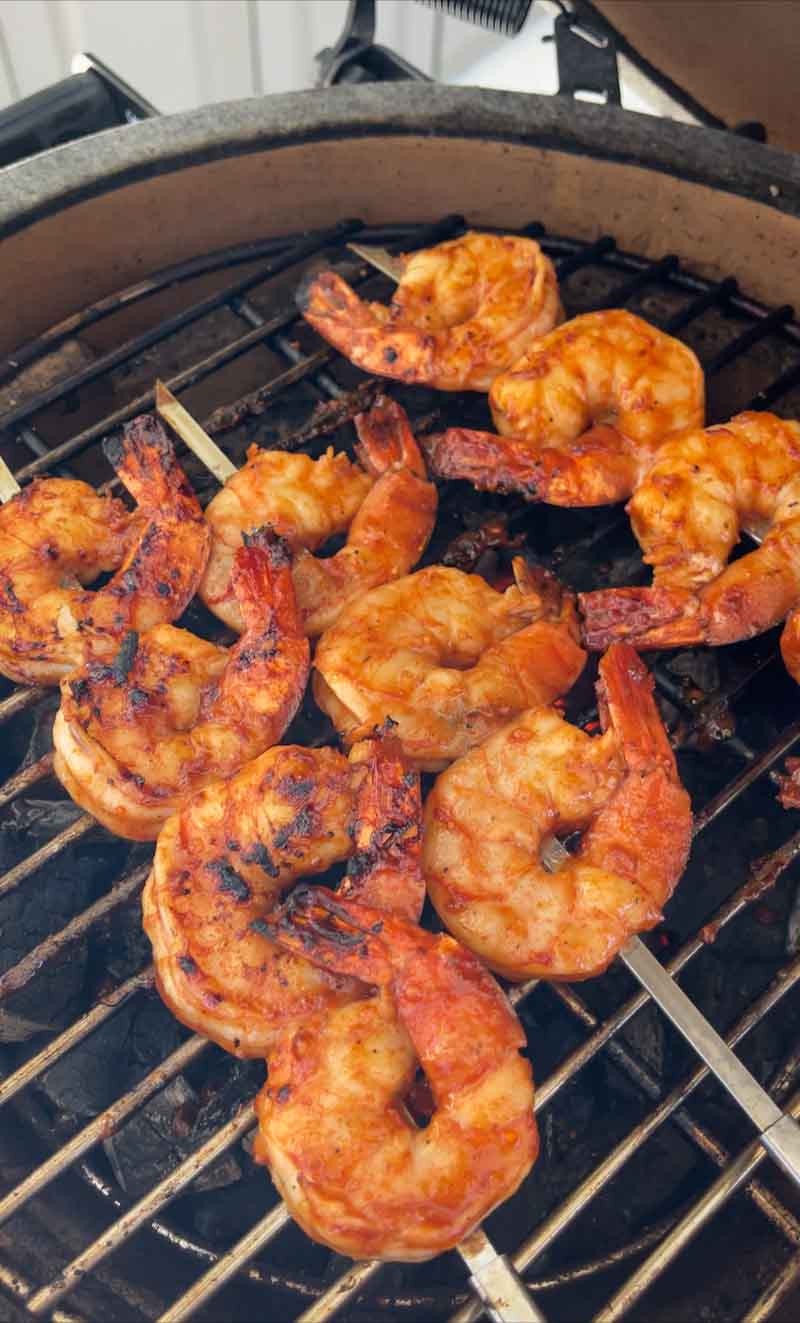
- The Flip: Once the shrimp are opaque halfway up the side and have a nice char, flip the skewers.
- The Finish: Repeat the glazing process on the newly flipped side. Let them cook for another 3 to 4 minutes. You are looking for a deep, rich color and those slightly blackened edges that signal the habanero and cherry sugars have fully transformed.
Grilling by Feel: The “C” vs. “O” Rule
Keep a close eye on the shape of the shrimp.
- The “C”: When the shrimp curl into a “C” shape, they are perfectly cooked and ready to be pulled. They will be succulent and snap when you bite into them.
- The “O”: If they curl tightly into an “O,” you have gone too far. Pull them immediately!
Because we are cooking on the Big Green Egg MiniMax, the heat is intense and efficient. Use your Thermapen if you want to be scientific (you are looking for an internal temp of 120°F to 145°F), but for shrimp, your eyes are often your best tool.
The “So What?” — The MiniMax Advantage
Cooking shrimp on a smaller unit like the Big Green Egg MiniMax is a game-changer. The smaller dome volume traps the moisture and smoke more effectively than a larger grill might for such a small batch. The result is a shrimp that is infused with genuine wood-fired flavor but remains incredibly juicy. It’s the ultimate 10-minute proof that big flavor often comes from small grills.
Step 5: The Pull and the Serve
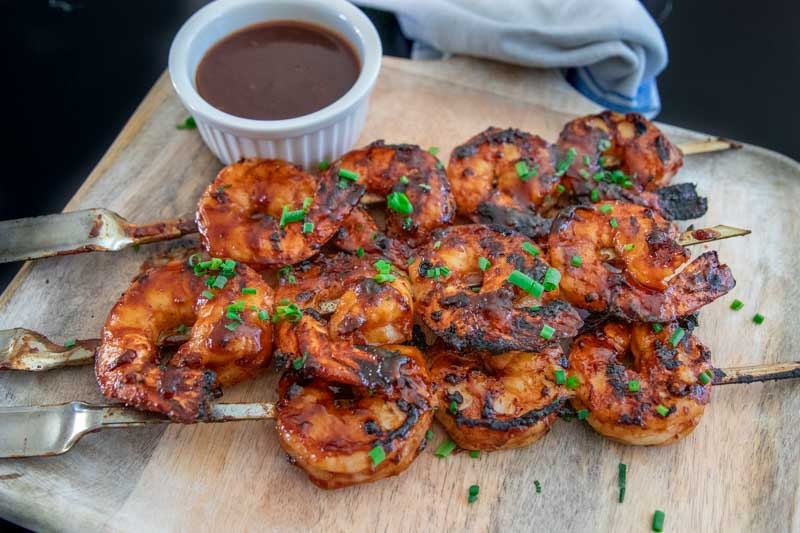
As soon as that second side has spent its 3 to 4 minutes over the coals and your glaze has turned into a sticky, mahogany-colored bark, it is time to get them off the heat. Unlike a large roast, shrimp do not need a long rest. In fact, they are at their absolute peak the moment they leave the Big Green Egg.
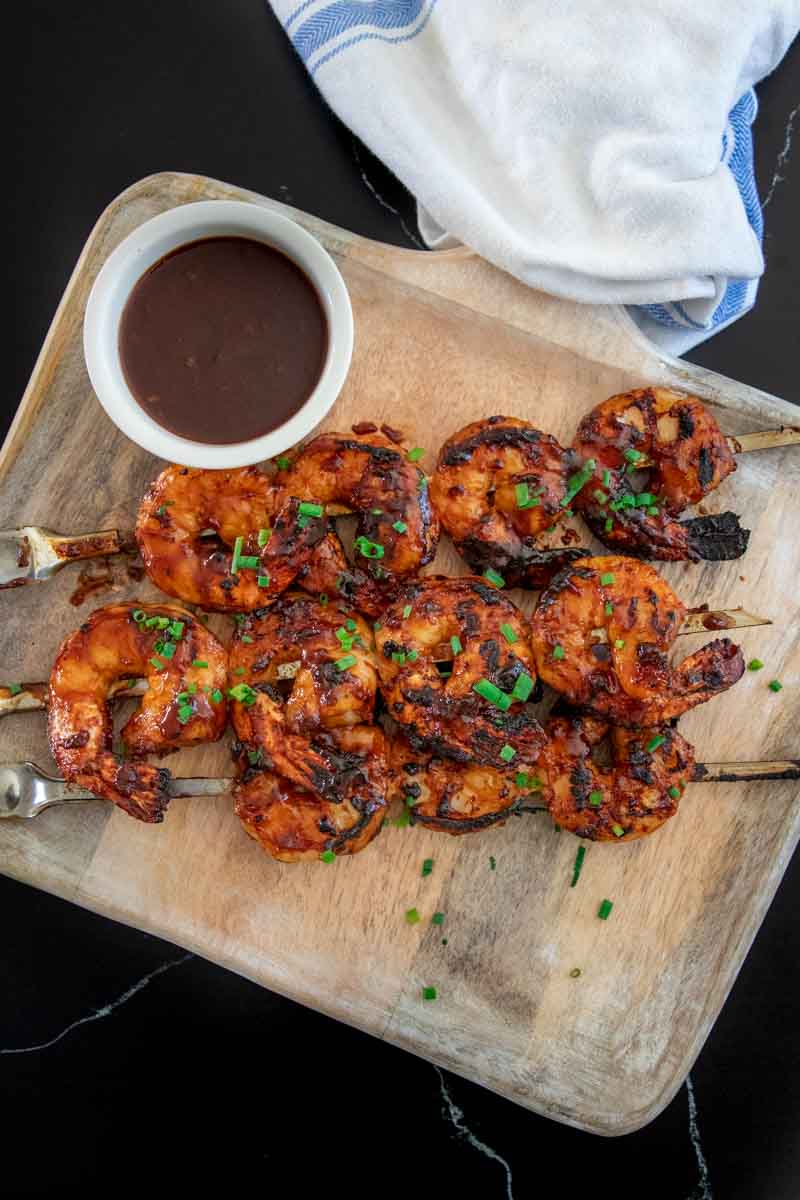
- The Pull: Slide the skewers off the grates and onto a clean platter. You’ll notice the Cherry Bomb sauce has thickened into a beautiful, lacquered coating that clings to every crevice of the shrimp.
- The Final Touch: I like to hit the platter with one last light brush of the reserved sauce or a quick squeeze of fresh lime juice to wake up the acidity.
- The Serve: You can serve these right on the skewers for a “tailgate-style” appetizer, or slide them off into a bowl for a main course.
The “So What?” — Why This 10-Minute Recipe Wins
The beauty of this dish lies in the High-Heat/High-Flavor ratio. By using the Lobster Anywhere Black Tiger Shrimp, you have a protein that can stand up to the intense direct heat of the Egg without drying out. The Dizzy Dust provides the savory foundation, while the PS Seasonings Cherry Bomb adds a complex, fruity heat that you just can’t get from a standard grocery store bottle.
In just ten minutes of cook time, you’ve managed to create a dish that tastes like it took hours of preparation. It’s smoky, sweet, spicy, and incredibly snap-fresh. It’s the perfect reminder that the Big Green Egg isn’t just for all-day low-and-slow sessions, it’s also the best tool in your arsenal for a world-class “fast food” dinner.
Grilled BBQ Shrimp on the Big Green Egg: The 10-Minute Recipe
Ingredients
- 1 pound 16/20 Black Tiger Shrimp, peeled and deveined
- 2 tbsp Dizzy Pig Dizzy Dust
- 1 bottle PS Seasonings Cherry Bomb BBQ Sauce, divided
- 1 tbsp chives, chopped
Instructions
- Season: Place the thawed shrimp in a large bowl. Dust generously with Dizzy Dust and toss to coat.
- Marinate: Pour half of the Cherry Bomb BBQ Sauce over the shrimp. Toss until well-coated and let sit for 30 minutes at room temperature.
- Prepare the Glaze: Pour a small amount of fresh BBQ sauce into a separate container for basting during the cook. (Do not use the marinade from the shrimp bowl for this step.)
- Skewer: Thread the shrimp onto skewers (about 4 per skewer). Pierce through the head-end and tail-end to prevent spinning on the grates.
- BGE Setup: Stabilize your Big Green Egg at 350°F for direct grilling. Ensure your grates are clean.
- The Cook: Place the skewers directly over the coals. Cook for 3–4 minutes on the first side. Apply a layer of the reserved glaze with a brush while they cook.
- The Flip: Flip the skewers and apply more glaze. Cook for another 3–4 minutes until the shrimp are opaque and have a deep, mahogany char.
- Serve: Remove from the Egg once the shrimp form a "C" shape. Serve immediately while hot and glistening.
Nutrition information is automatically calculated, so should only be used as an approximation.