
This post contains affiliate links. Please see our disclosure policy.
The “Texas Crutch” is one of the most debated techniques in the world of low and slow barbecue. To wrap or not to wrap is a question every pitmaster faces once the pork hits that dreaded mid-cook stall. Many backyard cooks wrap their Boston Butt simply because that is how they were taught, but it is important to understand the actual science behind the choice.
The decision to use aluminum foil changes the texture, the flavor, and the timeline of your cook. Choosing the right path depends entirely on your goals for the final product. Some smokers prefer a heavy, crunchy bark that stands up to a vinegar sauce, while others want a tender and juicy interior that pulls apart with zero effort and finishes in record time.
I decided to run a proper side-by-side comparison on the Big Green Egg to see exactly how wrapping in foil affects the cooking process compared to leaving the meat unwrapped. This test highlights the clear differences in bark formation, moisture retention, and total cook time. Here is the breakdown of the pros and cons of the “Crutch” and how it stacks up against other popular methods.
Table of Contents
- Step 1: The Side-by-Side Prep
- Step 2: The Seasoning: Building the Foundation
- Step 3: Firing up the Big Green Egg
- Step 4: Smoke and Spritz
- Step 5: The Maintenance Phase: Building the Bark
- Step 6: The Showdown: To Wrap or Not to Wrap?
- Step 7: Pull, Rest, and The Final Reveal
- Step 8: The Surprising Results
- Step 9: The Final Verdict: So, What Have We Learned?
- Step 10: Let’s Eat!!!
- Boston Butt Wrap Test: Does the Texas Crutch Make a Difference? Recipe
Get My NEW Book
The Ultimate Big Green Egg Cookbook

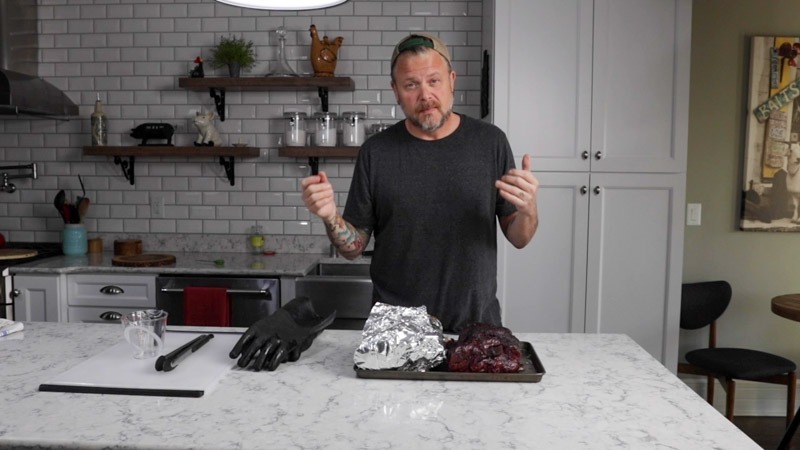
Step 1: The Side-by-Side Prep
Before we dive into the science of the wrap, we have to start with a consistent baseline. While this is a test, the foundation is a rock-solid recipe that produces some of the best pulled pork you’ll ever eat. To get an accurate comparison, you need to treat both pieces of meat exactly the same until the moment one of them hits the foil.
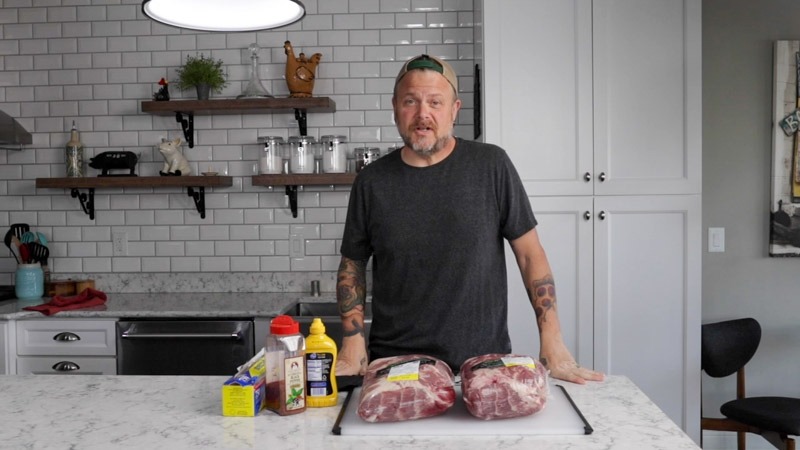
Selecting and Cleaning the Meat
Pick up two 8-pound Boston Butts. Look for consistent fat caps and good intramuscular marbling in both. Remove them from the packaging and pat them dry with paper towels. Removing that surface moisture is a small but vital step; it allows your binder and rub to adhere properly rather than sliding off as the meat sweats.
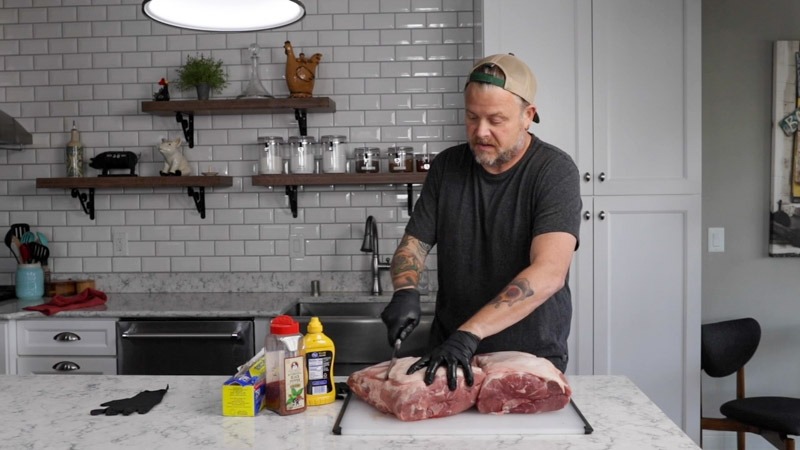
Consistency is Key
Trim any loose “flaps” of meat that might burn, but keep the fat caps intact for this test. By using two butts of the same weight and placing them on the Egg at the same time, we ensure that the only variable in this experiment is the aluminum foil.
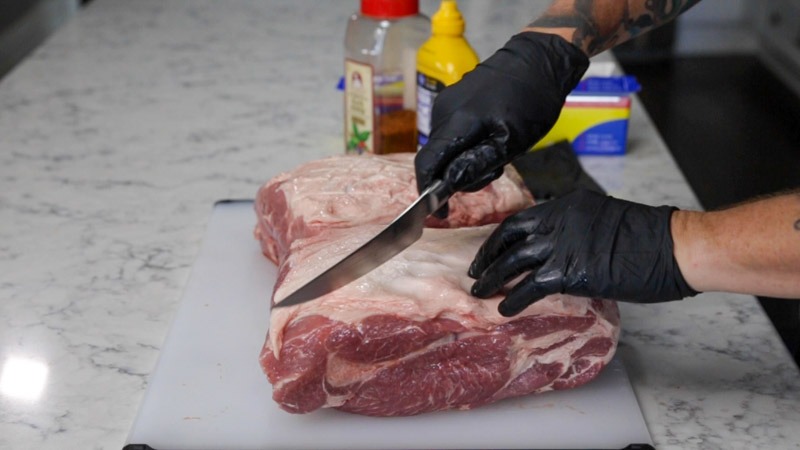
The Cross-Hatch Technique
Once trimmed, turn your attention to the fat cap. Use a sharp knife to score a cross-hatch pattern (a diamond shape) into the fat, cutting about a half-inch deep.
Why this matters:
- Deep Flavor: The cross-hatch allows your dry rub to penetrate through the fat and reach the actual surface of the meat.
- Superior Rendering: It creates more surface area for the heat to hit. As the fat melts (renders), it bastes the meat naturally, while the edges of the “diamonds” become crispy and flavorful.
- Bark Development: This technique prevents the fat cap from acting as a solid shield, ensuring that your bark forms in the crevices and creates those highly coveted “burnt ends” throughout the shoulder.
With the butts trimmed and scored, they are ready for the binder and seasoning. By prepping both shoulders identically, we ensure our wrap test results are based purely on the cooking method, not the prep work.
Step 2: The Seasoning: Building the Foundation
With the fat caps cross-hatched and the meat trimmed, it’s time to lay down the flavor. Even though this is a test of the “Texas Crutch,” the bark starts here. To get a fair comparison, both Boston Butts must be seasoned identically.
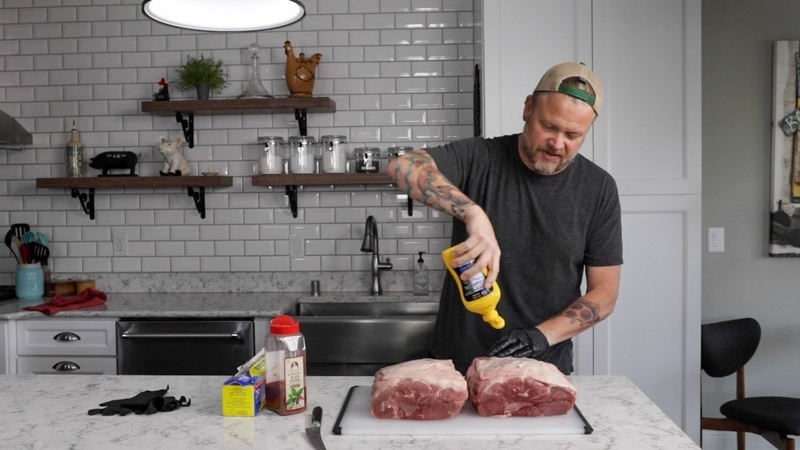
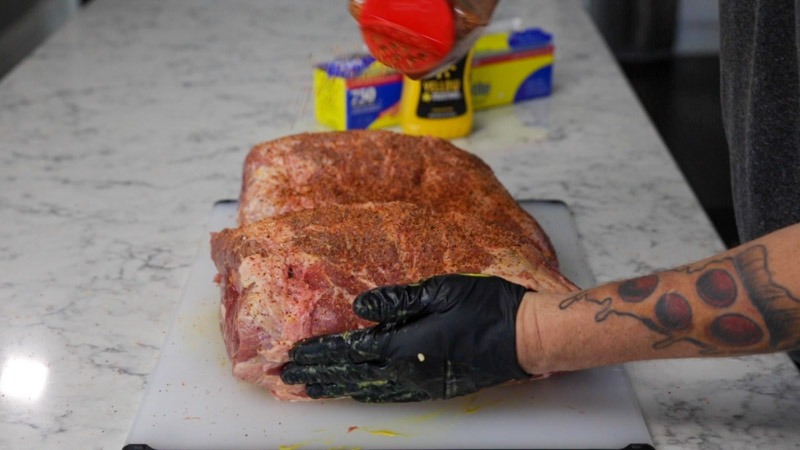
The Slather: Why Yellow Mustard?
Start by applying a light coat of yellow mustard over the entire surface of both butts. This is what we call a “slather” or “binder.”
- The Goal: You aren’t looking for mustard flavor—in fact, the vinegar and mustard notes will almost entirely cook off during the long smoke.
- The Benefit: The mustard provides a tacky surface that allows the dry rub to adhere to the meat without falling off. It also helps kickstart the formation of that beautiful crust we call “bark.”
The Rub: Simplicity Wins
For this test, I used a classic, homemade SPP (Salt, Pepper, Paprika) blend. When you are doing an A/B test, a simple rub is often better because it allows the natural flavor of the smoke and the quality of the meat to shine through.
The “Buddha’s Basic” Blend:
- 2 parts Coarse Kosher Salt
- 2 parts 16-Mesh Black Pepper
- 1 part Smoked Paprika (for that deep mahogany color)
Apply the rub liberally. Don’t be shy—a Boston Butt is a massive, dense muscle, and it can handle a lot of seasoning. Make sure to work the rub into the cross-hatch cuts you made in the fat cap and cover every “nook and cranny.”
Pro Tip: Apply your rub from about 12 inches above the meat. This ensures an even “snowfall” of seasoning rather than heavy clumps, which helps the bark develop uniformly on the Big Green Egg.
Once seasoned, let the butts sit for about 15 to 20 minutes. You’ll see the rub start to look “wet” as the salt draws out a little moisture—this is exactly what you want. It means the rub is bonding to the meat and is ready for the smoke.

Step 3: Firing up the Big Green Egg
While your meat is coming up to room temperature, get your Big Green Egg ready for a “low and slow” journey.
- Clean the Firebox: Ensure you have clear airflow for a long burn.
- The Setup: Load your lump charcoal and add 3 to 4 chunks of hickory or oak for a bold smoke profile.
- Indirect Heat: Insert the ConvEGGtor (legs up) to protect the pork from direct flame.
- The Target: Stabilize your temperature at 250°F. This is the sweet spot for rendering fat while giving the bark enough time to develop before the stall.
Pro Tip: If you need a refresher on the perfect indirect setup, check out my [Step-by-Step Low and Slow Guide].
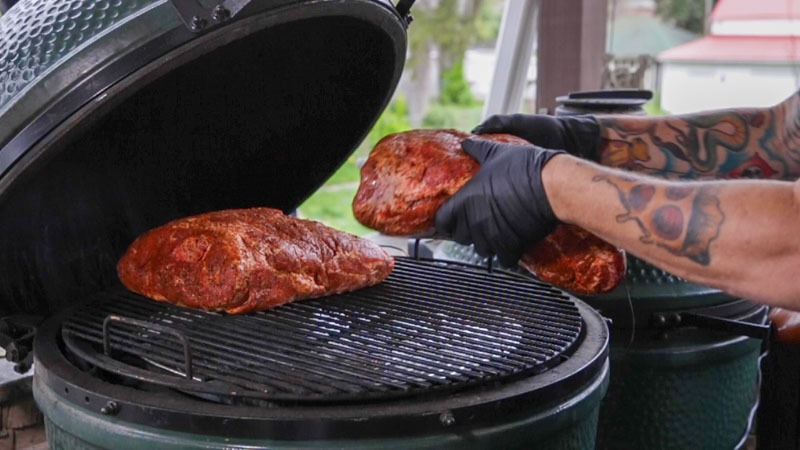
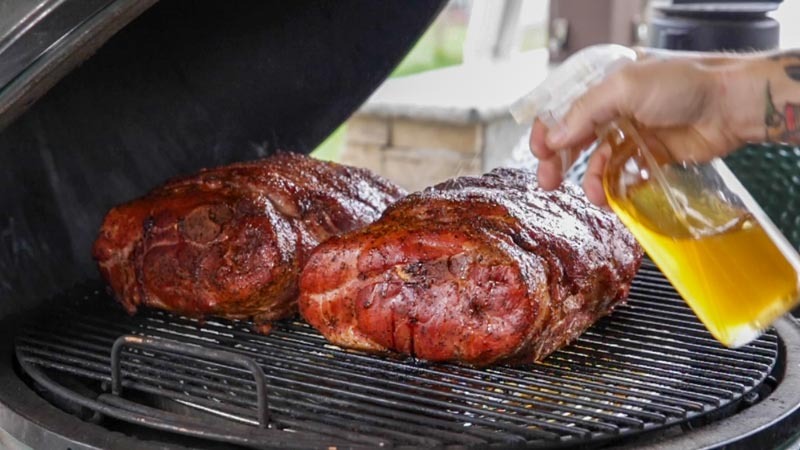
Step 4: Smoke and Spritz
The Smoke Phase: Patience and the Mop
Once the meat hits the grate, the most important tool in your arsenal is restraint. For the first 3 hours, do not open the dome. Every time you peek, you lose the heat and the precious “blue smoke” that the Big Green Egg has worked so hard to stabilize.
The Science of the First 3 Hours
This initial window is the most critical for flavor development. The meat is still cold, which allows the smoke particles to adhere to the surface more effectively. During these hours, the smoke from the hickory or oak chunks is penetrating the outer layers of the pork, creating that signature pink smoke ring and laying the groundwork for a deep, complex bark.
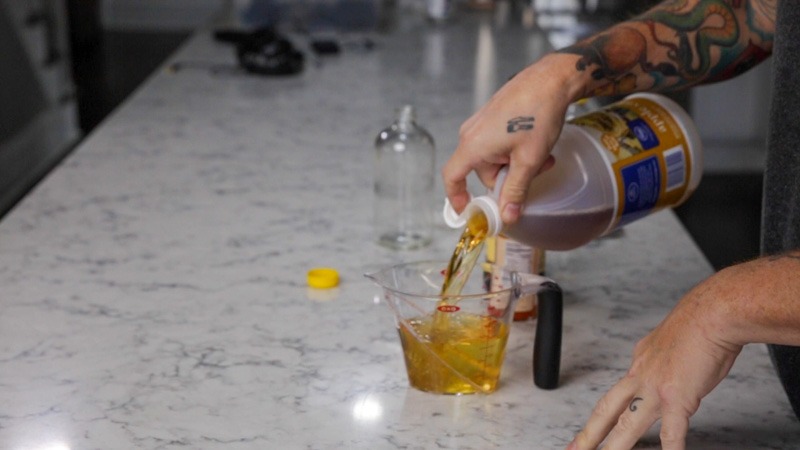
The Secret Weapon: Tangy Mop Sauce
While the Egg is doing its thing, it is time to prep your mop sauce. This isn’t just about flavor… the acidity and moisture in the spray help the smoke “stick” to the meat while keeping the surface from drying out too quickly.
The Mop Recipe:
- 1 cup Apple Juice (for sweetness and color)
- 1/2 cup Apple Cider Vinegar (to tenderize the exterior)
- 2 Tbsp Worcestershire Sauce (for an umami punch)
- 1 Tbsp Your favorite Hot Sauce (for a subtle back-end heat)
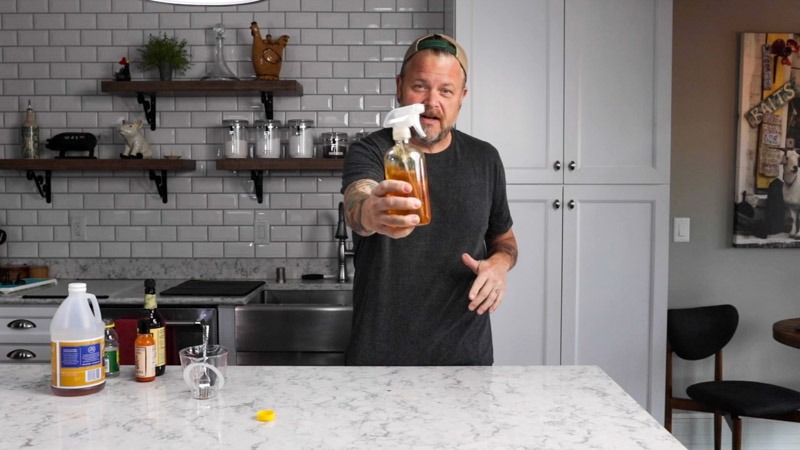
Mop or Spray?
After that initial 3-hour mark, you can begin hydrating the meat every 45 to 60 minutes. Whether you use a traditional cotton mop or a spray bottle is a matter of personal preference:
- The Spray: This is the “clean” method. It allows you to hydrate the meat quickly without disturbing the rub you’ve worked so hard to set.
- The Mop: This is the old-school way. It applies a heavier layer of moisture and flavor but requires a gentle touch so you don’t accidentally “wash off” the seasoning.
By keeping the surface of the Boston Butts tacky and moist with this mixture, you are creating the perfect environment for a world-class bark to form before we reach the next critical stage: The Stall.
Step 5: The Maintenance Phase: Building the Bark
From the 3-hour mark to the 8-hour mark, you transition from “setting” the meat to “building” the bark. This five-hour window is where the magic happens. The fat cap you cross-hatched earlier will begin to render and pull apart, while the sugars in the apple juice and the proteins in the meat react to create a dark, flavorful crust.
The Hourly Ritual
Every hour, give the Big Green Egg a quick “burp” and spray the Boston Butts generously with your mop sauce.
- Hydration is Key: Smoke is attracted to cool, moist surfaces. By spraying every hour, you keep the exterior temperature of the meat slightly lower, which allows it to spend more time in the “smoke absorption zone.”
- The Color Check: You are looking for the meat to transition from a raw pink to a deep, mahogany red. If you notice certain spots (like the corners) looking a bit dry or turning dark too fast, give them an extra hit of the spray to protect them.
Monitoring the Stall
As you move through these five hours, you will likely notice your internal temperature climbing steadily before suddenly leveling off somewhere between 150°F and 170°F. This is the infamous Stall.
The meat is essentially “sweating”, the moisture evaporating from the surface cools the meat as fast as the Egg can heat it. This is the moment where we decide the fate of our two butts. One will remain “naked” to battle the stall with patience and smoke, while the other is about to get the Texas Crutch treatment.
Step 6: The Showdown: To Wrap or Not to Wrap?
After 5 hours of consistent spritzing, and 8 hours of total cook time, you have reached the most critical fork in the road. At this stage, the bark on both Boston Butts should be beautifully set, displaying a deep mahogany color, and the internal temperature should be hovering right around 160°F.
This is the peak of “The Stall.” The meat is working hard to evaporate moisture, and your choice here will determine the texture and timing of your dinner.
Method A: The “Naked” Butt
For our control variable, I left the first Boston Butt exactly as it was. No foil, no protection… just meat, smoke, and the heat of the Big Green Egg. This butt will have to power through the stall naturally.
- The Goal: To see if the extra time results in a superior, crunchy bark that justifies the wait.
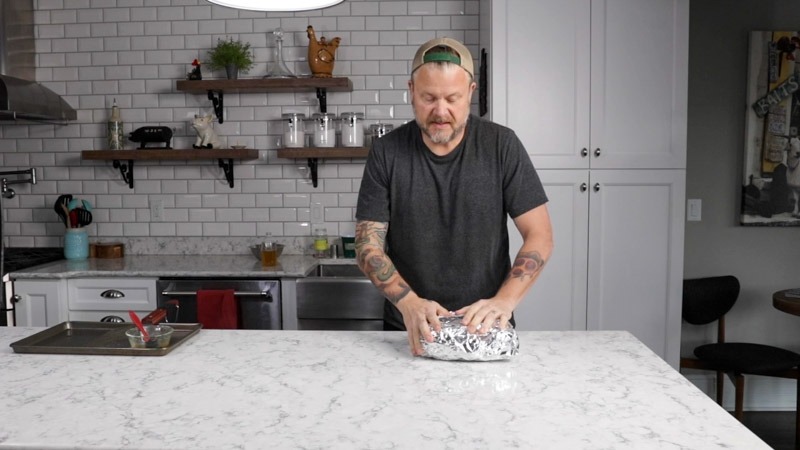
Method B: The “Texas Crutch” (Foil Wrap)
I pulled the second Boston Butt and placed it on a double layer of heavy-duty aluminum foil. Before sealing it up, I added a final generous splash of the apple juice mop sauce over the top.
- The Goal: The extra liquid creates a steam-oven environment inside the foil. This “crutch” forces the internal temperature to spike, softening the connective tissues and meat fibers in record time.
The Home Stretch: The Temperature Bump
Once the wrapped butt was tucked back into the Egg next to its “naked” sibling, I opened the vents slightly to bring the Big Green Egg up to 275°F.
While 225°F–250°F is great for the smoke phase, this final 2-hour push at 275°F is a pro move. It helps the wrapped meat reach its finishing temp efficiently while the increased heat helps the unwrapped butt continue to render its fat cap without drying out the interior.
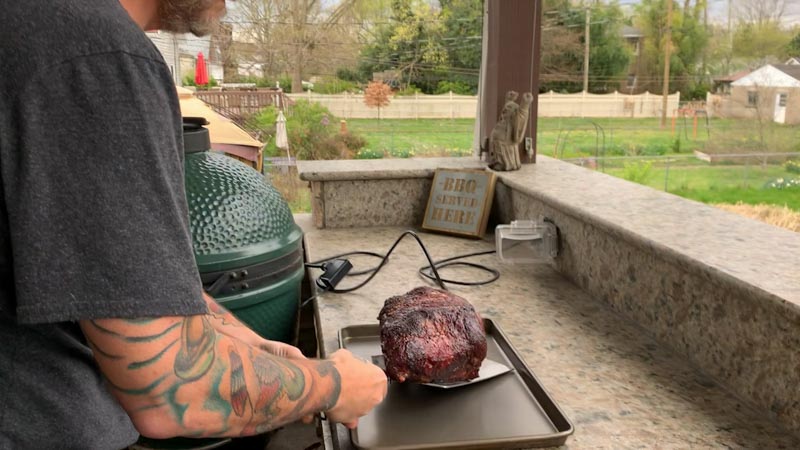

Step 7: Pull, Rest, and The Final Reveal
After 10 total hours on the Big Green Egg, the finish line is finally in sight. But before you grab the claws and start shredding, we need to talk about the most controversial part of this test: The Rest.
When I originally posted the YouTube video for this cook, I was so excited to show the results that I glossed over the resting period. Let me tell you, the BBQ community noticed, and I definitely got called out for it! They were right to do so. Skipping or rushing the rest is the fastest way to turn a 10-hour masterpiece into a dry pile of disappointment.
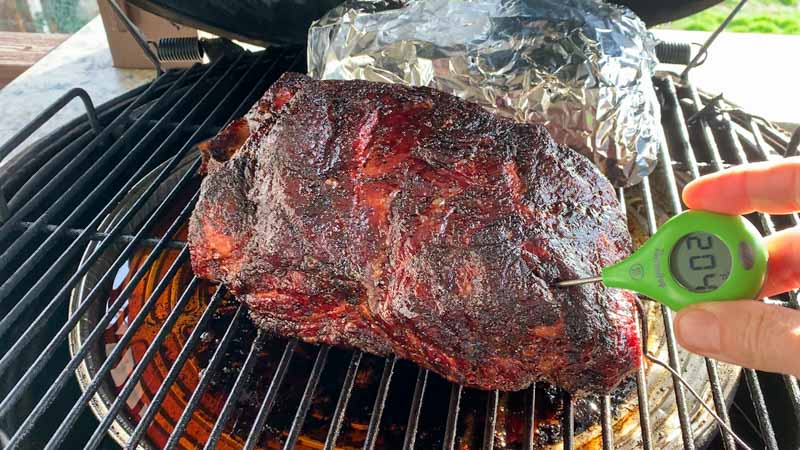
The Peanut Butter Test
Using an instant-read thermometer like a ThermoPop, start checking both the wrapped and unwrapped butts once you hit the 10-hour mark. You are looking for an internal temperature of 204°F, but the feel is what matters most.
You want that probe to slide in and out like you are sticking it into a jar of creamy peanut butter. If there is any resistance, the connective tissue hasn’t fully surrendered yet. Give it more time.
Why the Rest is Non-Negotiable
Once you hit that “peanut butter” texture, pull the meat off the Egg. Now, here is the part I missed in the video: You must let the meat rest for at least 45 to 60 minutes.
- The Science: At 204°F, the juices are under high pressure and are essentially liquid steam. If you pull the pork immediately, that moisture evaporates into the air the second you break the bark.
- The Result: By waiting, you allow the temperature to drop slightly and the juices to thicken and redistribute back into the muscle fibers. This ensures that the moisture stays in the pork, not on your cutting board.
The Verdict: Foil vs. Naked
After a proper rest, the differences were clear:
- The Foil-Wrapped Butt: This was the undisputed champion of moisture and tenderness. It was incredibly juicy and finished much faster. While the bark was “steamed” and softer, the texture of the meat was effortless.
- The Unwrapped (Naked) Butt: This produced “Black Gold” bark. If you live for that crunchy, smoky exterior, this is your winner. However, it took longer to finish and was slightly less “forgiving” than the wrapped version.
So, learn from my YouTube “fail”… whether you wrap or go naked, give that butt a rest. Your patience will be rewarded with the juiciest pulled pork of your life.
Step 8: The Surprising Results
After 10 hours of smoke, heat, and tracking temperatures, it was time to compare the two. Going into this, I had some preconceived notions about how the “Texas Crutch” would behave, but the results on the Big Green Egg threw me a few curveballs.
The Clock: A Total Tie
The biggest surprise? Both Boston Butts finished at the exact same time. I fully expected the wrapped butt to power through the stall and cross the finish line an hour or two early, but in this specific A/B test, it didn’t happen.
This proves that every piece of meat is a “unique snowflake.” Even with identical weights and temperatures, the internal structure and moisture content of the individual shoulders can dictate the pace. Don’t assume wrapping is a guaranteed “fast forward” button… always cook to feel and temperature, not just the clock.
The Bark: Aesthetic vs. Reality
As expected, the unwrapped butt won the beauty pageant. Its bark was darker, more uniform, and featured that classic “black gold” crust that BBQ fans dream about.
The wrapped butt, on the other hand, suffered from some aesthetic issues. Because the foil traps steam, that moisture condensed and fell back onto the surface of the meat. This caused “streaking,” where the liquid washed away portions of the rub, leaving a mottled look rather than a solid crust.
The Final Verdict: Does it Matter?
Here is the honest truth: At the end of the day, the streaking didn’t matter. Unlike a brisket where the bark is a primary feature of the sliced presentation, a Boston Butt is destined to be pulled and chopped. Once you shred that pork and mix the crunchy exterior bits with the juicy interior meat, those visual streaks disappear entirely. The flavor was still there, and the moisture in the wrapped version was arguably superior.
The Lesson: If you want a perfect Instagram photo of a whole smoked shoulder, go naked. If you want a foolproof, juicy result and aren’t worried about “bark streaks” that will be mixed in anyway, the wrap is a tool you should absolutely keep in your kit.
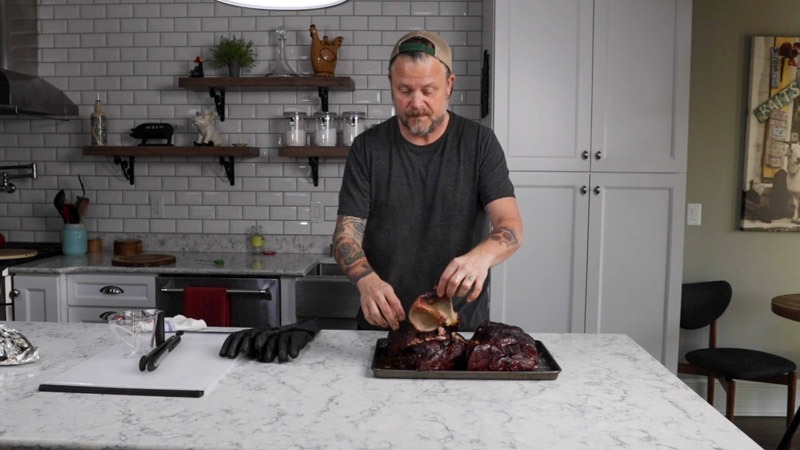
The Ultimate Test: The Bone Pull
While the timing and the bark gave us plenty to talk about, the most dramatic difference between the two methods happened the moment I reached for the blade bone.
On the wrapped Boston Butt, the bone didn’t just come out—it practically glided out with zero resistance. It was clean, dry, and left behind a perfectly hollow pocket in the meat. This is the “Gold Standard” of BBQ. It tells you that the collagen and connective tissues deep inside the shoulder, the parts that hold the meat to the bone, have completely liquified into silky, delicious gelatin.
On the unwrapped butt, the bone still came out, but it required a bit more of a tug. There was still a tiny bit of “grab” from the meat.
Why the Wrap Wins the Bone Pull
The “Texas Crutch” creates a pressurized steam environment that the naked butt just can’t match. That trapped heat acts like a heavy-duty braise, penetrating deep into the center of the roast and attacking those stubborn connective tissues around the bone.
If your goal is pork that is so tender it literally falls apart when you look at it, the wrap is your best friend. That clean bone pull is the sign of a successful cook and makes the pulling process significantly easier and faster.
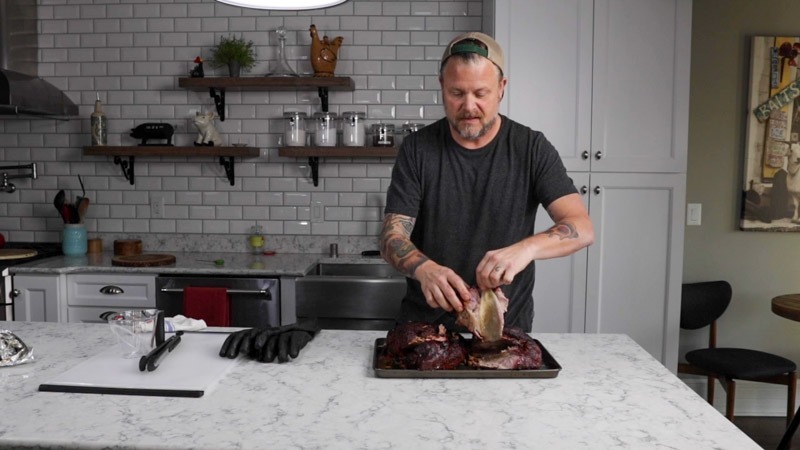
The “Bone Pull” Discrepancy
While both Boston Butts passed the “peanut butter” probe test and registered the same internal temperature, the real truth came out during the final pull. This is where the physics of the two methods showed their true colors.
The Clean Release
On the wrapped Boston Butt, the blade bone practically glided out with zero resistance. It was clean, dry, and left behind a perfectly hollow pocket in the meat. This is the “Gold Standard” of BBQ. It tells you that the collagen and connective tissues deep inside the shoulder, the parts that hold the meat to the bone, have completely liquified into silky gelatin.
The Unwrapped Resistance
In contrast, the unwrapped butt put up a bit of a fight. Even though it was technically “probe tender,” it didn’t want to let go of the bone as easily as its counterpart. There was a noticeable “grab” when I tried to pull it, requiring more effort to get it clean.
The Takeaway
This proves that “probe tender” and “bone-pull tender” are two slightly different stages of the cook.
- The Texas Crutch acts like a pressurized steam environment, forcing heat into the very center of the roast to break down those stubborn attachments around the bone.
- The Naked Butt relies on dry heat, which takes much longer to achieve that same level of deep-tissue breakdown.
If you want a clean bone and meat that shreds with a light touch, the foil wrap is your shortcut to success.
Step 9: The Final Verdict: So, What Have We Learned?
After 10 hours of smoke, heat, and tracking every variable, it was time to compare the two. Going into this, I had some preconceived notions about how the “Texas Crutch” would behave, but the results on the Big Green Egg threw me a few curveballs.
Both Boston Butts finished with beautiful, deep pink smoke rings and that nuanced, smoky flavor you only get from a long session over lump charcoal and fruitwood. Both were undeniably juicy. However, when you put them side-by-side, a clear winner emerged.
The Winner: The Wrapped Butt
If I have to choose the superior pork, the wrapped Boston Butt takes the trophy. While the bark on the unwrapped butt was aesthetically “cleaner,” the sheer tenderness and concentrated juiciness of the wrapped meat were noticeably better. Between the effortless bone pull and the silky texture of the shredded pork, the results reinforced this as a technique I will use from now on without question.
In BBQ, results are the only thing that matters. While the “naked” method has its purists, the foil wrap provides a level of consistency and moisture that is hard to beat for a crowd-pleasing pulled pork.
Wrapping vs. Naked Comparison
| Feature | Foil Wrapped (Texas Crutch) | Unwrapped (Naked) |
| Bark Quality | Softer; prone to moisture “streaking” | Superior; dark, crunchy, and well-formed |
| Moisture | Maximum; meat is effectively self-basted | High; but requires more diligent spritzing |
| Bone Pull | Effortless; glides out perfectly clean | Some resistance; still “grabs” the meat |
| Cook Time | Often faster (though a tie in this test!) | Traditional; subject to a longer “stall” |
| Overall Result | Noticeably more tender and juicy | Better for “bark-aholics” and presentation |
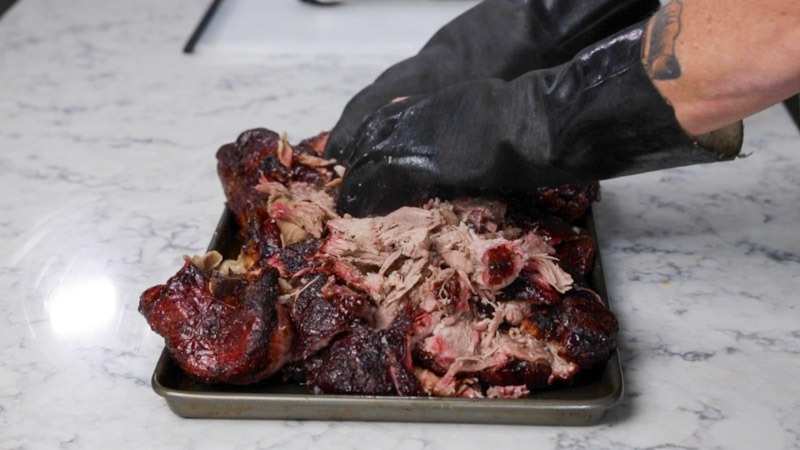
Step 10: Let’s Eat!!!
When the resting period was finally over, it was time for the moment of truth. I took those massive shoulders and began the process of pulling them apart. The meat from the wrapped butt practically shredded itself under the weight of the forks, while the unwrapped butt provided those beautiful, thick chunks of “black gold” bark that add so much texture to a dish. I made sure to toss the meat together so every bite had a perfect balance of moisture and crunch.
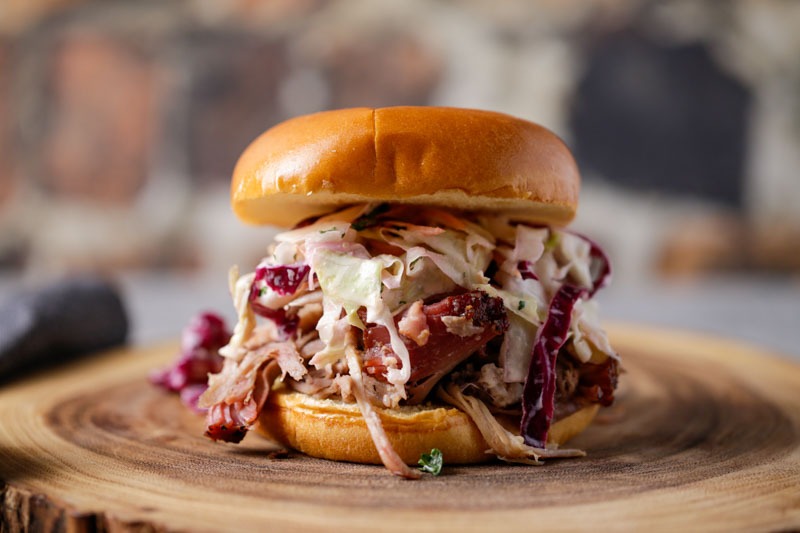
I piled the shredded pork high on soft, toasted buns, letting the natural juices soak into the bread. To finish them off, I topped each sandwich with a generous heap of my classic Southern slaw.
There is something special about the marriage of warm, smoky pork and cold, tangy cabbage. The vinegar from the slaw cuts right through the richness of the fat, while the crunch of the vegetables provides a necessary contrast to the melt-in-your-mouth tenderness of the meat. These sandwiches were the ultimate reward for ten hours of patience… a true backyard masterpiece that proved exactly why the “Texas Crutch” is a technique worth mastering.


Boston Butt Wrap Test: Does the Texas Crutch Make a Difference?
Ingredients
- 2 x 8 Lbs Boston Butts
- 1/4 cup kosher salt
- 1/4 cup coarse ground black pepper
- 1/8 cup paprika
- 2 Tbs yellow mustard
- For the mop:
- 1 cup apple juice
- 1/2 cup apple cider vinegar
- Several dashes of hot sauce
- Several dashes of Worcestershire sauce
Instructions
- Take your Boston Butts out an hour before cooking them
- Fill your Big Green Egg with lump charcoal placing 3-4 wood chunks in the charcoal
- Light your Big Green Egg lump charcoal and set temp to 250°
- Cross hatch the fat cap on the Boston Butts
- Apply mustard slather and then rub
- Once the Big Green Egg is stable at 250° and the smoke is clean, put your pork in
- Leave untouched for 3 hours
- Mix the mop ingredients together (Apple juice, Apple Cider Vinegar, hot sauce, and Worcestershire sauce)
- After 3 hours start spraying/mopping the sauce on the Boston Butts every hour for the next 5 hours
- At the 5 hour mark take your Boston Butts off and wrap in foil with a little mop applied to the Butts
- Putt back on the Big Green Egg, bump temperature to 275° and let cook another 2 hours
- When the meat is probe tender and measures 204° take the Boston Butts off the Big Green Egg
- Make a crack in the foil to let steam escape and Boston Butts to stop carryover cooking
- After 20-30 minutes, wrap the foil tight, place Boston Butts in cooler with a towel and let rest for an hour or two before pulling meat and serving
Nutrition information is automatically calculated, so should only be used as an approximation.


Great article, Chris…You’ve made a believer out of me. I bet that would go great with some Mac & Cheese and dusted with a Dizzy Pig Seasoning like we did up at The Harpoon Invitational so many years ago. May you and your family, Stay Safe! Stay Healthy!, and keep them coals burning my friend. 🙂
Thanks James!
You are awesome! The pork was delicious, moist and flavorful.
Thank you!
I have a Pitboss gas smoker, New at this.! Any suggestions since gas and not charcoal?
Figure out how to setup the grill of indirect cooking and make sure the Boston Butt is on that side of the grill when you try this recipe. You can also find smoke boxes for gas grills allowing you to put wood chips in a box over the flames of the grill to add smoke flavor.
Hey, Chris. Great recipe – I’ve had several successful cooks with it. Any thoughts on placing fat cap up vs. down on the BGE?
Thanks for the kind note! When I cook on the BGE I typically put fat cap down as the heat source is coming from the bottom. That fat will help insulate the cut for the long cook.
Hey Chris, have you ever done a mop vs no mop test? I see people going back and forth a lot about whether to mop or just leave it.
No, but that’s a good idea. I can say this, a pork shoulder does well with the added moisture and flavor over time. The moisture helps with two things: the bark and adding the necessary humidity for smoke absorption. The better this vs that test would be mop vs. spritz. Make sense?
Having tried several of your recipes I applaud your advice!
Thanks Brother! I have never wrapped my Butt! My little brother was doing his and wrapped it and it got me kinda curious. O just a Tip for unwrapped, the bone comes out easier after a long rest. (At least for me) Thank you for posting this!
You’re welcome ?
It was terrific!
Thank you 🙏
Excellent explanation and I really appreciate the comp on wrapping. Perfect results!!
Thanks for the kind words!
Hey brother, hope you’re well. if I am doing a little 5lber half Butt should I just do the 3,2,1 method? I am using cabinet smoker btw.
For a 5-pound Boston butt on a cabinet smoker, you’ll want to make the following adjustments to the process in your recipe:
1. Adjust Cooking Time
• A general rule is 1.5 to 2 hours per pound at 250°F, so you’re looking at around 7-10 hours total cook time.
• Wrapping (if using foil or butcher paper) should happen once the internal temp reaches 165°F (usually around the 4-5 hour mark).
2. Adjust Seasoning & Injection (If Used)
• Scale down rub and injection ingredients proportionally if your original recipe was for an 8-10 lb butt.
• Consider using slightly less salt in the rub to avoid over-seasoning, since a smaller butt has a higher surface area to meat ratio.
3. Cooking on a Cabinet Smoker
• Cabinet smokers tend to hold moisture better than offsets or kettles, so:
• You may not need a water pan unless you’re in a very dry climate.
• Keep the top vents open to maintain airflow and avoid creosote buildup.
• Consider rotating the butt once or twice if your smoker has hot spots.
4. Spritzing & Wrapping
• Spritz (if using) every 45-60 minutes after the bark is set (around 3 hours in).
• Wrap at 165°F and continue cooking until 195-203°F internal.
5. Resting
• After pulling from the smoker, rest in a cooler for at least 1 hour (wrapped in towels) for best results.