This post contains affiliate links. Please see our disclosure policy.
When I first got my Big Green Egg in 2012, I was a bit intimidated. I knew I had the skills to be successful on this new grill as I had been smoking meat and grilling for many years on various other cookers. But, if you are anything like me, when making an investment like this, you want to make sure that you are going to master the Big Green Egg and everything it has to offer. So, I made a commitment to myself day 1 of the Big Green Egg entering my life and that was to cook on this new grill every day for 30 days. You read that right… 30 days straight! I am happy to say I cooked on the Big Green Egg for 30 days straight and I am still cooking on a Big Green Egg (most every day) all these years later. In this post for Big Green Egg 101: Unlocking the Secrets of Temperature Control, I will distill my experience and help you understand and eventually master all the amazing things the Big Green Egg can do.
Yes, the Big Green Egg really can do it all: Smoking, Grilling, Roasting and Baking. With some knowledge, practice, and tenacity you can learn to do all of this too. Let’s break down each of these functions, outline some of the must have accessories helping to get the most out of your Big Green Egg, and cover ways to setup your Big Green Egg for a successful cook.
Table of Contents
Get My NEW Book
The Ultimate Big Green Egg Cookbook

How does a Big Green Egg work?
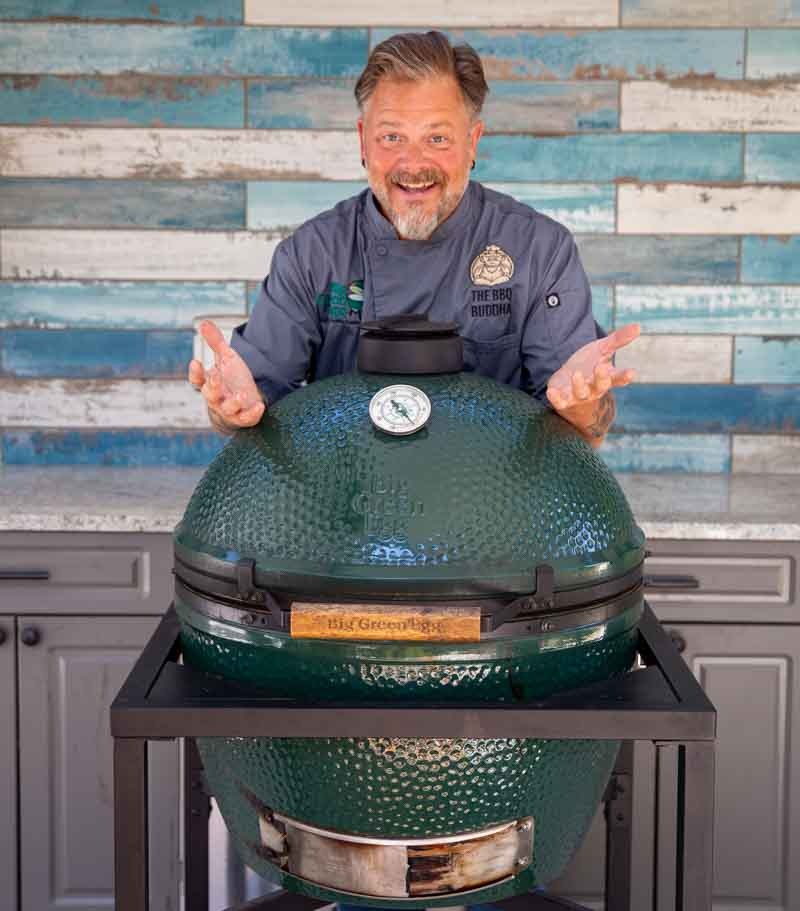
First, let’s look at the basic design of this grill and how it is optimized for any kind of cooking you plan to do.
CERAMIC DESIGN: this cooker is made from state-of the-art ceramic technologies (a combination of high temperature ceramics, terracotta, and crushed lava rock) which provides incredible insulation. This design can withstand temperatures of more than 750°F without breaking, even when there are temperature fluctuations opening and closing the grill. The thick ceramic walls absorb heat, releasing it back slowly during the long cook which helps maintain even cooking temperatures. In addition, the ceramic insulation helps manage fuel consumption, so you do not need to re-load your fuel at any time during a long cook.
FUEL SOURCE: the Big Green Egg is fueled by lump charcoal which is made from pieces of wood and lumber scraps. The wood is then heated in a device, like a kiln, that features low levels of oxygen. This process of heating the wood ensures it does not burn into ashes making it unusable. Lump charcoal burns hotter and for a long time making it the optimal choice for low and slow cooking. As the wood burns, it does not create as much ash as briquettes, keeping airflow unencumbered helping to maintain the fuel source for a long period of time. I have had cooks go longer than 14-hours without having to refuel.
SHAPE: the oval shape of the Big Green Egg combined with the ceramic insulation creates a hot airstream which circulates around the meat cooking inside. Essentially, you have a live fire convection oven. The Big Green Egg is designed to cook with the lid always closed to ensure you are harnessing the full power of this egg-shaped design and managing the temperature properly.
AIR-TIGHT SEAL: on the Big Green Egg’s top and bottom dome’s you will find a felt material known as the gasket. This material gives you close to an air-tight seal when the top dome is closed. This important seal enhances heat retention inside the Big Green Egg and prevents moisture from leaving the cooker, which helps keep the humidity levels where they need to be. The combination of this tight seal and the thickness of the ceramic material is second to none at retaining moisture, ensuring your food never dries out.
HEAT SHIELD: for the old school Eggheads out there, you knew this as the Plate Setter. The current name for this ceramic deflector is the ConvEGGtor. No matter what you call it, this piece is critical to smoking anything on your Big Green Egg. Basically, the convEGGtor is a ceramic heat shield, protecting your meat from the burning charcoal below. In addition, this heat shield helps to circulate the hot air in and around the dome creating that charcoal fueled convection oven discussed above.
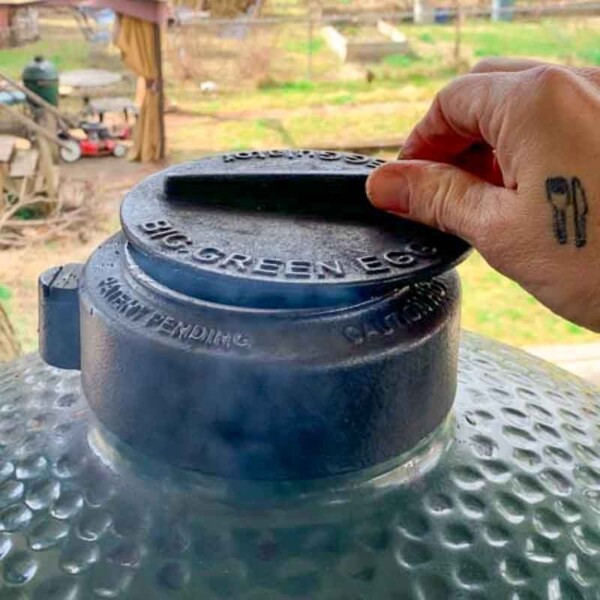
AIR VENTS: arguably the most important design feature of the Big Green Egg is the air vent on top and bottom designed to manage the amount of heated air moving through the cooking chamber. These vents allow the user to set and manage the cooking temperature as if it were on a sliding scale.
Top vent (chimney): the vent on top of your Big Green Egg in combination with the rEGGulator allow you to dial in the cooking temperature accurately. NOTE: I will cover more on this later in the chapter.
Bottom vent (Draft Door): this is your main air source where the Big Green Egg will take in the oxygen needed to maintain the fire. Knowing how to manage this vent in combination with the top vent is the key to setting the right temperature for smoking and BBQ.
THERMOMETER: your Big Green Egg comes with a thermometer that is set about 2/3 up the dome. It is important to keep in mind a couple of things when using the Big Green Egg thermometer. First, the difference in temperature from the grilling grate to the top part of the dome where the thermometer is set can be as much as 50°F higher. So, if your target temperature is 250°F just know the temperature measured at the dome could be 300°F. Next, the thermometer at the dome isn’t the most accurate and will need tuning and adjustments to be effective. The best way to monitor temperature in your Big Green Egg is with a digital probe like the Flame Boss 500 Kamado Smoker and Controller Kit. The probe used with this tool is accurate and measures at the grill grate giving you the temperature measured at the right location.
Must have Big Green Egg components and accessories
As many EGG Heads know, add-ons and accessories help make cooking with the Big Green Egg versatile and fun.
- Firebowl & Divider or Kick Ash Basket system: whether you get the Big Green Egg’s Firebowl or the Kick Ash Basket you will be happy with this addition to your Big Green Egg setup. Managing the cleanup and use of your lump charcoal is made much easier with the addition of this gear. Use either of these devices to shake loose ash and debris before you light your lump charcoal for the next cook. In addition, if you get the divider for either system, it will turn your Big Green Egg in to a 2-zone grill with ease.
- EGGspander: this accessory from Big Green Egg is a game changer allowing you to take advantage of all the vertical space inside. The multitier system allows you to cook at the grilling surface and above. In addition, this add-on helps manage your indirect/direct, raised direct, and cowboy grilling setup.
- Half-moon inserts: In addition to the EGGspander mentioned above, having an array of Big Green Egg half-moon inserts on hand help you take your grilling game to the next level. They fit in and work with the EGGspander system allowing you to use grill grates in different configurations, ceramic stones for 2-zone grilling setup, cast iron grates for the perfect sear, and finally a plancha allowing you to turn your Big Green Egg in to a flattop grill.
- Temperature control: Flame Boss by far is the best option for remote temperature control and management. They make the EGG Genius for Big Green Egg which is another good option. These tools allow you to monitor and control the temperature inside your Big Green Egg with an app on your phone.
- Charcoal: For me, the best lump charcoal on the market is made by Fogo. This hand-picked wood is sustainably sourced and offers longer burning coals. You will come to crave the signature inga wood flavor.
- Firestarter’s: If you are not using the SpeediLight fire starters from Big Green Egg your next best option is the Looft lighter. Their new Looft X is wireless and very powerful. The electric Firestarter has a low powered blower on it to help light and build the right fire every time.
- Instant read thermometer: To be successful on the grill every pit master needs a good instant read thermometer. I use the ThermaPen from ThermaWorks. For me this is the best digital thermometer on the market.
- Heat Resistant Gloves: You need a good set of gloves to protect your hands when cooking in a live fire environment or handling hot cast iron pans. Heat resistant gloves, made from durable heat resistant fibers, offer your hands protection from temperatures as high as 500°F. Big Green Egg has one that I like named the EGGmitt® though there are many others to choose from.
Smoking on the Big Green Egg
If you purchased your Big Green Egg for smoked meats, you made the right decision. This grill’s design is perfect for low and slow cooks. Next, I will show you how to setup your Big Green Egg for smoking and how to manage the temperature of the Big Green Egg for long cooks.
How to set up your Big Green Egg for a long smoke
When smoking on your Big Green Egg you need to focus on the “The BBQ Zone,” which is the temperature range best suited for cooking larger, tougher cuts of meat to BBQ perfection. The temperature range of 200°F – 275°F is ideal for breaking down connective tissue helping to turn a large and/or tough piece of meat in to a smoky, tender masterpiece. In addition, another key concept is managing the proper humidity in your Big Green Egg to allow the gasses released from the burning wood to be absorbed into your meat, giving you the color and taste of a true pit master. In the section below I will review my method for setting up the charcoal and wood for a low and slow cook in your Big Green Egg.
DIALING IN THE TEMPERATURE FOR THE “BBQ ZONE”
First, let’s explore how to build the optimal fire, place the wood, and manage the temperature needed to cook in the “BBQ Zone”.
To start, make certain you clean your Big Green Egg’s Firebox, Firebowl and Grate of old ash, debris, and small pieces of lump leftover from previous cooks. It is essential you have proper airflow between the Big Green Egg’s Draft Door and the rEGGgulator sitting on top of the Chimney.
To set up the Big Green Egg for smoking, first place a small amount of lump charcoal in the Firebox, just enough to cover the Grate (about ¼ of the total space available). From there, place 3-4 baseball sized chunks of smoking wood in the base of the charcoal. Make sure they are spaced apart so they will not all light at one time.
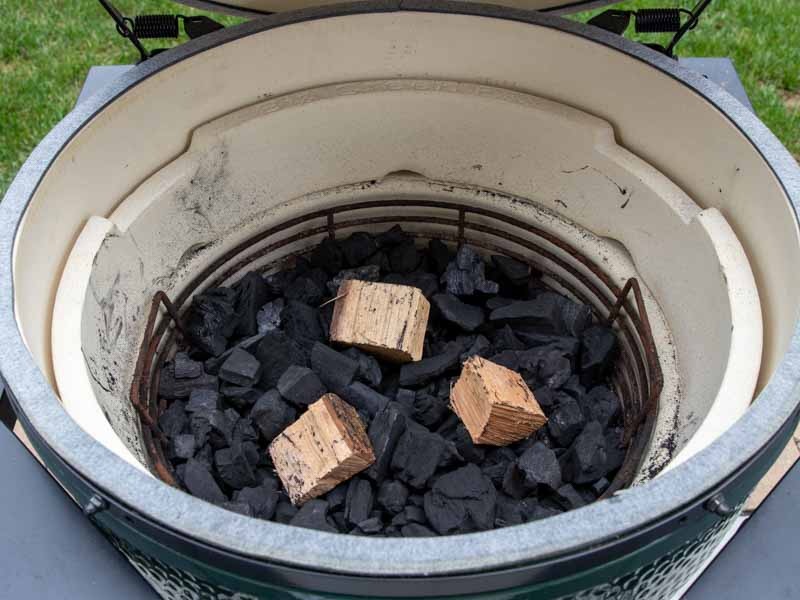
Once your wood is in place it is time to fill the rest of the Firebowl with lump charcoal.
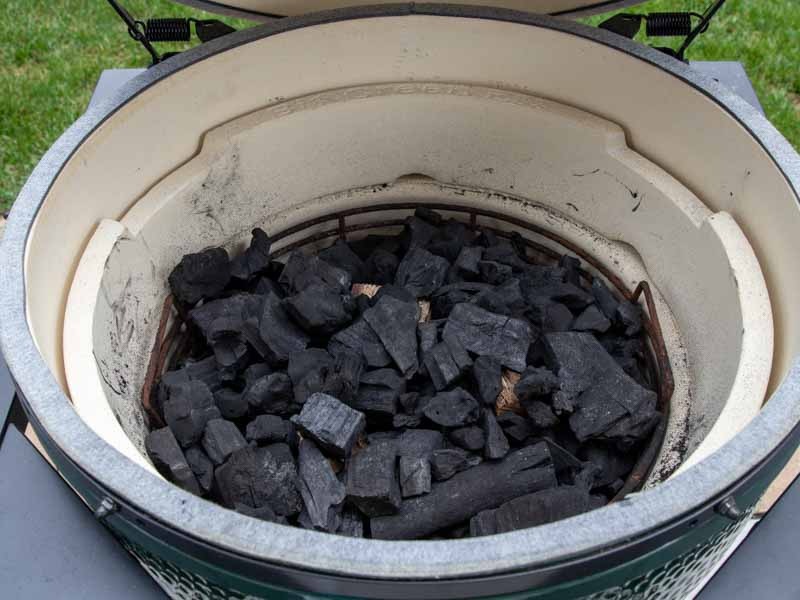
NOTE: As discussed above, you could get up to 12-hours (or more) of cooking time with a full load of lump charcoal in your Big Green Egg. This is achieved with the heat absorbed by the ceramic materials, the tight air seal keeping oxygen flow controlled, and the lump charcoal which burns more efficiently than other charcoal types.
After your charcoal and wood are in place it is time to light and manage the fire. If you ask 100 different EGGHeads how they light their Big Green Egg, you will certainly get 100 different answers. What works best for me is using my 10 x 10 x 10 method which I will outline here. To start, light your fire towards the front of the Firebowl closest to the Draft Door below. Leave the draft door all the way open, as well as the top dome and let the fire burn uninterrupted for 10 minutes. In this state, your Big Green Egg is getting the most oxygen it can to help start and build the temperature necessary to get the combustion temperature needed to produce clean smoke.
Next, place in your ConvEGGtor (or 2 ceramic half-moon inserts if you are using the EGGspander base), grill grate, and close the top dome. When you do this the temperature will drop considerably as the convEGGtor or ceramic inserts will block the burning coals below from the temperature probe in the dome. So, after the insert is placed be patient while the temperature begins to rise and gets to the desired range.
NOTE: You want both the Draft Door and the rEGGgulator fully open for this allowing in as much oxygen as possible to ramp the temperature of your fire up to the desired level. Leave your Big Green Egg in this state for another full 10 minutes. When you come back to check the temperature should be around 250°F.
And finally, adjust the vents on your Draft Door and your rEGGulator. After placing the ConvEGGtor in the Big Green Egg the air flow starts to move around considerably creating a convection cooking environment. The air vents allow you to control the air flow as it is drawn in from the bottom and released from the top. These adjustments are the big reason why the modern Kamodo grills are perfect for smoking as you can dial in exactly the temperature desired and know it will stay in place for the duration of the cook. We want to shut both down almost all the way to keep the temperature where it is for smoking. So, close the top and bottom vents 90% of the way (shown below in the pictures).
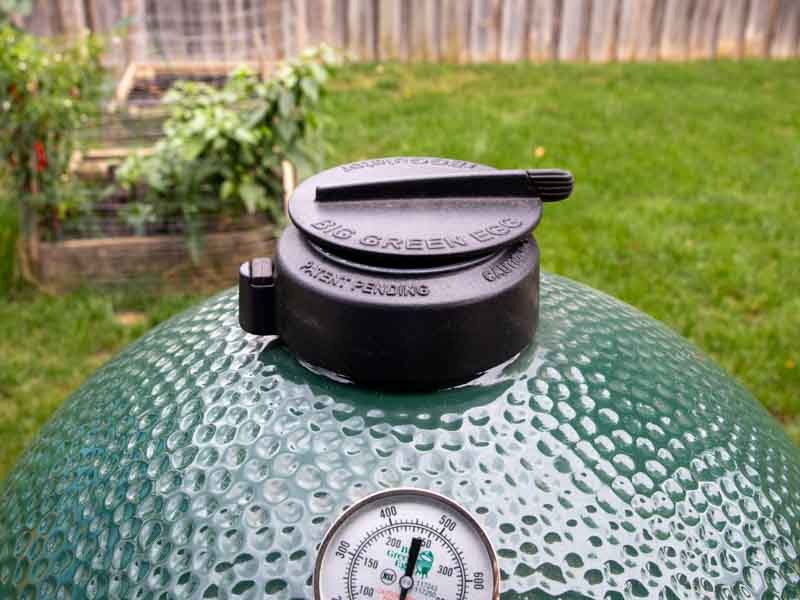
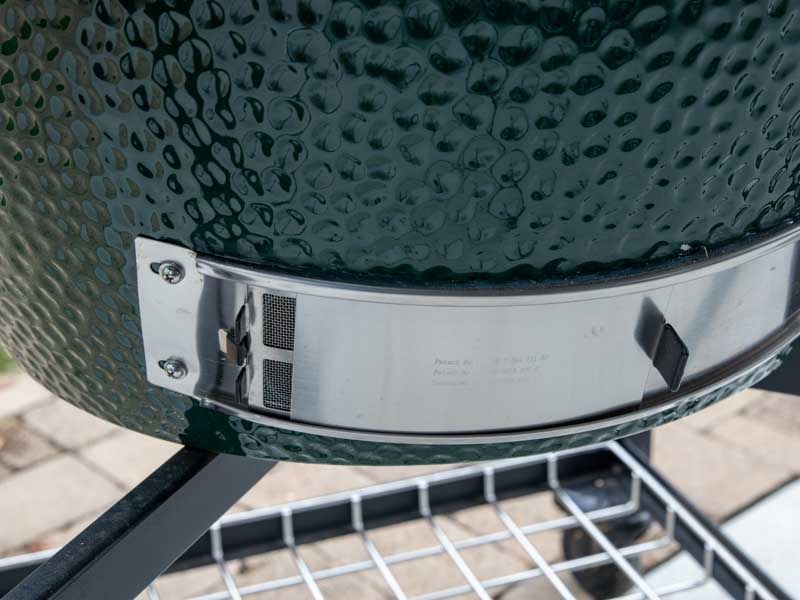
For the final 10 minutes manage the vent settings to achieve the desired temperature between 200°F and 275°F. This typically takes the full 10 minutes making micro adjustments to the vents until your desired temperature has been achieved and is stable. From here it is time to start smoking!
Humidity and the Big Green Egg
The Big Green Egg has an air-tight ceramic cooking chamber that keeps the food moist by trapping excess moisture released during the cook inside the insulated chamber. Basically, as your food cooks it expresses moisture from the meat which is then turned into the humidity needed (a range of 70-80% humidity is ideal) for good BBQ. This insulated environment keeps external heat and cold from affecting the food cooking inside for the duration of the cook. For long cooks with lower temperatures such as brisket, add a small steam table pan full of warm water to the cooking chamber (pictured below) to help keep the needed humidity in place. In addition, you could mist the cooking chamber with warm water as you monitor the meat and pellicle formation during a long cook.
Baking with the Big Green Egg
The most important thing to do to bake successfully on your Big Green Egg is to ensure it is clean before you start. When I say clean, I mean clean! The last thing you want your friends and family to taste when baking a pie or a loaf of bread it is all the BBQ that came before it. So, to get your Big Green Egg in the best shape as possible to bake you will need to perform a “clean burn” the day before you plan to do your baking.
Clean Burn
Fill your half of your Big Green Egg Firebowl with fresh lump charcoal. Light the lump charcoal, place the convEGGtor and grill grate in place, and get the temperature up to 750°F. Once you stabilize the temperature, set a timer for an hour, then leave it alone. When the hour is up, shut down the top and bottom vents allowing the Big Green Egg to cool down. When cooled you will find the clean burn loosened and/or dissolved all the grease buildup that had accumulated in your Big Green Egg and on your grill grate and convEGGtor.
Once your Big Green Egg is completely cooled, it is time to break out the Shop Vac. Remove any remaining lump charcoal, the fire ring, and fire box. Scrape off any of the grease buildup that wasn’t dissolved during the clean burn and vacuum thoroughly with your Shop Vac. After vacuuming all the ash and debris, reassemble your freshly cleaned Big Green Egg.
Baking setup
Setting your Big Green Egg up for baking is just like smoking (outlined above) but with one key difference, you will not use smoking wood of any kind. Other than that, fill the Firebowl as you would for a low and slow cook, light your fire, place the convEGGtor (or 2 ceramic half-moon inserts if you are using the EGGspander base) and grill grate inside, and start baking when your desired temperature is reached.
Grilling with the Big Green Egg
When you are grilling on the Big Green Egg, you have many setup options to consider and use. The goal when grilling food is to expose whatever you are cooking to direct heat in a controlled fashion, so you have the desired outcome when finished. Let’s review 4 ways to setup your Big Green Egg for grilling success:
- Out of the box: This is the setup your Big Green Egg has right “out of the box”. The grilling surface is 6” or so below the felt line (the place where the dome meets the bottom of the Big Green Egg). There is no ceramic insert between the lighted lump charcoal in the firebox and grill grate. This gets you close to the coals but not so close you have no control. This is the most common setup for grilling on the Big Green Egg.
- Raised direct: this is my preferred setup and one I use to grill food with all the time. In this scenario you are using the EGGspander base (or for the old school Egg Heads out there, a Woo from the Ceramic Grill Store) to raise the grilling surface to be aligned with the felt line (the place where the dome meets the bottom of the Big Green Egg). This raised grilling surface allows you greater control over the lighted lump charcoal below as it is 6” higher than the grilling standard setup described above.
- 2-Zone Grilling: This setup is essentially spelled out for you in the name. You have one zone setup for direct grilling (the food is directly exposed to the lighted lump charcoal) and the other for indirect grilling (the food is only exposed to ambient heat in the cooking chamber). This gives you the most control over grilling food as you can move the food from being directly exposed to the fire below to a cooler zone allowing it to bake/roast. This is the perfect setup for reverse searing. There are two ways to achieve this setup on the Big Green Egg: First, using the Firebox to divide the charcoal in to 2-zones. To do this you need the Big Firebowl with Divider (XL, XXL) or the Kick Ash Basket with Adjustable Divider. Second, is to use the EGGspander base with half-moon ceramic insert. In this way you still have 2-zones direct and indirect but the indirect side as more radiant heat coming from below which is baffled by the ceramic insert.
- Cowboy Grilling: This setup gets the grilling grate directly over the lighted lump charcoal below. To do this you need the EGGspander Multi-Level Rack. The top tier of the 5-piece Big Green Egg can be turned upside down where it fits perfectly into the notches in the Fire Ring and drops the grilling grate to an inch or so above the charcoal. This style of cooking is indeed “hot and fast” as you only need a minute or two per side to cook the food in this way.
Big Green Egg setup and temperature control for grilling
To set up the Big Green Egg for grilling, load your lump charcoal in the Firebox filling it about halfway. Now it is time to light your fire and get grilling. Take 3 SpeediLight fire starters and light them in a triangular pattern nestled in the lump charcoal.
Let’s use a clock as a visual reference for SpeediLight distribution: place one at 12:00, one at 4:00, and one at 8:00.
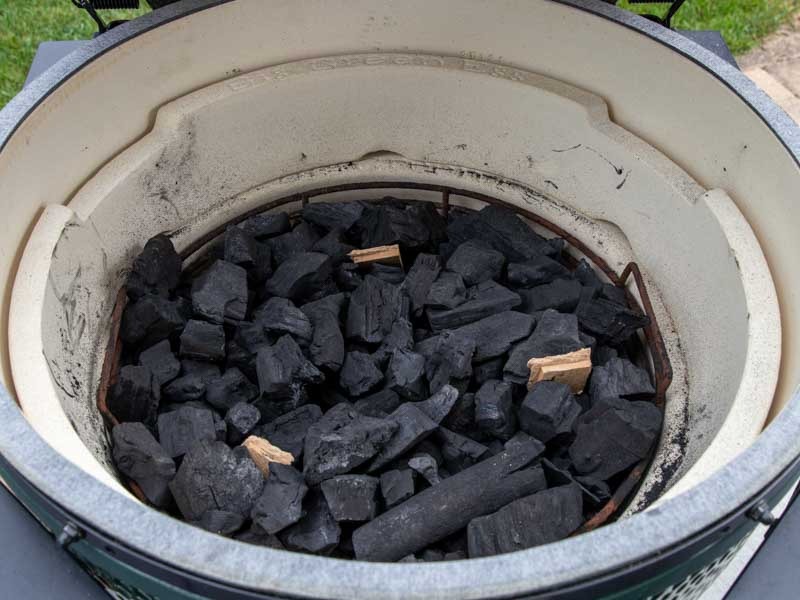
Now using my 10 x 10 x 10 eave the draft door all the way open, as well as the top dome and let the fire burn uninterrupted for 10 minutes. In this state, your Big Green Egg is getting the most oxygen it can to help start and build the temperature necessary to get the combustion temperature needed to produce clean smoke.
Next, place in your grill grate, and close the top dome leaving the top and bottom vents 100% open. Let the fire burn like this for another 10 minutes.
At this point, you should be at or near 350° F and can now start adjusting the top and bottom vents to stabilize or change the temperature. Once you are dialed in, that’s it you are ready to start grilling!
Temperature setting guide
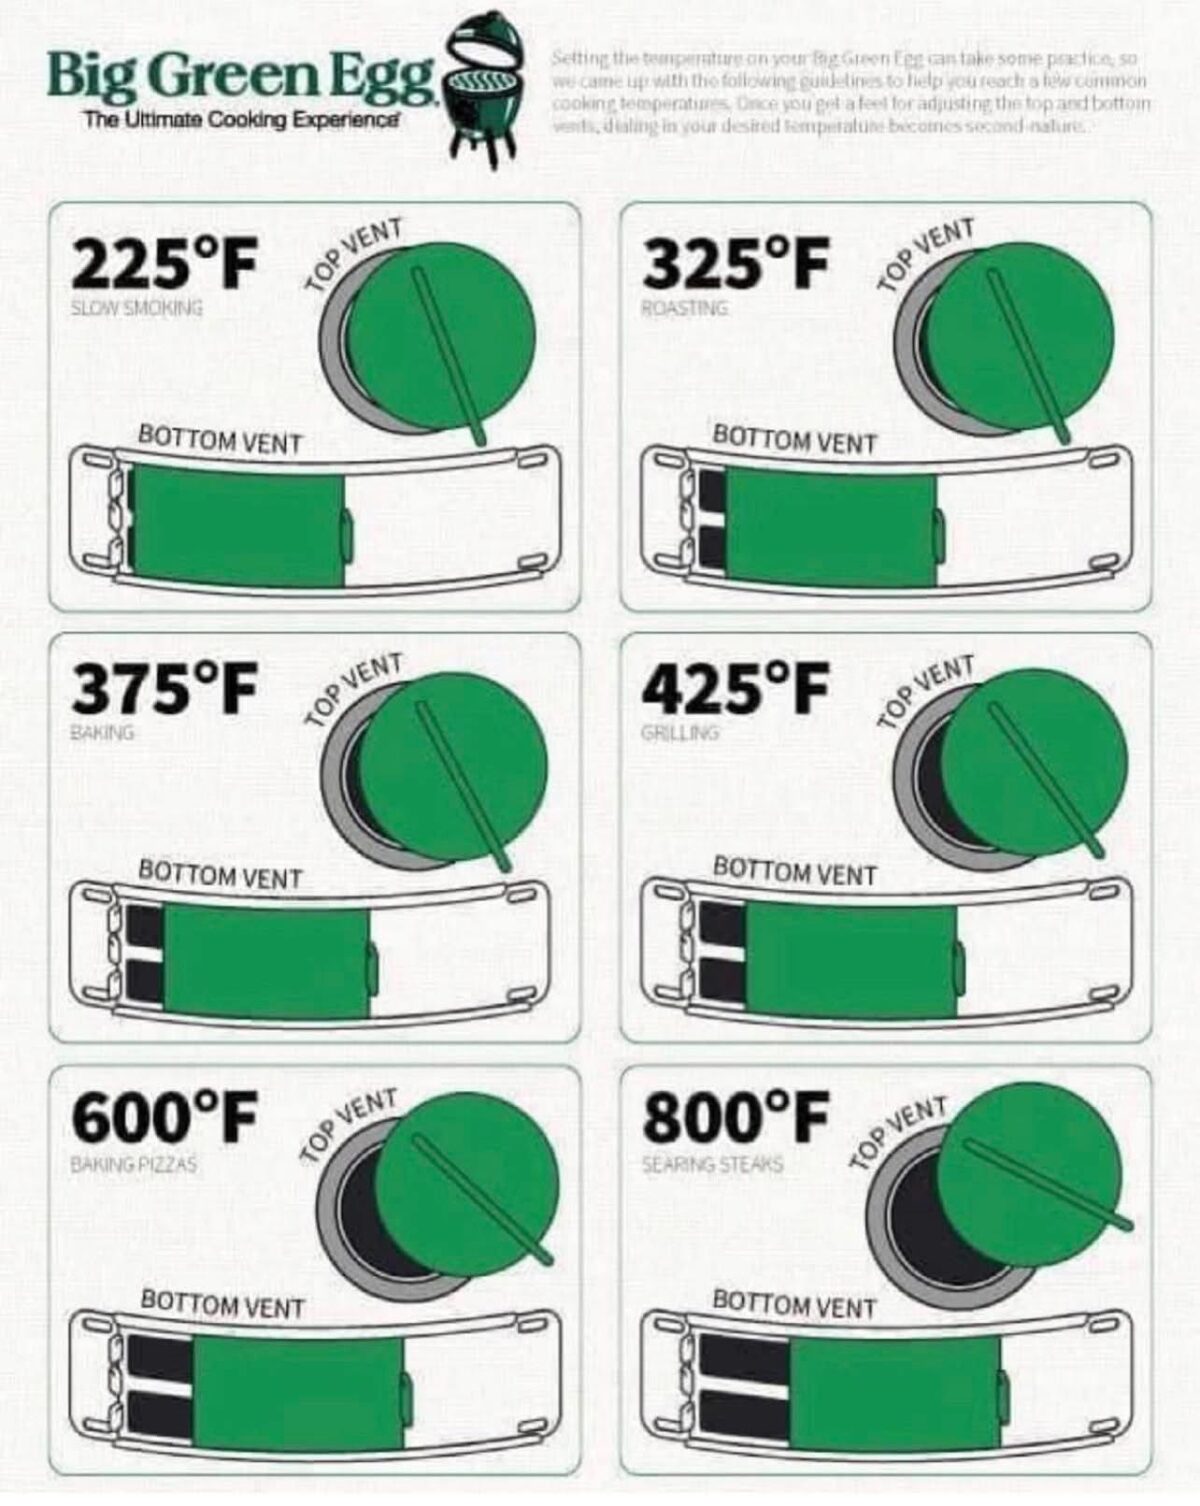
Here is a quick chart showing you the various top and bottom vent settings to dial in the correct temperature on your Big Green Egg:
Big Green Egg Troubleshooting & Maintenance Guide
Cleaning:
Cleaning your Big Green Egg is something you should do regularly as it will impact the performance and your ability to manage the temperature for each cook. I divide the task of cleaning in to two separate and distinct categories pre-cook cleaning and bi-annual maintenance cleaning. Let’s dig in to each one so you can be setup for success.
NOTE: Please clean your Big Green Egg when it has not been used recently and is cool. You do not want to hurt yourself or cause a fire by cleaning when the Big Green Egg is still hot from your previous cook.
Pre-cook cleaning: First, think about your prior cook because if it was greasy, you will have dried grease over the remaining lump charcoal impacting its ability to burn evenly. In addition, the burned grease will be negatively affecting the flavor of the food you are cooking. If this is the case, you want to throw out all the lump charcoal (not just the ash and debris) and start with a fresh batch. If you are using lump charcoal from your previous cook, you must clean the old ash and debris to ensure proper airflow management. I suggest using either the Kick Ash Basket or the Big Green Egg’s Fire Bowl to make this job much easier. Take your Kick Ash Basket or Fire Bowl and shake all the small bits of ash and debris loose and into a metal garbage can. If you are not using either of those devices, take your Ash Tool and run it through the leftover lump charcoal until the ash and debris falls through the Fire Grate and into the Fire Box below. Then use the Ash Tool to remove the ash and debris through the bottom draft door. After all the previous ash and debris has been removed, look at the Fire Grate and make sure nothing is blocking the holes preventing oxygen from reaching the fire.
Bi-annual maintenance cleaning: Twice a year, I will take the Big Green Egg apart by removing the inside components (cooking grid, Fire Ring, Fire Grate, and Fire Box) and clean all the debris, ash, and fallen pieces of lump that have accumulated inside.
NOTE: It helps to do a clean burn before you do this by heating your Big Green Egg to 600°F and letting it run at that temperature for an hour. This process will clean your cooking grid, ConvEGGtor, Fire Ring, Fire Grate, and Fire Box by burning grease and build up left from previous cooks.
After the clean burn allow the Big Green Egg to completely cool down then remove the components outlined above. Use a shop vac to remove all the ash, debris, etc. from the bottom of your Big Green Egg. In addition, this is a good time to check the gaskets on the top and bottom domes. The gaskets last 2-3 years with normal use, so you shouldn’t have to change them often. However, this bi-annual check is the right time to make that decision. Finally, this is the time to check that all the bolts are tightened on the bands holding your Big Green Egg together. Over time the bolts loosen and in turn the bottom and top domes get misaligned. To prevent this, semi-annual tightening of the bolts should be done.
Tricks to manage temperature control on the Big Green Egg when things go wrong:
Most people ask me how to manage temperature in a Big Green Egg. I will breakdown the two most common issues people run I to when cooking on the Big Green Egg: I cannot get my Big Green Egg hot enough (350°F or higher) and I need to cool my Big Green Egg down to 250°F or lower for smoking. Let’s look at what you can do to fix each scenario.
Trouble getting your Big Green Egg to 350°F or higher: The best way to fix this is by following the cleaning tips outlined above. Having obstructed airflow is the top reason your Big Green Egg won’t get to 350°F or higher. Make sure you do the pre-cook cleaning before you get started on your next cook that requires temps of 350° or higher.
Trouble getting your Big Green Egg temperature lower for smoking: Has this happened to you… you have setup your Big Green Egg for a low and slow cook, the temperature gets above 300°F, and you can’t get the temperature lower? Well, this scenario happens all the time and you will be surprised with the solution. Using heat resistant gloves take out the ConvEGGtor (or the EGGspander base and ceramic half-moon inserts) out of the Big Green Egg and top the lighted lump charcoal with unlit lump charcoal. This sounds counterintuitive but it works by starving the current fire of the needed oxygen to grow. As the fire no longer grows it begins to die down until the unlit charcoal above ignites. By this time, you have lowered the temperature to your desired range and have adjusted the top and bottom vents to keep it that way for the long cook.
Calibrating external temperature gauge:
NOTE: Before taking the actions below make sure your Big Green Egg is cooled down and not hot to the touch. I suggest using a heat resistant glove for this exercise.
If your external temperature gauge is not reading correctly, it needs to be adjusted. To do this, remove the external temperature gauge from the top dome of your Big Green Egg. Next, carefully boil a pot of water on your stovetop. Place the stem of the external temperature gauge in the boiling water being careful not to touch the tip to the bottom of the pan. After 1-minute in the boiling water your external temperature gauge should read 212°F/100°C. If it does not read the correct temperature, you need to make small adjustments to correctly set the temperature. Remove the stem from the boiling water then use a 7/16” wrench to rotate the nut at the top of the stem of your external temperature gauge. Rotating it clockwise will raise the temperature and counterclockwise will lower it. Continue making small adjustments and checking the temp in the boiling water until you have set it correctly.
That’s it in a nutshell my friends, you have all the knowledge you need to cook the on the Big Green Egg. I hope you find as much joy cooking with this grill as I do!



I’ve had an egg for 15 years and this called this was very informative. Thank you.