This post contains affiliate links. Please see our disclosure policy.
Mastering pork belly on the Big Green Egg is a definitive step toward becoming a backyard pitmaster. While many outdoor cooks stick to the safety of pork butts or ribs, the belly offers a level of decadence and flavor that is unmatched. Traditionally, Hawaiian Kalua Pork is cooked in an underground Imu, but your ceramic grill is a perfect modern substitute. The thick walls of the Big Green Egg provide the deep, radiating heat and moisture retention necessary to transform this rich cut into smoky, island-inspired perfection.
In this guide, we are utilizing a sophisticated Hawaiian glaze featuring mirin, soy, and star anise to cut through the richness of the fat. I want to be direct with you on the texture: this specific smoking method produces a result that eats like a high-end, succulent pork tenderloin with a savory bark. If you are looking for that “fall-apart” braised texture, I will show you exactly where to add a liquid braising step during the cook. However, if you want a sliceable, restaurant-quality belly with a deep smoke ring, this is the gold standard.
So, sit back, grab an ice-cold Kona Big Wave, and let’s dive into this post for Smoked Kalua Pork Belly on the Big Green Egg: A Hawaiian Masterclass.
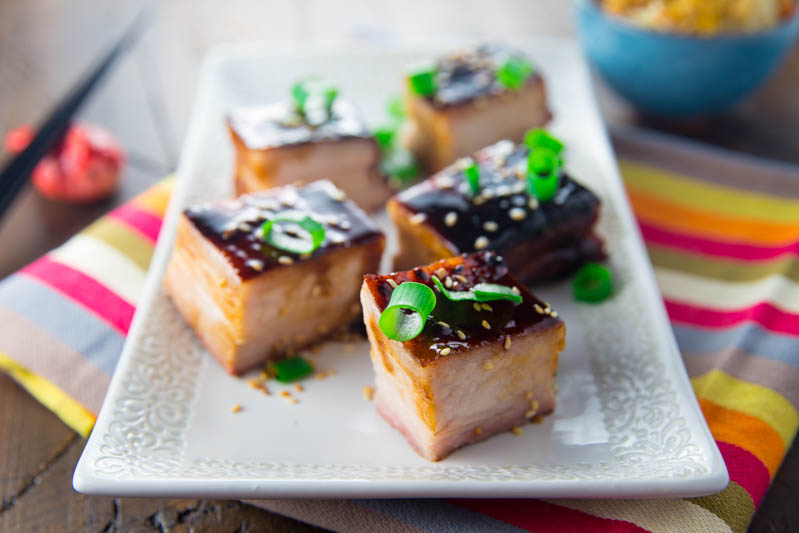
Table of Contents
- Step 1: Crafting the Dark Chicken Stock Base
- Step 2: Building the Stock Foundations
- Step 3: Infusing the Hawaiian Glaze
- Step 4: The Final Glaze Fusion
- Step 5: Sourcing and Prepping the Pork Belly
- Step 6: Preparing for the Smoke
- Step 7: Crafting the Finishing Glaze
- Step 8: The Big Green Egg Setup
- Step 9: The Lacquer and the Sear
- The Service: Plating the Island Flavors
- Smoked Kalua Pork Belly Recipe
Get My NEW Book
The Ultimate Big Green Egg Cookbook

Step 1: Crafting the Dark Chicken Stock Base
The secret to this incredible Hawaiian glaze starts with a Dark Chicken Stock. Unlike a standard light stock, this version utilizes charred chicken bones and deeply browned vegetables to build an intense, savory foundation. This extra layer of effort transforms the glaze from a simple sauce into a rich, complex reduction that perfectly complements the fatty pork belly.
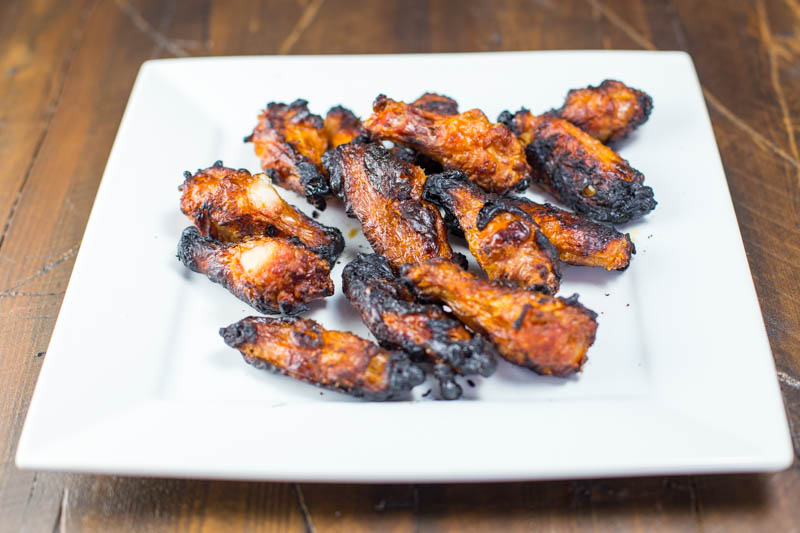
To begin, you must char your chicken wings over direct heat on the Big Green Egg at 400°F. Roast them until they are dark and caramelized, as this char is what provides the deep color and smoky undertones for the stock. Once the wings are charred, simmer them with browned onions, carrots, and celery. This “liquid gold” will serve as the backbone for your Kalua marinade and final glaze.
Step 2: Building the Stock Foundations
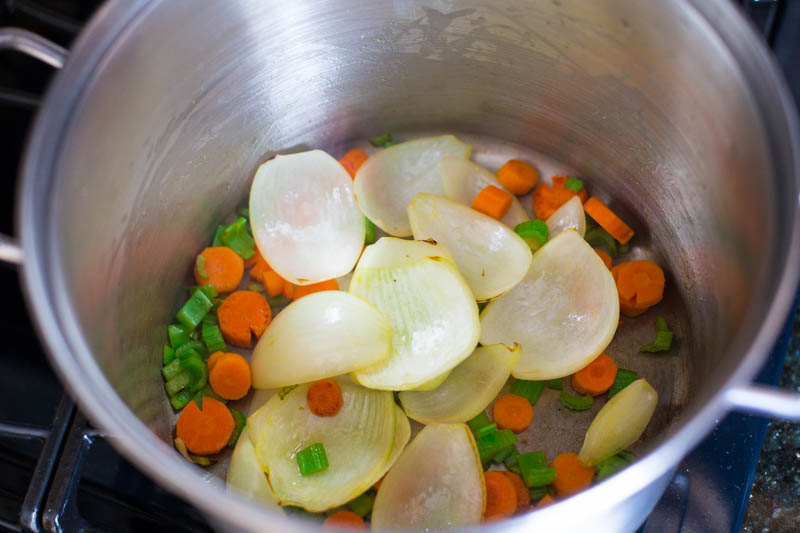
Once your chicken wings have a deep char, you must focus on the aromatic base of the stock. A classic mirepoix (a blend of onions, carrots, and celery) provides the essential sweetness and depth needed to balance the salty soy and mirin in the final glaze. By browning these vegetables before adding any liquid, you unlock a caramelized complexity that a standard stock simply cannot replicate.
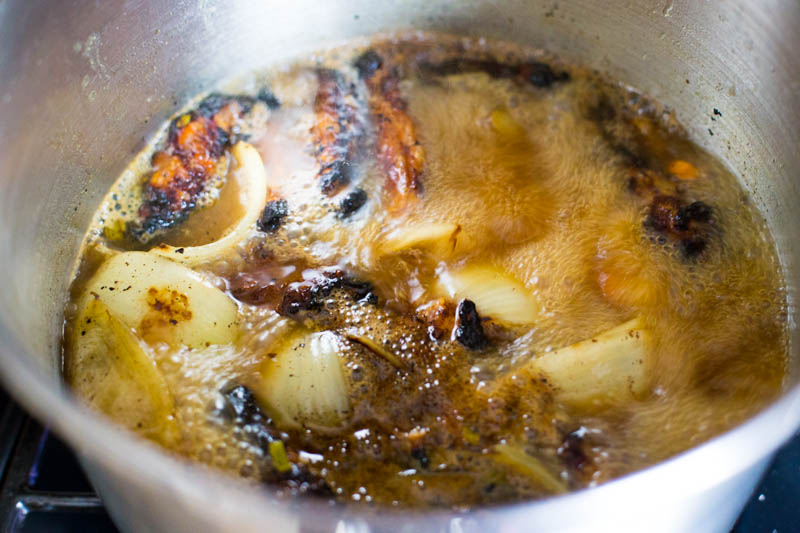
Place your mirepoix into a large pot and cook until the vegetables develop a dark, rich exterior. From there, add the charred chicken wings and cover everything with high-quality chicken stock. Bring the mixture to a rolling boil to begin the extraction process. This stage is where the smoke from the wings and the sugars from the vegetables meld into a singular, powerful base.
Step 3: Infusing the Hawaiian Glaze
While the dark chicken stock simmers, you should focus on the aromatic components that give the Kalua Pork Belly its distinct island profile. This glaze is a sophisticated balance of sweetness, salt, and warmth. By prepping your ingredients in advance, you ensure that the flavors have ample time to meld before they meet the rich, smoky pork.
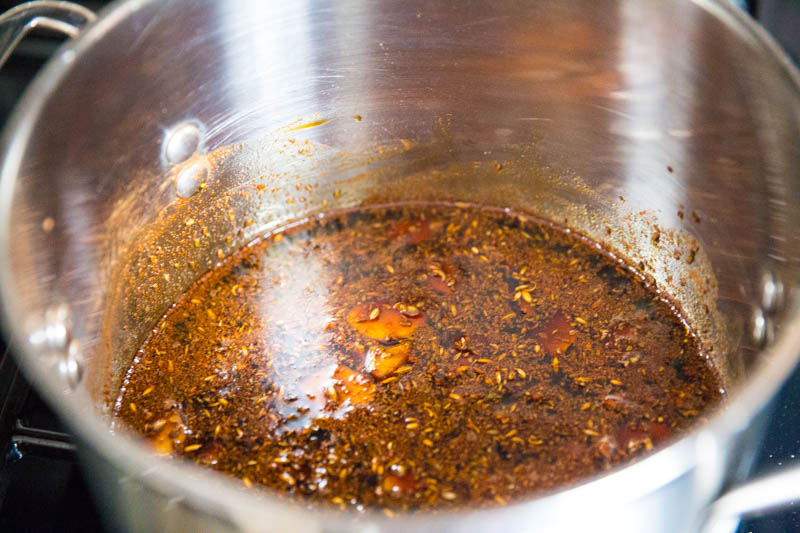
Gather your sugar, mirin, and soy sauce to act as the primary flavor carriers. To add depth, you will need fresh garlic and ginger, along with a warm spice blend of cinnamon, fennel, and star anise. These spices provide a subtle licorice and earthy note that cuts through the intense fat of the belly. Once the dark stock has finished its reduction, these ingredients will be combined to create the final coating that defines the dish.

Step 4: The Final Glaze Fusion
Once your dark chicken stock is rich and flavorful, you must cool it down quickly before it meets the rest of the marinade. I recommend placing the stock in the freezer for a few minutes to drop the temperature. While that cools, combine your sugar, mirin, soy sauce, and spices in a separate pan and bring them to a gentle simmer. This step ensures the sugar dissolves completely and the aromatics like star anise and ginger fully infuse the liquid.
After the simmer is complete, whisk the cooled dark chicken stock into the glaze mixture. Let the combined liquid come down to room temperature on your counter. This patience is vital because a hot marinade would prematurely “cook” the exterior of the pork belly, preventing the deep penetration we want for that 24-hour soak. Once cooled, you have a potent, umami-rich liquid that is ready to transform the meat.
Step 5: Sourcing and Prepping the Pork Belly
Finding a high-quality, four-pound slab of pork belly is the first step toward a successful Kalua cook. While many standard grocery stores carry pre-sliced strips, you want a whole, unsliced piece for the Big Green Egg. I recommend visiting a local butcher or a specialty market where you can find skinless belly with a consistent ratio of meat to fat. Look for a piece that is firm to the touch with bright, pinkish-red meat layers.
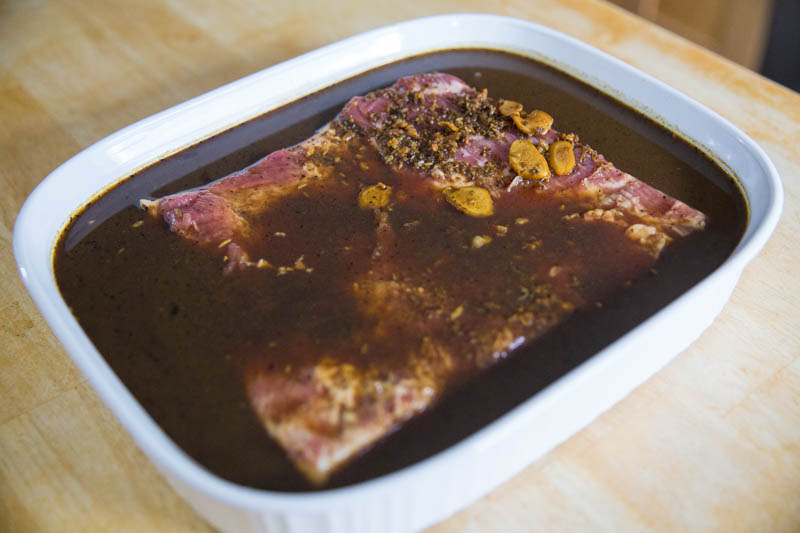
Once you have your meat home, you must perform a quick cleanup. Use a sharp knife to trim any excessive fat or silver skin from the meat side. For this cook, I placed the four-pound pork belly into a large baking dish and poured the room-temperature marinade over the top. Let the meat soak in the refrigerator for at least 24 hours. This long marinating time is non-negotiable because the salt and sugar need hours to migrate into such a thick cut.
Pro Tip: To Braise or Not to Braise?
If you are looking for that ultra-moist, “fall-apart” texture, this is your pivot point. To braise the meat, you would leave the pork belly in this marinade, cover the dish tightly, and cook it for 4 to 5 hours before finishing it on the Big Green Egg. For this specific cook, I chose to skip the braise to achieve a firmer, succulent texture similar to a high-end pork tenderloin.

Step 6: Preparing for the Smoke
After the 24-hour soak is complete, the pork belly will have absorbed a significant amount of salt and aromatic flavor from the Hawaiian glaze. Remove the meat from the marinade and place it on a clean tray. It is vital that you allow the pork to sit on your counter for about 30 to 45 minutes to come to room temperature before it hits the Big Green Egg.
Putting cold meat directly onto a grill causes the muscle fibers to tense up, which can lead to a tougher finished product. By taking the chill off the fat and meat, you ensure a more even cook and a better smoke absorption during the initial phase of the grill. While the meat rests, use a paper towel to lightly pat the surface. You want the belly to be moist but not dripping with excess liquid, as this helps the smoke “stick” to the surface to form a beautiful mahogany bark.

Step 7: Crafting the Finishing Glaze
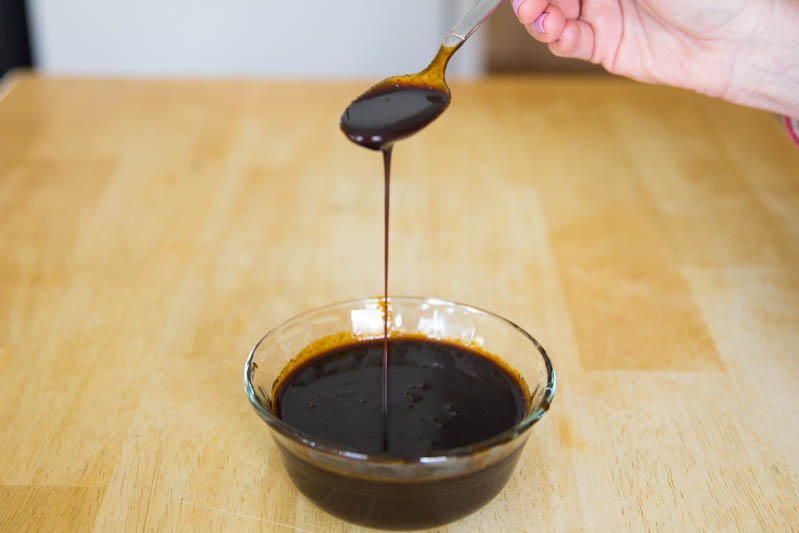
While your pork belly rests and the Big Green Egg stabilizes, you should transform your leftover marinade into a high-gloss finishing glaze. This step ensures that none of that liquid gold goes to waste. By reducing the liquid, you concentrate the sugars and the essence of the dark chicken stock, creating a thick sauce that will cling to the meat during the final stages of the cook.
Pour the marinade through a fine-mesh strainer into a small pot to remove any particulates or ginger fibers. Place the pot over medium heat and bring the liquid to a steady simmer. You must watch the pot closely as the water evaporates and the sugars begin to caramelize. Once the liquid coats the back of a spoon and reaches a syrupy consistency, remove it from the heat. This concentrated reduction provides a punch of umami that a fresh marinade simply cannot offer.
Step 8: The Big Green Egg Setup
To achieve that signature Kalua flavor, you must transform your Big Green Egg into a precision smokehouse. The goal here is a low-and-slow environment that allows the fat to render slowly while the meat stays tender. By using a heat deflector, you protect the delicate sugars in the Hawaiian glaze from scorching over the open flame.
Start by stabilizing your BGE at 225°F. This low temperature is the sweet spot for breaking down the tough connective tissues in the belly without drying out the meat. For wood choice, I highly recommend apple wood chunks. The subtle, fruity sweetness of apple smoke perfectly complements the mirin and ginger in the glaze without overpowering the pork.
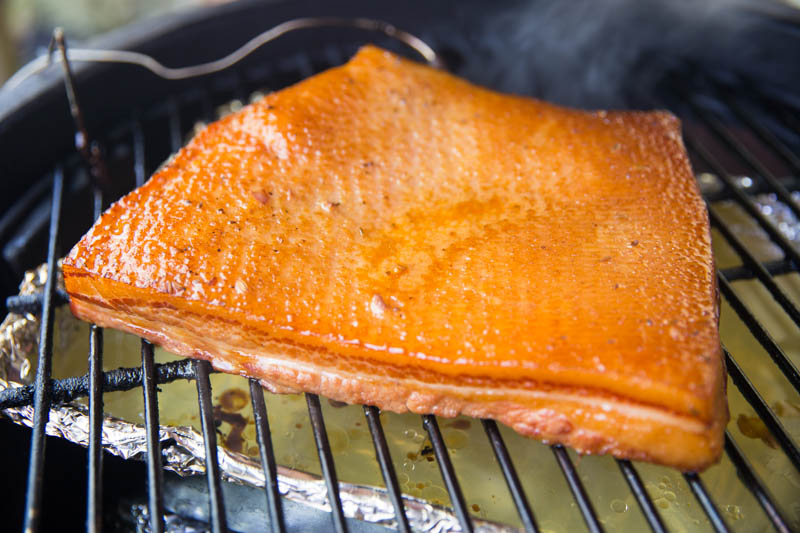
Once your temperature is locked in, drop your wood chunks into the hot coals and install the ConvEGGerator (legs up). Place a drip pan filled with water on top of the deflector; this adds moisture to the cooking chamber and catches the rendering fat to prevent flare-ups. Lay the pork belly on the grate skin-side up (fat-side up). This placement allows the rendering fat to bast the meat as it melts, ensuring every bite remains succulent.
Step 9: The Lacquer and the Sear
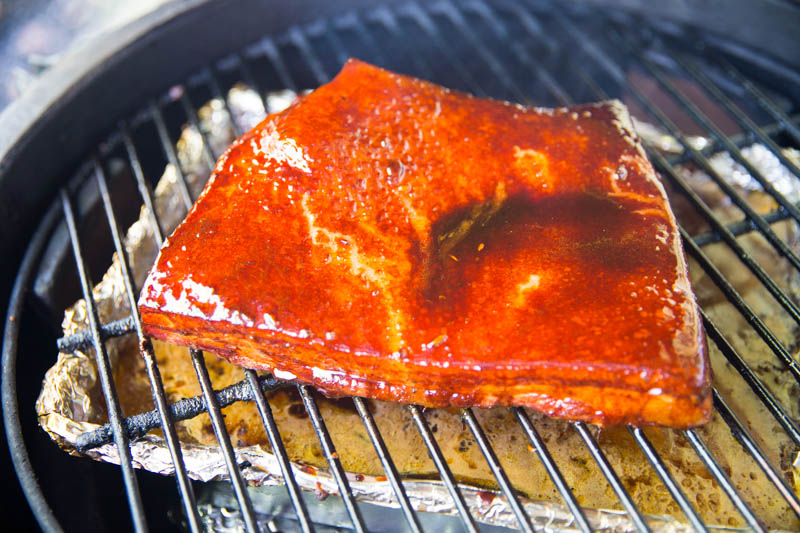
After three hours of low-and-slow smoking, the pork belly is ready for its transformation. At this stage, the meat has absorbed the essence of the apple wood and the fat has begun to soften. To achieve that signature restaurant-quality look, you must start the mopping process. By layering the reduced glaze onto the warm surface of the meat, you build a thick, savory lacquer that intensifies with every minute on the Big Green Egg.
Continue to monitor your progress with a reliable digital thermometer. Once the pork belly hits an internal temperature of 160°F, pull it from the grill and let it rest on a warm plate. While the meat settles, remove the ConvEGGerator to transition your Egg to a direct cooking setup. This final high-heat blast is what sets the glaze and creates the incredible texture on the fat cap.
Place the pork belly back on the grate skin-side down over the direct flames. Stay close to the grill, as the sugars in the glaze and the rendering fat can ignite quickly. Let it sear for 2 to 5 minutes until the surface is bubbling and caramelized. This brief encounter with direct heat provides the “vengeance” of flavor that makes this Kalua Pork Belly truly stand out.
The Service: Plating the Island Flavors
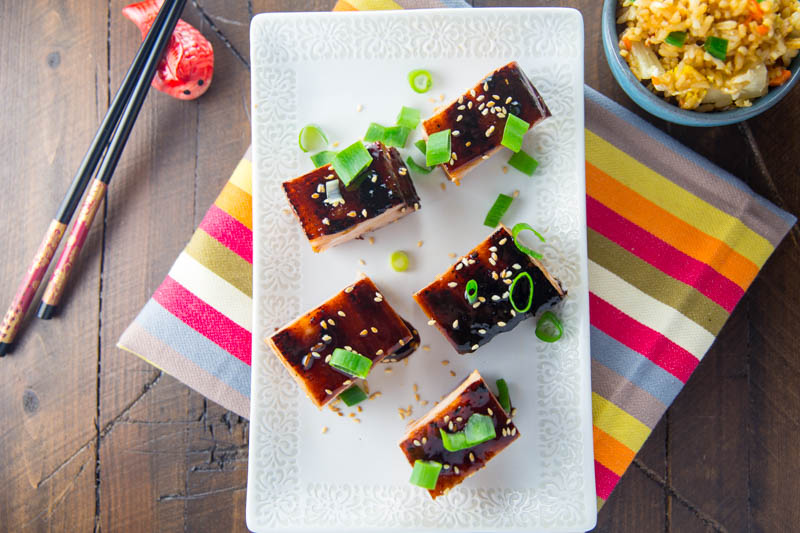
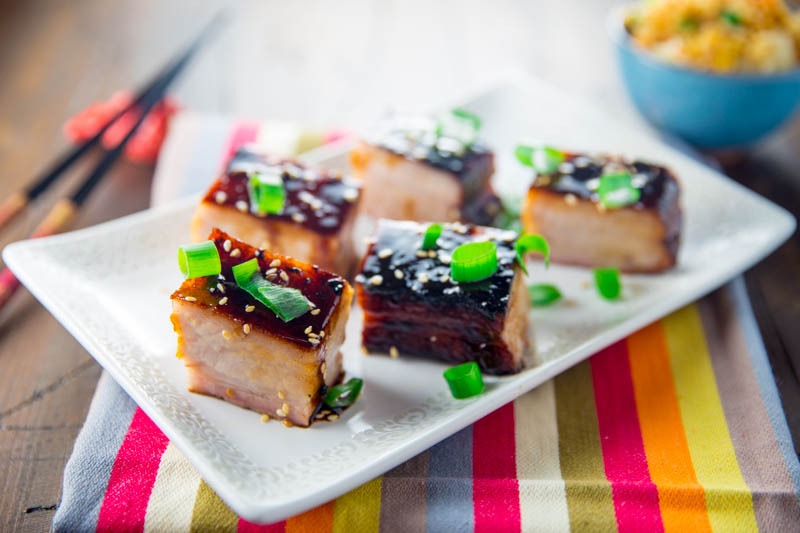
After the intensity of the direct sear, patience is your final ingredient. You must allow the pork belly to rest for at least 10 minutes before your knife ever touches the meat. This rest period is essential because it allows the internal juices to redistribute and the sugar-laden lacquer to set. If you slice too early, that beautiful dark glaze will run off onto the board instead of staying on the pork.
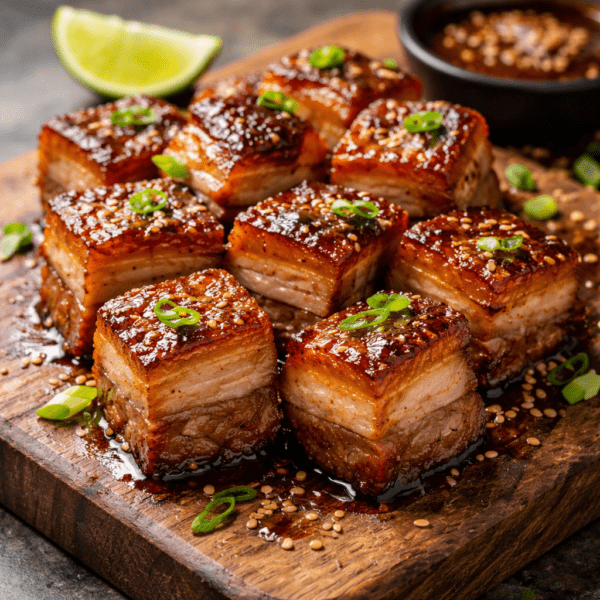
To serve, slice the belly into uniform 1 x 2 inch pieces. These “two-bite” medallions provide the perfect ratio of crispy fat, succulent meat, and smoky bark. For the ultimate Hawaiian experience, I pair this rich pork with Hawaiian rice—either a simple coconut-infused jasmine or a classic Musubi-style rice. The starch provides a clean, neutral base that lets the complex notes of the ginger, star anise, and dark chicken stock shine through.
Smoked Kalua Pork Belly
Ingredients
The Meat:
- 4 pounds skin-on pork belly
- 5 cups dark chicken stock, from recipe below
For the Dark Chicken Stock:
- 1 1/2 pounds chicken wings
- 1 tsp olive oil
- 1/4 yellow onion, quartered
- 1/2 cup chopped carrot, 1 medium carrot
- 1/2 cup chopped celery, 2 stalks
- 2 quarts low-sodium chicken stock
For the Marinade:
- 1/2 cups sugar, + 2 tbsp
- 2 tbsp mirin
- 1/2 cups soy sauce, + 2 tbsp
- 2 garlic cloves, smashed
- 1/2 tbsp ground cinnamon
- 1/2 tbsp fennel seeds
- 6 pieces whole star anise pods
- 2 tbsp sliced ginger
- 1/2 tbsp liquid smoke
For Garnish:
- 1 1/2 tbsp toasted sesame seeds
- 1/4 cup thinly sliced scallion
Instructions
- Make the dark chicken stock: Preheat the oven to 425° and line a rimmed baking sheet with parchment paper. Place the chicken wings onto the baking sheet and roast until the skin is blistered and dark brown, 1 to 1½ hours.
- While chicken is roasting, brown your vegetables: In a large pot over medium heat, add the olive oil, onion, carrot and celery. Cook until the vegetables begin to soften and brown, 15 to 20 minutes. Add the roasted chicken wings and chicken stock and bring to a boil. Reduce to a simmer and cook until you have 5 cups, about 1 hour.
- Prepare a large ice bath. Strain your stock, discarding the meat and vegetables, and chill in a large bowl set over the prepared ice bath.
- Marinate the pork belly: In a large pot over medium heat, combine all the marinade ingredients except for the dark chicken stock and pork belly. Bring to a simmer and cook for 3 to 5 minutes. Remove from the heat and stir the liquid into the chilled dark chicken stock. Transfer the pork belly to a large, deep baking dish, then add the marinade. Cover and transfer to the refrigerator to marinate for 12 to 24 hours.
- Remove pork belly and allow to come to room temperature while preparing the BGE.
- Preheat the BGE to 225° using indirect heat, add chunks of apple wood when at temperature.
- When the BGE is producing that blue smoke, place the pork in, skin side up, and smoke until pork registers 160 degrees on an instant read thermometer inserted into the center of the belly, about 4 to 5 hours.
- Place pork belly on a medium hot grill, skin side down and cook until skin is crisp.
- Remove to a cutting board, let rest for 10 to 15 minutes, then slice and serve.
Nutrition information is automatically calculated, so should only be used as an approximation.