
This post contains affiliate links. Please see our disclosure policy.
The Low and Slow Philosophy: Mastering the 200°–275° Zone
Setting up the Big Green Egg for low and slow cooking is easy to do, but it is also the most critical skill any Egghead can master. This post shows you how to get your Big Green Egg setup for a temperature between 200° and 275°, which is the absolute “sweet spot” for classic BBQ. Now sit back, grab an ice-cold beer, and enjoy this post for How to set your Big Green Egg for Low and Slow.
Table of Contents
Get My NEW Book
The Ultimate Big Green Egg Cookbook

Why “Low and Slow” Works
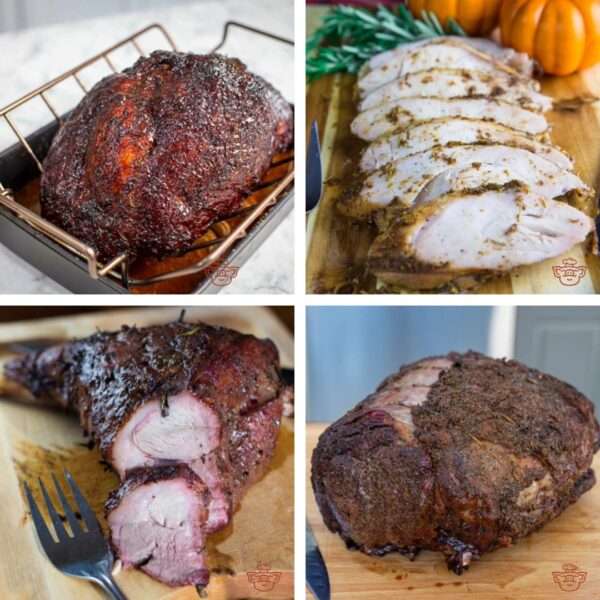
Low and slow isn’t just a catchy phrase; it’s a biological necessity for great BBQ. When you are cooking tough, collagen-rich cuts of meat, like pork butt or beef brisket, high heat is your enemy. High heat causes muscle fibers to seize up and squeeze out moisture, leaving you with dry, tough meat.
By keeping the temperature low, you allow the collagen (the connective tissue) to slowly break down and melt into gelatin. This process happens gradually, usually starting around 160° internal temperature. By maintaining a steady 200°–275° environment, you give the meat enough time to transform that tough tissue into the succulent, pull-apart texture that makes BBQ legendary.
The Science of the 200°–275° Zone
Why is this specific range the holy grail? It’s all about balance:
- The Low End (200°–225°): This is the ultimate “gentle” zone. It’s perfect for smaller items like fish or when you have all the time in the world to let a brisket slowly render. It maximizes smoke absorption.
- The High End (250°–275°): Many modern pitmasters actually prefer this range. It’s hot enough to render fat efficiently and help develop a beautiful “bark” (the dark, flavorful crust on the outside), but still low enough to prevent the meat from drying out.
The Power of the Ceramic Shell
The Big Green Egg is uniquely qualified for this task. Because of its heavy ceramic walls, once you “heat soak” the grill and find your vent settings, the Big Green Egg acts like a thermal flywheel. It holds onto that heat with incredible efficiency, requiring very little airflow to stay lit. This means less fuel is consumed and less moisture is pulled out of your food compared to a traditional metal offset smoker.
NOTE: If you want my comprehensive guide on managing the temperature for any cook on your Big Green Egg check out this post: Big Green Egg 101: Unlocking the Secrets of Temperature Control
Clean out the Big Green Egg
Step 1: The Foundation of Airflow
The first thing you do is clean out the ashes from the bottom of your Fire Box. I cannot emphasize this enough: airflow is the lifeblood of temperature management. If your grill is choked with old ash, it’s like trying to run a marathon while breathing through a straw. You’ll struggle to get the temperature up, or worse, you’ll experience a “dead fire” halfway through an overnight cook.
The Deep Clean
Make sure all the ash and debris is cleared from the Draft Door (the bottom vent) and the air holes in the Fire Box. Use your ash tool to scrape the bottom of the ceramic base to ensure there is a clear path for oxygen to reach the coal. If those small holes in the bottom grate are plugged with tiny bits of leftover charcoal, your fire won’t “breathe” evenly, leading to hot spots or a fire that keeps going out.
Managing Your Firebox: Tools of the Trade
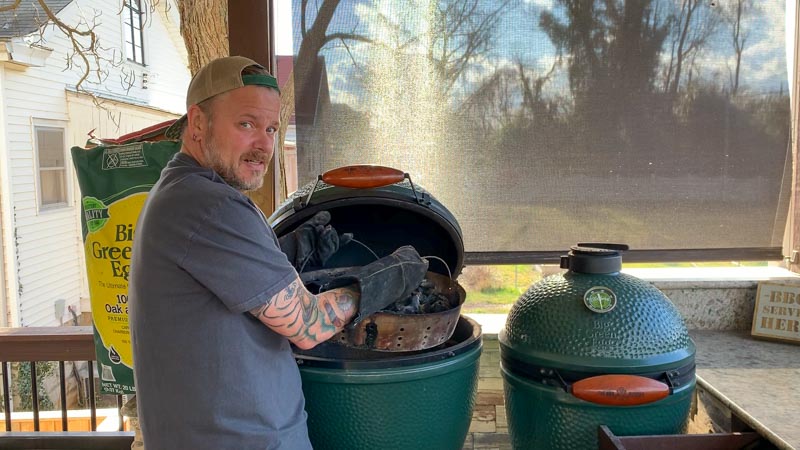
To make this process easier, there are several ways to organize your firebox. In this cook, I am using the new Big Green Egg Stainless Steel Fire Bowl.
This device sits inside your Fire Box and acts as a heavy-duty sieve. When you’re ready to clean up, you simply lift the handles and shake the bowl; the fine ash falls through to the bottom for easy removal, while the good, reusable charcoal stays in the bowl. It significantly speeds up the “pre-flight” check.
However, depending on your setup, you might be using one of these alternatives:
- The “Out of the Box” Setup: If you’re using the Egg exactly as it came from the factory, you have a cast-iron fire grate sitting at the bottom of the Fire Box. This works perfectly fine! The key here is to use your ash tool to poke through the holes from the bottom to ensure they aren’t clogged before you light your new coal.
- The Kick Ash Basket: A very popular aftermarket alternative. Similar to the BGE Fire Bowl, this wire mesh basket allows for maximum airflow because it eliminates the need for the cast-iron grate entirely. It’s legendary for helping the Egg reach high temps quickly, but it works just as well for keeping a steady, oxygen-rich environment for low and slow cooks.
- The DIY “Wiggle” Method: If you don’t have a basket or bowl, you can use a “shred-claw” or a sturdy stick to stir the leftover charcoal vigorously before adding new fuel. This knocks the loose ash down into the collection area so you can scoop it out through the draft door.
Load Your Fuel: Lump Charcoal
Step 2: Loading the Fuel for the Long Haul
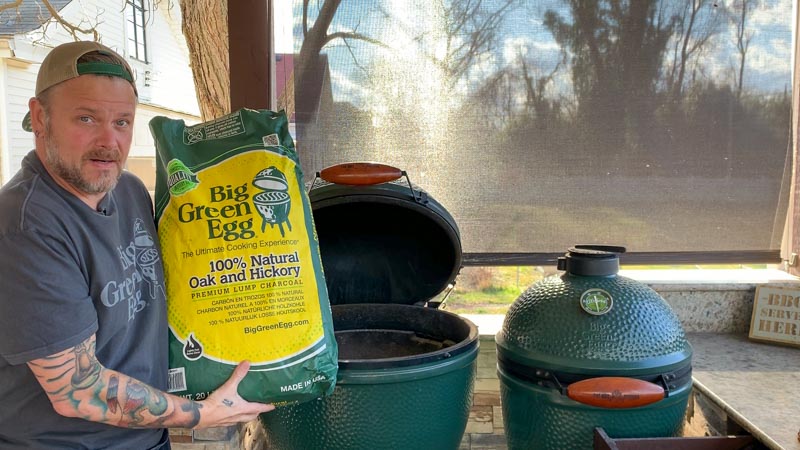
Now that the air passages are clear, it’s time to build your fire. Next, add some fresh Big Green Egg Lump Charcoal to your Fire Box. For a low and slow cook, you aren’t just tossing coal in; you are building a fuel bed that needs to burn consistently for anywhere from 8 to 18 hours.
Choosing Your Fuel: The Lump Advantage
In a Big Green Egg, you should never use briquettes. The fillers and additives in briquettes produce an enormous amount of ash that will clog those air holes we just cleaned. High-quality lump charcoal is simply carbonized wood, which burns hotter, cleaner, and leaves behind very little ash.
While I often use the Big Green Egg Brand Lump, which is a solid, reliable hardwood blend, there are other “boutique” lumps that many pitmasters swear by for long cooks:
- Fogo Charcoal (The Yellow or Black Bag): Known for having massive, “fist-sized” chunks. These are incredible for low and slow cooks because the large pieces allow for better airflow and burn for an incredibly long time.
- Jealous Devil: This is a popular choice for those who want a very clean, neutral smoke profile. It’s made from South American “Quebracho” wood, which is incredibly dense (the name literally means “axe breaker”). Because it’s so dense, it holds heat for a long time without needing a massive pile of fuel.
The “Vertical Stack” Technique
When loading your charcoal, try to follow the size-gradient rule:
The Fill Line: For a long cook (like a brisket or pork butt), fill the charcoal up to the top of the Fire Box (where it meets the Fire Ring). Don’t be afraid to fill it up—you can always extinguish the fire and reuse the leftover coal for your next cook!
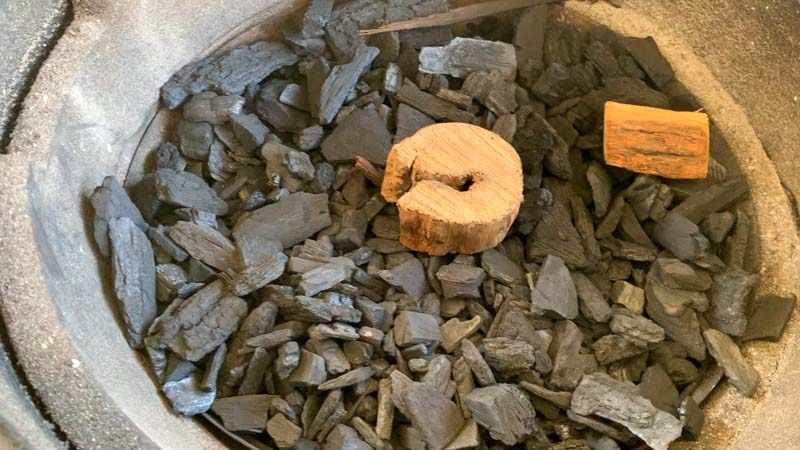
The Foundation: Place your largest chunks of charcoal at the very bottom, directly on top of the fire grate or in the bottom of your Fire Bowl. This ensures that as the fire burns down, the air holes don’t get blocked by small pieces.
The Fill: Pour your medium and smaller pieces on top.
Add Smoke Source: Wood Chunks
Step 3: The Smoke Profile—Quality Over Quantity
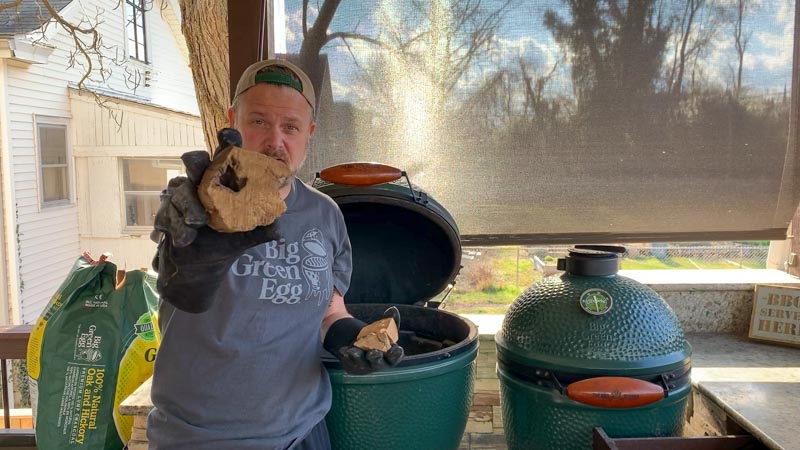
Before we light the match, we need to add the soul of BBQ: the wood. I like to use wood chunks rather than chips for my low and slow cooks. While chips burn up in a flash, chunks are dense and slow-burning—providing a steady, clean stream of smoke that lasts for hours.
Less is More
A common mistake for beginners is over-smoking the meat. You aren’t trying to create a chimney fire; you’re looking for “thin blue smoke.” In a Big Green Egg, 2-3 fist-sized chunks are truly all you need for a long cook.
- The Placement: I like to bury one chunk just below the surface of the charcoal and place the other two on top near the center. As the fire slowly spreads outward and downward, it will “find” the wood, ensuring a consistent release of flavor.
- The 3-Hour Rule: Remember, the first 3 hours of the cook is where the meat is most receptive to smoke flavor. This is when the surface is cool and tacky, allowing the smoke to adhere and form that beautiful pink smoke ring. Once the exterior of the meat reaches about 140°F–150°F and the surface begins to dry and form a bark, the absorption of smoke flavor slows down significantly.
Because of this, you do not need to keep adding wood chunks throughout the day. Those initial 2-3 chunks will provide all the aromatic depth you need for a world-class result.
Light Your Fire: Ignite the Lump Charcoal
Step 4: Lighting for Precision Control
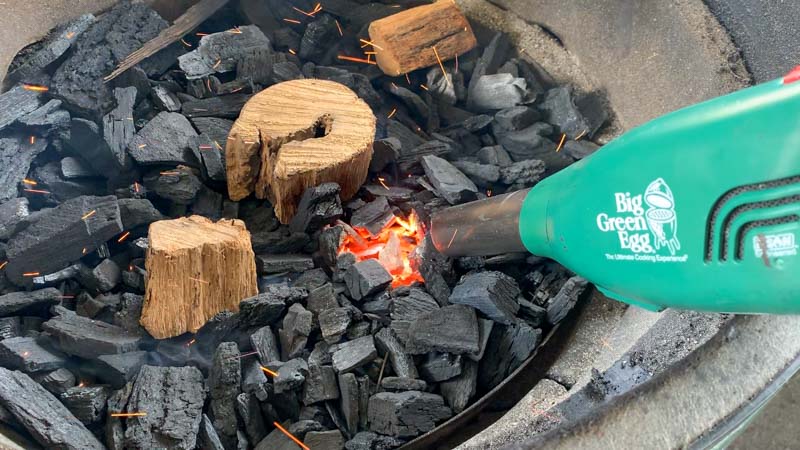
Now that your lump charcoal and wood chunks are in place, it is time to light the Big Green Egg. This is the moment where your strategy for the rest of the day is set. For long cooks with a low temperature, I light my charcoal in one small spot only. By igniting just the very center, you allow the fire to slowly migrate outward to the unlit coals. This “slow burn” approach is the secret to stability; it helps you bring the temperature up gradually to the desired range of 200° to 275° without overshooting your mark. If you light too many spots at once, the fire will grow too large too quickly, and because the ceramic Egg is so efficient at holding heat, it is much harder to bring a temperature down than it is to nudging it up.
Ignition Options: Finding Your Spark
I am using the new EGGniter to light the charcoals. This tool is a game-changer because it uses super-heated air to ignite the lump in seconds with zero chemical aftertaste. However, there are several other reliable ways to get your fire moving:
The Paper Towel Trick (DIY): If you find yourself without starters, take a single paper towel, drizzle it with a tablespoon of vegetable oil, and tuck it into the center of your charcoal. Light the towel; the oil acts as a wick, providing a steady flame for several minutes, long enough to get those stubborn lumps of coal glowing.
SpeediLight Starters: These are the classic Big Green Egg brand natural starter cubes. They are made of fatwood and wax, are odorless, and burn long enough to ensure your lump is caught. Simply tuck one into your center “lighting spot,” light the corner, and walk away.
The Looftlighter: Similar to the EGGniter, this is an electric wand that uses a heating element and a fan to “blow-torch” your charcoal into submission. It’s fast, clean, and great for those who want to avoid matches or lighters.
Paraffin Fire Starters: Often found in puck or square shapes, these are a “set it and forget it” option. They are inexpensive and highly effective, though you should always ensure they are the “natural” variety to keep your BBQ tasting like wood, not chemicals.

Temperature Control: Get Dialed in
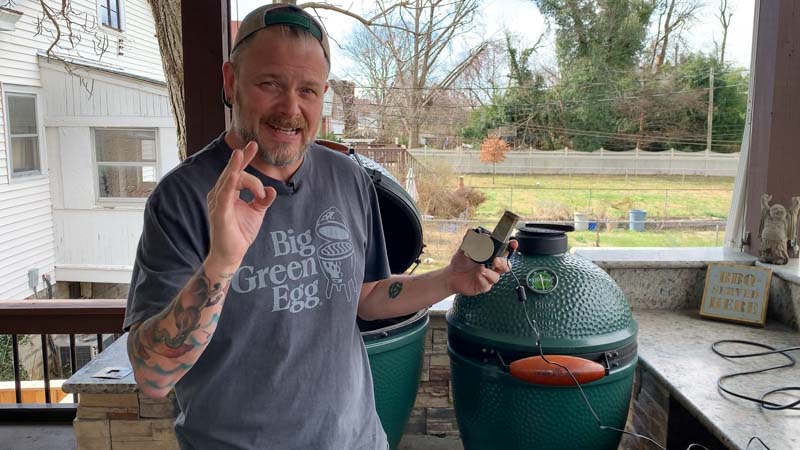
Step 5: Mastering Temperature Control
Once the fire is established and the dome is closed, the real “magic” of the Big Green Egg begins. Achieving a steady 225°F–250°F is all about managing the balance of oxygen. To help me manage the temperature for a long cook, I use the Big Green Egg EGG Genius. #### Automating the Cook: The EGG Genius This device is a “set it and forget it” solution for the modern pitmaster. It works by hooking a variable-speed fan to the Draft Door (bottom vent) and monitoring the internal pit temperature with a high-precision probe.
- The Logic: You set your target temperature (let’s say 225°F) on your smartphone app. If the temperature drops even a single degree below the target, the fan kicks on and blows oxygen into the coals. If the temp gets too high, the fan shuts off, effectively starving the burning charcoal of oxygen to bring the heat back down.
- The Benefit: It takes the guesswork out of overnight cooks, allowing you to sleep soundly while the device “babysits” the fire.
Other Tech Alternatives
If you aren’t using an EGG Genius, there are other fantastic “Automatic Temperature Controllers” (ATCs) on the market:
- Flame Boss: Known for its extremely user-friendly interface and robust cloud app.
- ThermoWorks Billows: If you already own a Signals thermometer, this fan plugs right in to create a seamless monitoring and control system.
- SMOBOT: A unique alternative that attaches to the top vent (daisy wheel) and physically opens and closes the damper to control the draft rather than using a fan at the bottom.
The “Analog” Method: Going Device-Free
Don’t worry if you don’t have a high-tech gadget; the Big Green Egg was designed to hold steady temps manually for decades before these devices existed! To do this by hand:
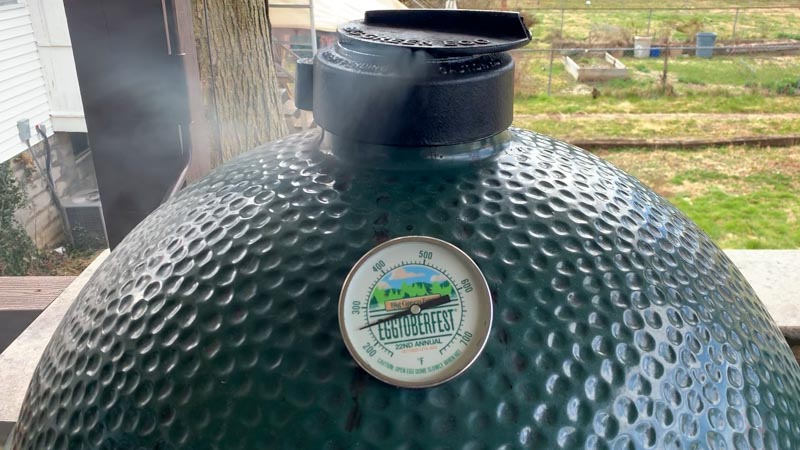
Patience: It takes about 15–20 minutes for a vent adjustment to reflect on the thermometer. Make small tweaks and wait!
The Lead-Up: Let the temperature rise slowly with the vents partially open.
The 25-Degree Rule: When the thermometer on the dome is about 25°F below your target, start closing your vents.
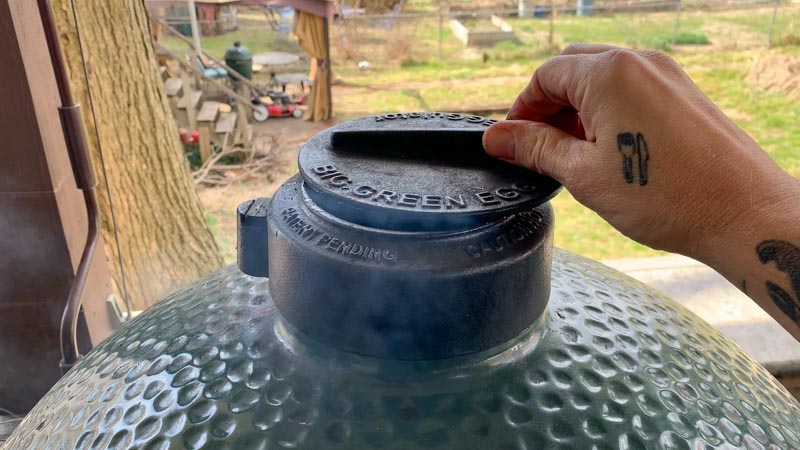
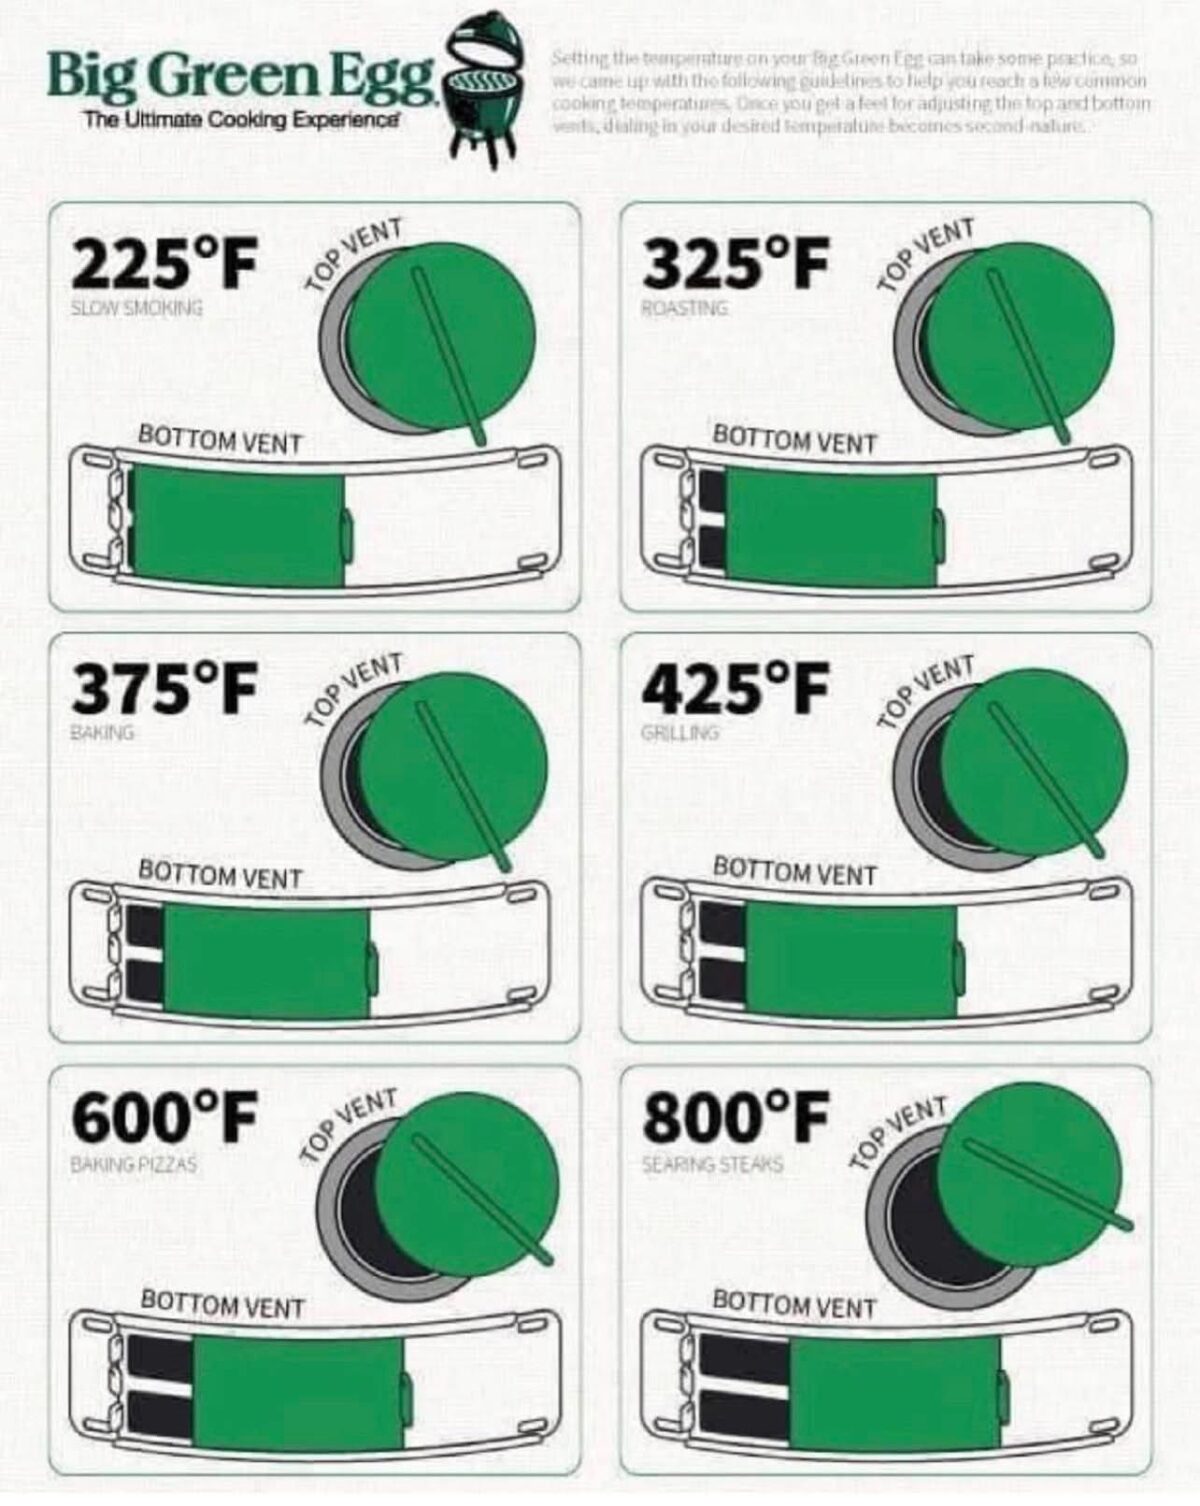
The Setting: For a low and slow cook, you want your bottom vent closed about 90% of the way (leaving only about a 1/4 inch crack). Your top vent (daisy wheel or RegulatEGG) should also be barely cracked open—usually just enough to see the small petals of the vent slightly exposed.
Adjusting Your Vents
Step 6: The Art of the Approach—Adjusting the Vents
The biggest mistake most people make is waiting until the thermometer hits their target temperature before they start closing the vents. Because the ceramic walls of the Egg hold onto heat so efficiently, if you wait until you’re at 250°F to shut things down, the “momentum” of the rising heat will carry you right past your goal and into the 300°F+ range.
The 50-Degree Rule
Once you are close to the desired temperature, within about 50°F of your target, it is time to start restricting the airflow. At this point, close the top vent 90% of the way.
- Why 90%? You need to find the balance between “choking” the fire and “feeding” it. By leaving just a small sliver of the top vent open (on the original daisy wheel, this means the bottom slide is closed and the small petals are only cracked open about 1/8th of an inch), you allow just enough hot air to escape to create a “draft.”
- The Vacuum Effect: This draft pulls a tiny, controlled amount of fresh oxygen in through the bottom vent. This keeps a very small, concentrated cluster of charcoal lit… just enough to maintain your temperature without letting the fire spread to the rest of the lump.
Fine-Tuning the Draft
If you are doing this manually (without an EGG Genius), your bottom vent should mirror the top. Slide the stainless steel door until there is only about a 1/4 inch opening.
Pro Tip: Think of the bottom vent as your “Volume” knob (it controls how much total heat the fire can produce) and the top vent as your “Fine-Tuner” (it controls exactly where that heat sits). If the temp is creeping up too high, tiny adjustments to the top vent are usually all you need to settle it back down.
That’s it, you now have a desired temperature of 250°. For cooks 8-12 hours, you should not need to refill your lump charcoal. Happy cooking everyone!
Common Vent Settings for the Big Green Egg


Hi Chris. I am used to the addage of having your charcoal at the white ash stage before putting your food on.
I start my charcoal in a chimney starter, then put in the Egg, and add more charcoal on top. I then leave it to come to the white ash stage. By this time the temp is 500 – 600 F and I now have to tamp down & wait till I get back down to the temp I want.
From what you’re saying, I can close the vents when I reach the desired temp, even though some charcoal is still black?
Correct. Lump behaves differently than charcoal. Specifically for a longer cook. What I want is to start a small fires that burns slowly through the whole cook which gives me two things: wood smoke flavor whole cook as the wood chunks catch at different times over the duration of the cook and second is I do not have to reload fuel.
Hi….I just sent you a question about charcoal and wood chips for cooking baby back ribs on the big green egg and guess what…I found my answer in this presentation on low and slow…awesome….thank you Chris…
You’re welcome ?
Hey Chris I’m having a helluva time getting my green egg to maintain a low temp. If I were to leave my top vent open as much as you I’d easily eclipse 300 (I’m using the egg genius as well). Mine seems to balance on a razors edge between increasingly hot and out. I’ve now put this thing out 3 times. I tried to reduce the heat really slowly but apparently that is just the bge’s natural temp decline after it goes out and by the time I realize it, it’s far too late. After a few hours at a steady temp it seems to climb and that’s when I have to close it down further. It’s getting pretty frustrating. Any advice and at what temp at the beginning do you shut the vent down? I’m usually 225 and let it slowly climb to 250 but again, I can’t have the vent open or it continues to climb.
Typically I leave the top vent open just a sliver so you are correct there. I think your issue may be related to lighting the fire? Are you doing it in one small place, letting it burn 10 minutes to set, then closing down vents, etc.? I have always found getting temp up is easier to control than getting it down. Perhaps set the EGGgenius to 25° lower than desired temp, let that hold for a bit then bump the temp up using the app. I never have issues described above so there must be something you are missing in the firing up phase.
You don’t worry about burning off the VOC’s from the charcoal? I seem to get an off flavor with lump that I don’t get in my WSM with briquettes when I just start with a small patch of lit coals on my BGE.
Nope. Works well and tastes great!
If you are using briquettes that’s true for me. Lump is just plain old wood.
Hi Chris,
Question specific to the XL: I have become proficient at starting and maintaining a low temp and my question is, have you noticed a low/slow fire move in any particular direction with the XL or does yours burn out to all sides from the middle? I feel like mine always moves towards the back (opposite the vent). I’m planning to do a pretty long cook this weekend and was thinking about starting the fire more towards the vent side and letting it move towards the back, as it seems to want to … have you noticed this or is it particular to mine?? Thanks!
Great question! I typically light my lump at the front i.e. near the front air vent. That way it is closest to the oxygen coming in and the fire will burn towards the back of the BGE catching the lumps of wood I have nestled in the lump along the way.
So I just watched your video. I need to keep my egg at 225 to smoke my butts. I had everything set up like you did (different thermometer) but my fire went out twice. What did I do wrong? The second time it went out I let the fire get really warm first to make sure it was solid.
Were you using a thermometer with a fan assembly to help monitor and control fire? Did you clean all the ash and debris?
I don’t have a thermometer with a fan, but I did clean all the debris.
Really bad advice all around.
The bge charcoal is crap.
Also most competition cooks know to place soaked wood on the bottom. Never on top.
If your having to force air into your bge, you do not have it setup correctly.
I would sell that fan and invest in one of the new stainless domes. Better heat control.
Lots of cheap mods you can do to your egg to make it work better.
Thanks for your positive energy and point of view. Hopefully you can start a blog and share your journey with all of us so we can learn from your experience. Have a great day.
lmfao
well played
Thanks for doing this blog! Do you find a large temp variance between the BGE thermostat and the Egg Genius? It would make sense there would be a variance, but do you just go by the Egg genius temp and ignore the thermostat?
The probe from the EGGgenius is measuring at the grilling surface which is what you want to know. The temp gauge on the BGE is high in the dome which can be as much as 50°F degrees higher. Managing that variance helps with effective use of the BGE’s vertical space.
should the rack that holds the ribs have the stone rack underneath the ribs? or should the rack be exposed to the charcolds
When smoking meat always use the ConvEGGtor to create indirect cooking environment.
Dear Chris,
you start the fire on the top, 1/3 at the front, right? Why not at the bottom and put the other charcoal on top?
And: I have red, some people water their smoking chips before putting them into the bge. You do the same?
Will have my first brisket on Monday… 8kg, flat & point.
Would you go for 110°C and 12-24 hours or 135°C and a shorter time till core temperature is reached?
And: how long would you run the bge before putting the meat on? 1 hr?
Best, Tom
At the front correct! You can start it at the bottom but risk the fire taking longer to set and/or go out. As for soaking wood chips, I cover this topic in my first The Four Fundamentals of Smoking, and recommend never soaking your chips. There is a longer explanation there, but the short answer is I do not soak them. As for your first brisket, here is a great resource for you: https://thebbqbuddha.com/how-to-smoke-a-brisket-on-the-big-green-egg/