
This post contains affiliate links. Please see our disclosure policy.
If you are anything like me, you are always looking for ways to elevate weeknight classics on the Big Green Egg. This recipe for Big Green Egg sweet and sour chicken thighs was inspired by a gift from my daughter… a cookbook by the legendary Dr. BBQ. While the original flavors are iconic, bringing this dish to the ceramic grill adds a layer of wood-fired depth that you simply cannot get in a wok.
The beauty of this meal is its simplicity and speed, making it perfect for a busy Tuesday or a relaxed weekend grill session. Because we are using boneless chicken thighs, the meat cooks quickly while remaining incredibly juicy even under the high heat of the Egg. Now sit back, grab your favorite crisp IPA, and enjoy this savory, fire-kissed recipe for The Best Big Green Egg Sweet and Sour Chicken Thighs: Easy Grilled Recipe.
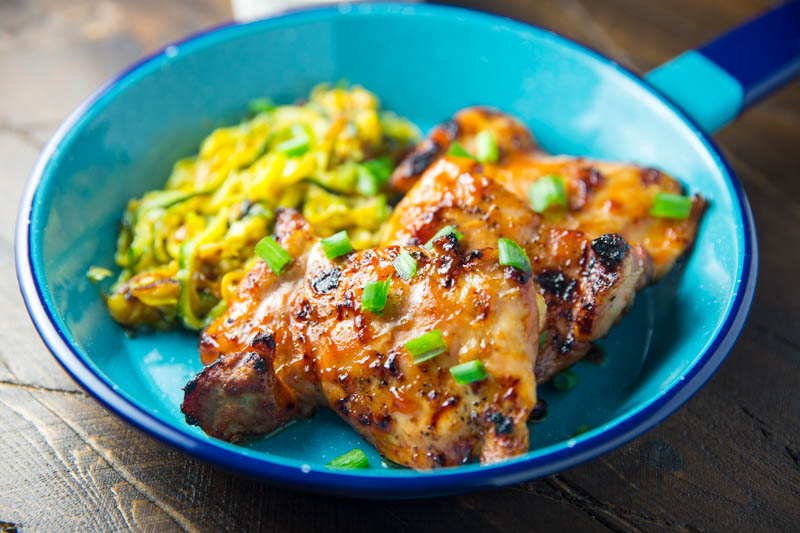
Table of Contents
Get My NEW Book
The Ultimate Big Green Egg Cookbook

Step 1: Mise en Place and Seasoning
Before you head out to the Big Green Egg, you must ensure your workspace is organized and your ingredients are ready. By measuring everything out ahead of time, you prevent the stress of fumbling with measuring spoons while the chicken is over an open flame. This “mise en place” approach is essential for high-heat cooking on the Big Green Egg, as things move quickly once the thighs hit the cast iron or the grate.
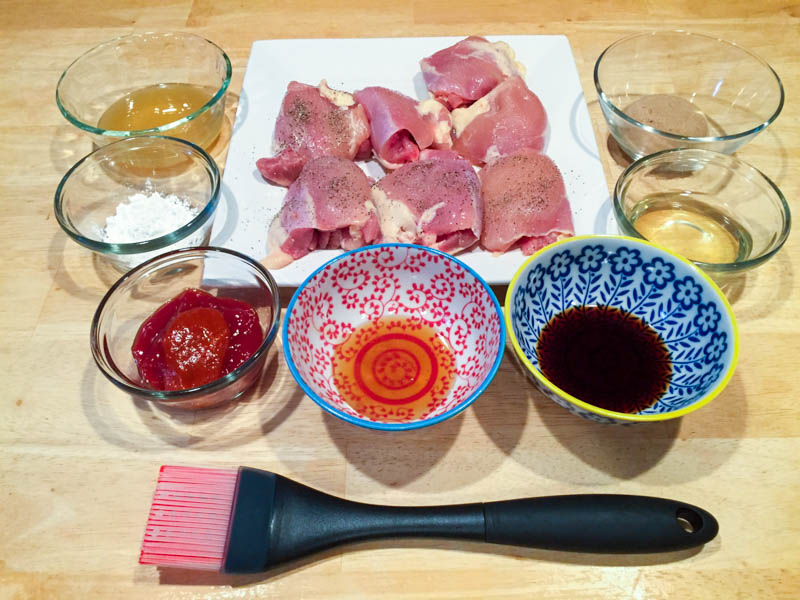
Start by measuring out all the glaze ingredients: pineapple juice, cornstarch, rice vinegar, brown sugar, ketchup, soy sauce, honey, and sriracha. Having these prepared in a single bowl allows the flavors to begin melding immediately. Next, focus on the chicken. While the glaze provides the bulk of the flavor, you must season the skinless and boneless chicken thighs with a base layer of salt and pepper or a light dusting of your favorite BBQ rub. This ensures the meat is seasoned from the inside out before it is enveloped in the thick, sweet and sour coating.
Step 2: Building the Glaze Base
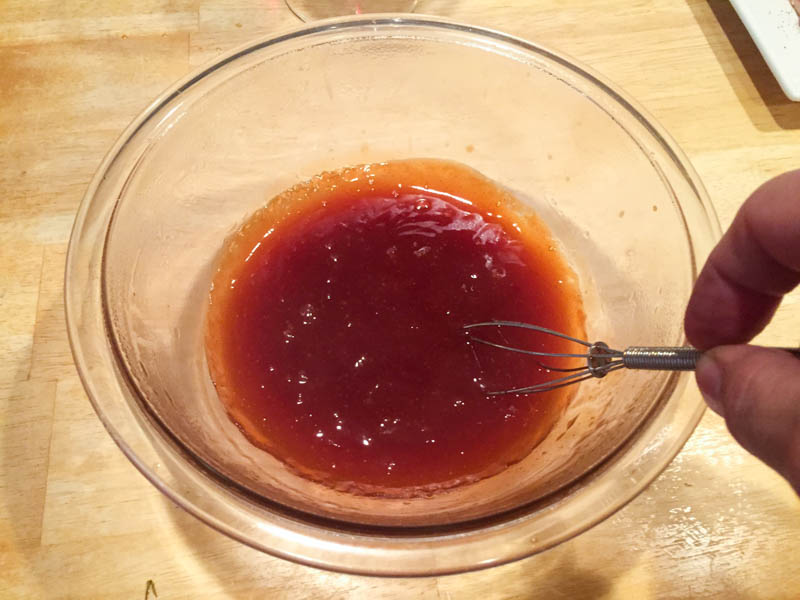
Creating a professional-grade glaze requires more than just mixing ingredients; it requires the proper technique to ensure the texture is silk-smooth. By starting with a slurry, you prevent the cornstarch from clumping when it hits the other liquids. This foundational step is what allows the glaze to thicken into a beautiful, lacquered coating that clings to the chicken thighs rather than sliding off into the coals of your Big Green Egg.
Mix the pineapple juice with the cornstarch in a small bowl to create the base for this glaze. Whisk the two together thoroughly until the cornstarch is completely dissolved and no white streaks remain. Once this base is stable, you can safely incorporate the vinegar, sugar, and other aromatics. Because the cornstarch is already suspended in the juice, the glaze will thicken evenly as it heats, providing that signature glossy finish that defines high-quality sweet and sour dishes.

Step 3: Thickening the Sweet and Sour Glaze
Once the slurry is smooth, you can build the full profile of the sauce. This stage is where the tang of the vinegar meets the heat of the sriracha and the deep sweetness of the brown sugar and honey. By warming the mixture in stages, you activate the cornstarch carefully, ensuring the glaze reaches a thick, honey-like consistency that will stand up to the high heat of the Big Green Egg.
Mix the remaining ingredients into the pineapple juice and cornstarch base, stirring until the sugar is mostly dissolved and the color is uniform. Place the bowl in the microwave and warm the mixture in thirty-second intervals. After each burst of heat, remove the bowl and stir the glaze well to distribute the temperature and prevent any hot spots from scorched sugar. Continue this process until the glaze has thickened significantly and coats the back of a spoon. Because the sauce will continue to set as it cools, you want it to be viscous but still pourable before you head out to the grill.
Step 4: Big Green Egg Setup and Preheating
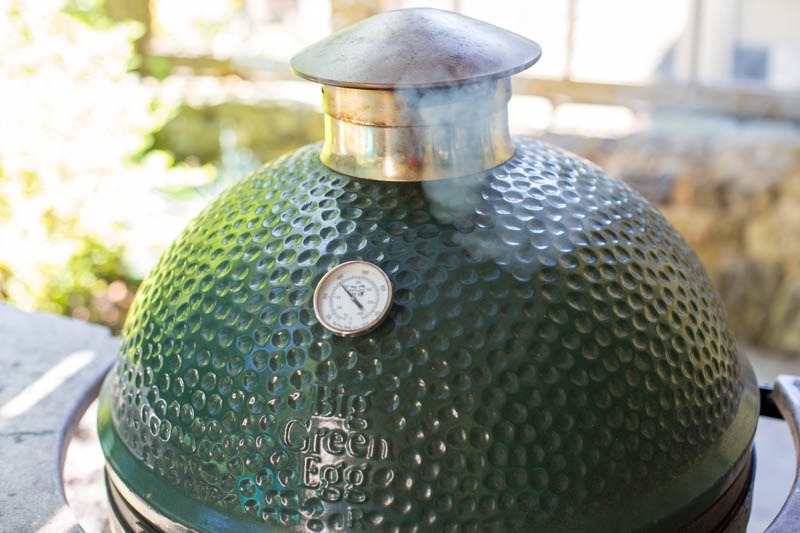
Stabilizing your temperature and grid height is the most important part of this cook. For these sweet and sour chicken thighs, you want to use a Raised Direct setup. By elevating the chicken away from the red-hot charcoal, you allow the meat to cook through and the sugars in the glaze to caramelize without the flare-ups that often plague standard direct grilling.
Set up the Big Green Egg using the EGGSpander base with a raised grid on top. This configuration provides the perfect distance between the fire and the chicken. Open your vents and preheat the grill until it holds a steady 400°F as measured at the dome. Because the EGGSpander system allows for better airflow around the meat, you will achieve a more consistent char across every thigh. Once the ceramic is heat-soaked and the temperature is stabilized, you are ready to begin the searing process.
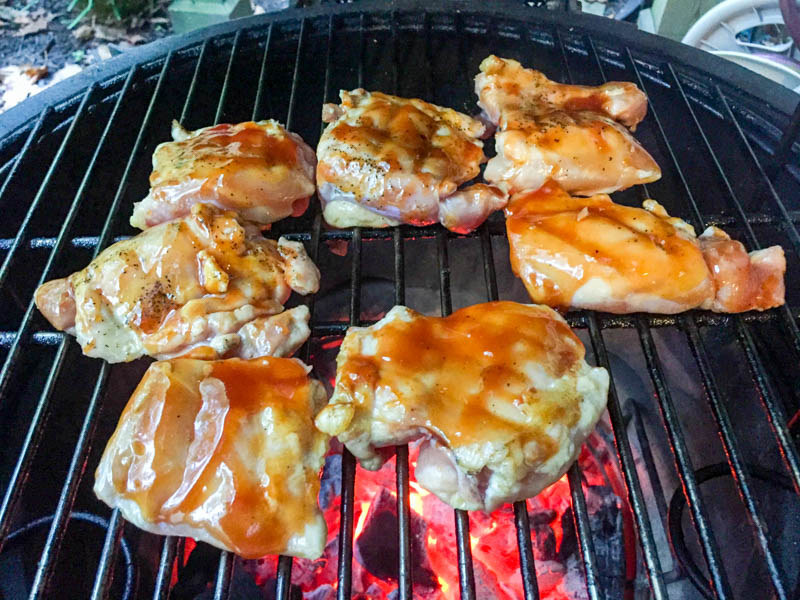
Step 5: The Sear and The Glaze
Precision timing is the secret to getting that beautiful, lacquered finish on your chicken without scorching the sauce. You must establish a good crust on the meat before you introduce the sugars from the glaze. By waiting until the first flip to apply the sauce, you ensure the chicken is partially cooked and the surface is firm enough to hold onto the thick, sweet and sour coating.
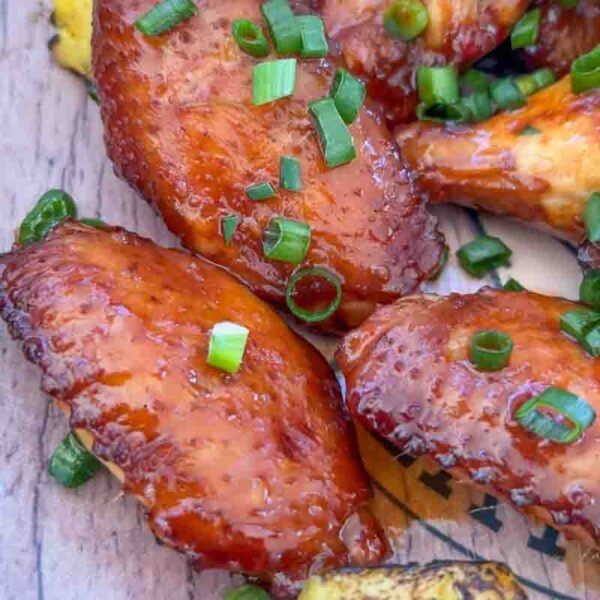
Place the chicken thighs on the raised grid and grill them for three minutes undisturbed. Once that initial time has passed, flip the thighs over to expose the seared side. This is the moment you begin to apply the glaze using a basting brush. Continue to flip and glaze the chicken every two to three minutes. This layering technique builds a deep, mahogany color and a complex flavor profile that permeates the meat. Monitor the internal temperature closely and remove the chicken once it measures 165°F on an instant-read thermometer. Because the carryover heat will continue to cook the meat slightly while it rests, this ensures the thighs remain juicy and tender.
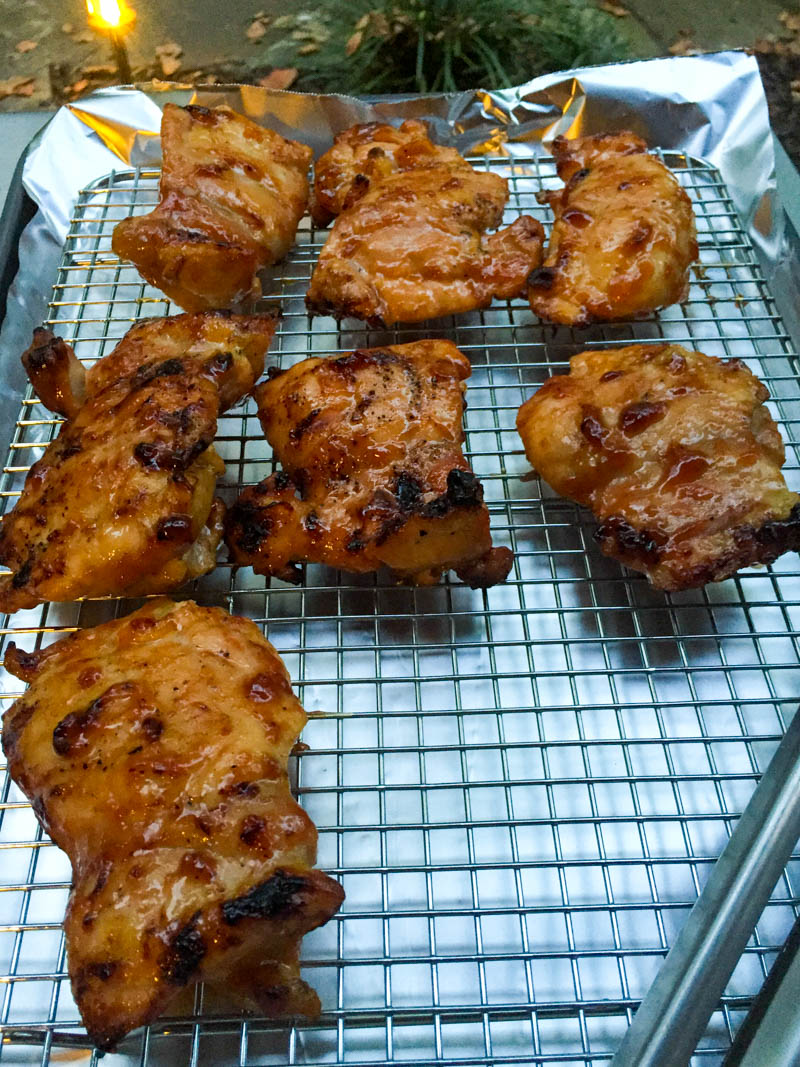
Step 6: The Rest and Final Service
Patience is the final ingredient for a successful cook on the Big Green Egg. While it is tempting to serve the chicken the moment it leaves the grill, you must allow the meat to sit undisturbed for a short period. By letting the chicken thighs rest, you allow the muscle fibers to relax and reabsorb the internal juices, ensuring that every bite is moist and tender rather than dry.
Once the chicken thighs reached the target temperature, I pulled them off the grid and let them rest for five minutes before serving. This brief window also allows the sweet and sour glaze to fully set, creating a sticky, tacky finish that clings perfectly to the meat. Because the sugars in the glaze have caramelized over the wood fire, this resting period helps those flavors stabilize.
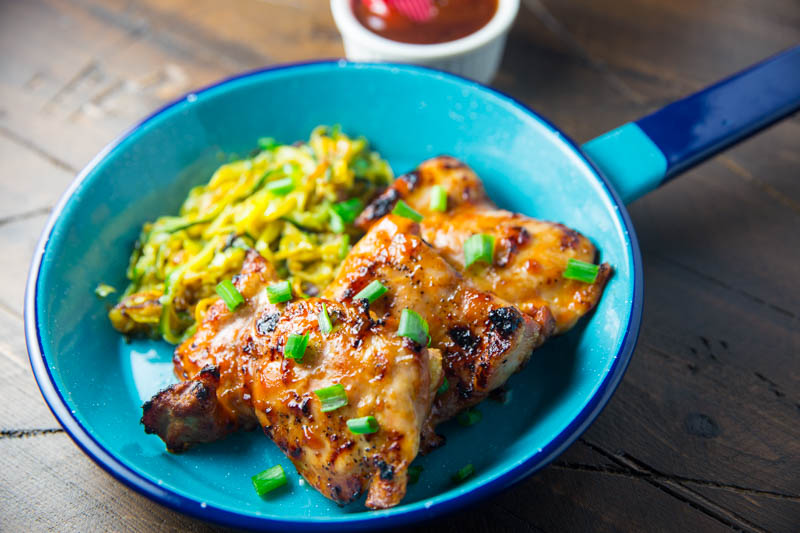
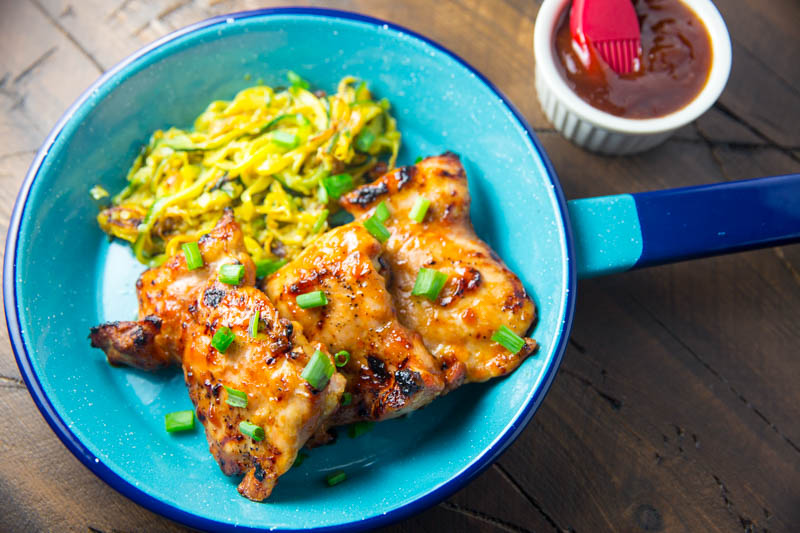
Final Thoughts and Serving Suggestions
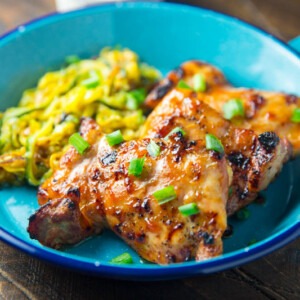
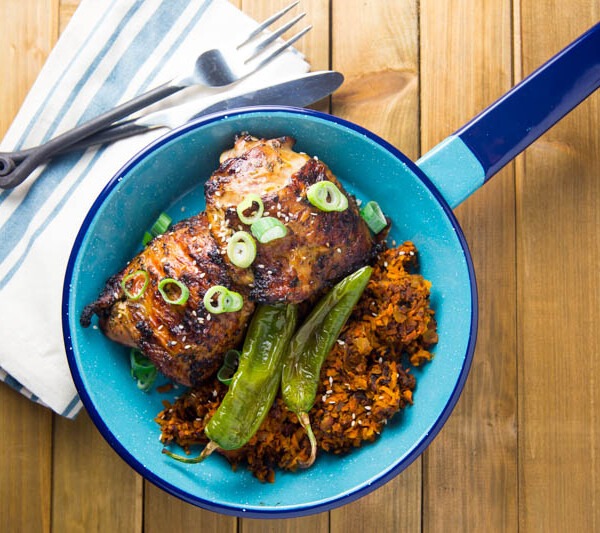
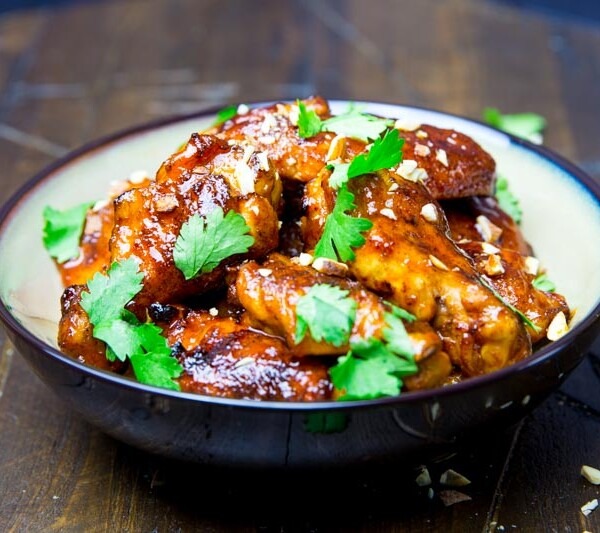
The beauty of this Big Green Egg sweet and sour chicken recipe lies in the balance of the smoky char and the bright, tangy glaze. While many people associate this flavor profile with heavy, fried takeout, this grilled version provides a much lighter alternative without sacrificing the bold taste you crave. By using the raised direct method on your ceramic grill, you achieve a level of caramelization that a stovetop simply cannot replicate.
I served the sweet and sour chicken thighs with a sautéed vegetable medley. This combination of fire-kissed chicken and crisp, vibrant vegetables makes the meal feel complete and well-rounded. This dish is quick, easy, full of flavor, and healthy, making it an ideal choice for a weeknight dinner that feels like a weekend treat. Because the prep is minimal and the cook time is fast, you can spend less time hovering over the grill and more time enjoying the results with your family.
The Best Big Green Egg Sweet and Sour Chicken Thighs: Easy Grilled Recipe
Ingredients
The meat:
- 2 pounds Boneless and Skinless Chicken Thighs
- 1 tsp Kosher salt
- 1/2 tsp Cracked black pepper
Glaze Ingredients:
- ¼ c pineapple juice
- 1 tbsp cornstarch
- ¼ c rice vinegar
- ¼ brown sugar
- ¼ ketchup
- 1 tbsp soy sauce
- 1 tbsp honey
- 1 tsp sriracha
Instructions
- Step 1: Prep the Chicken Season the boneless and skinless chicken thighs generously with salt and black pepper on both sides while you prepare the grill.
- Step 2: Create the Glaze Base Whisk the pineapple juice and cornstarch together in a small microwave-safe bowl until the mixture is smooth and the cornstarch is dissolved.
- Step 3: Mix and Thicken Stir in the remaining glaze ingredients and microwave in thirty-second intervals, stirring between each, until the sauce is thick and glossy.
- Step 4: BGE Setup Configure your Big Green Egg for raised direct grilling using the EGGSpander base and a raised grid, then preheat to 400°F.
- Step 5: The Initial Sear Place the seasoned chicken thighs onto the raised grid and grill them undisturbed for three minutes to develop a light sear.
- Step 6: Glaze and Flip Flip the chicken thighs over and apply a thick layer of the sweet and sour glaze using a clean basting brush.
- Step 7: The Finish Continue flipping and glazing the chicken every two to three minutes until the internal temperature reaches 165°F on an instant-read thermometer.
- Step 8: The Rest Remove the chicken from the grill and allow the meat to rest for five minutes so the glaze sets into a sticky finish.
Nutrition information is automatically calculated, so should only be used as an approximation.


This looks so delicious…and the recipe is so easy too…I’m definitely going to give this a try!
It is so delicious and easy to make. Let me know how it turns out for you!
Everything is so nicely described that really helped me lots.
Chris,
This recipe is incredible.
I used bone-in thighs, but everything else was exactly as your recipe.
Thanks!!!
Thanks for your kind words 🙏