
This post contains affiliate links. Please see our disclosure policy.
The tri-tip is the undisputed “hidden gem” of the butcher’s case. This 1.5 to 2 pound triangular muscle, located at the bottom of the sirloin, was popularized in the 1950s as a California Central Coast delicacy that turned a “discard” cut into a BBQ legend.
While it looks like a beef roast, it eats like a premium steak. The challenge? Its tapered shape and lean profile make it notoriously easy to overcook. The solution is the Big Green Egg Reverse Sear. By bathing the meat in low-and-slow smoke before finishing with a high-heat, flame-kissed crust, we unlock a level of juicy tenderness that rivals the most expensive cuts on the market.
If you want edge-to-edge pink perfection and a crust that snaps, this is the only way to cook a tri-tip. Pour a glass of your favorite Cabernet, stoke the coals, and let’s master the The Ultimate Guide to Big Green Egg Reverse Sear Tri-Tip.
Table of Contents
Get My NEW Book
The Ultimate Big Green Egg Cookbook

Step 1: Finding the Perfect Tri-Tip
Finding a tri-tip used to be a “West Coast only” perk, but its popularity has exploded. Still, depending on your local butcher, it might go by a different name. If you don’t see “Tri-Tip” on the label, look for:
- Santa Maria Steak
- Triangle Roast
- Bottom Sirloin Butt
Trimmed vs. Untrimmed
You will usually find this cut in two ways:
- Untrimmed (The “Fat Cap”): This comes with a thick layer of white fat on one side. This is great for the Big Green Egg as the fat renders and bastes the meat, but it does require some DIY trimming if the cap is too thick.
- Trimmed: This is the most common “ready-to-cook” version. The silver skin and heavy fat are gone, leaving you with the lean, red muscle.
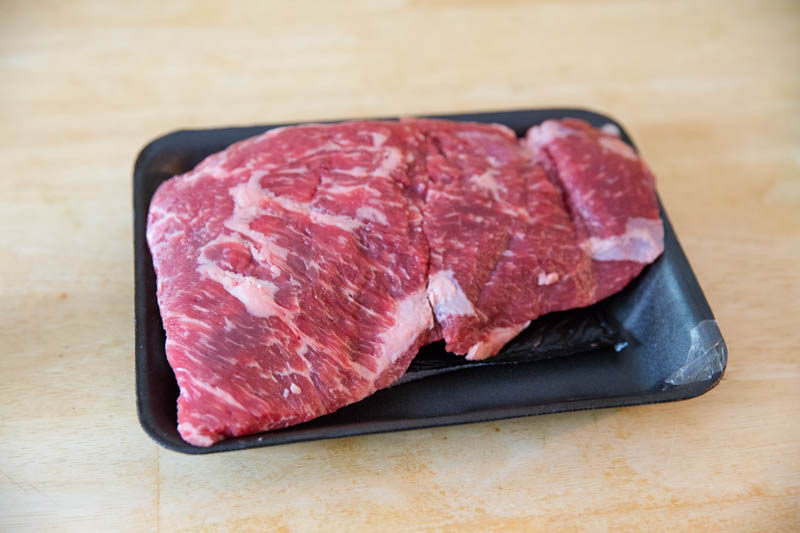
The “Quality” Check
Since tri-tip is a lean muscle, marbling is king. Look for a roast that has visible flecks of white fat running through the red meat.
- Choice vs. Prime: If your budget allows, go for a Prime cut. Because tri-tip is lean, that extra marbling in a Prime grade makes a massive difference in the final juiciness after the sear.
- The “Pounce”: A standard tri-tip weighs between 1.5 and 2.5 pounds. If you see one over 3 pounds, double-check the label; it might be a different sirloin cut that won’t be as tender.
A Pro Tip on Sourcing
If you are at a standard grocery store and don’t see it, ask the butcher. Often, they have the bottom sirloin in the back and just haven’t sliced it into tri-tip roasts yet. If they seem confused, tell them you’re looking for the “pope’s nose” or the “triangle” from the bottom sirloin.
Step 2: Prep, Trim, and Season
The goal with a tri-tip is to maximize the surface area for that beautiful crust while ensuring the meat stays tender.
The Trim
Even if you bought a “trimmed” roast, give it a quick once-over.
- Remove the Silver Skin: Use a sharp boning knife to peel back any iridescent, tough “silver skin.” Unlike fat, this won’t melt away; it just stays chewy.
- Level the Fat: If you have an untrimmed roast with a thick fat cap, trim it down to about 1/8 inch. This is thin enough to render during the smoke but thick enough to protect the meat.
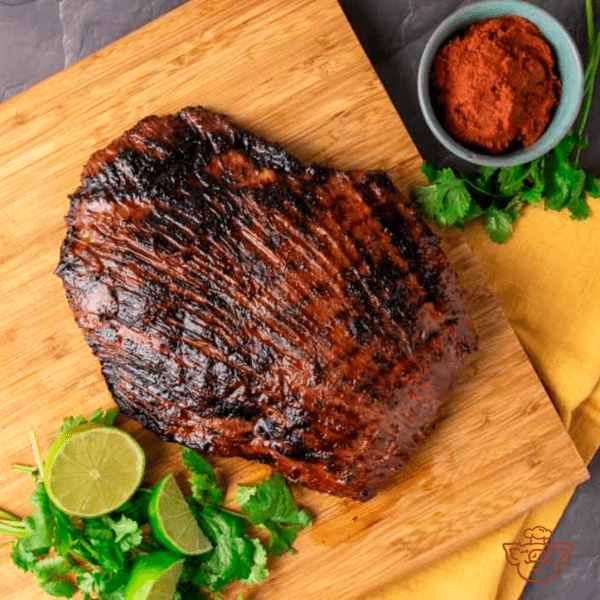
The Slather and Seasoning
To get your rub to stick through the high heat of the Big Green Egg, you need a binder. I used a light coating of olive oil, but you can also use yellow mustard or even a dash of Worcestershire sauce. Don’t worry, you won’t taste the binder once the meat hits the fire.
For this cook, I reached for Meat Church’s Holy Cow. It is a heavy, black-pepper-forward rub that is designed specifically for beef. It creates a fantastic bark that stands up to the smoke.
Other Popular Options:
- The Classic Santa Maria: A simple blend of equal parts salt, black pepper, and garlic powder.
- Coffee Rubs: The acidity in finely ground coffee helps tenderize the beef and provides a dark, rich color after the sear.
DIY “Buddha Big Beef” Blend
If you want to mix up your own at home, try this balanced ratio:
- 2 parts Coarse Kosher Salt
- 2 parts 16-mesh Black Pepper
- 1 part Granulated Garlic
- 1/2 part Smoked Paprika (for color)
- 1/4 part Onion Powder
Don’t Forget the Sides
The Big Green Egg is an ecosystem, so don’t let that extra grate space go to waste. While the tri-tip is getting ready, I prep my sides:
- Grilled Vegetables: Thick-sliced zucchini and onions tossed in olive oil and the same beef rub.
- Corn and Poblano Salsa: I picked out fresh corn and a poblano pepper for a quick, bright salsa (shout out to Food & Wine for the inspiration). The char from the poblano adds a smoky depth that cuts right through the richness of the beef.
Pro Tip: The “Dry Brine”
If you have the time, season your tri-tip and let it sit uncovered in the fridge for 2 to 4 hours (or even overnight). This allows the salt to penetrate deep into the muscle fibers, resulting in a much juicier finished product.

Step 3: The Dual-EGG Setup (and the One-EGG Alternative)
Efficiency is the name of the game. By using two separate grills, you eliminate the “waiting game” while your charcoal comes up to searing temps. Here is how I staged this cook:
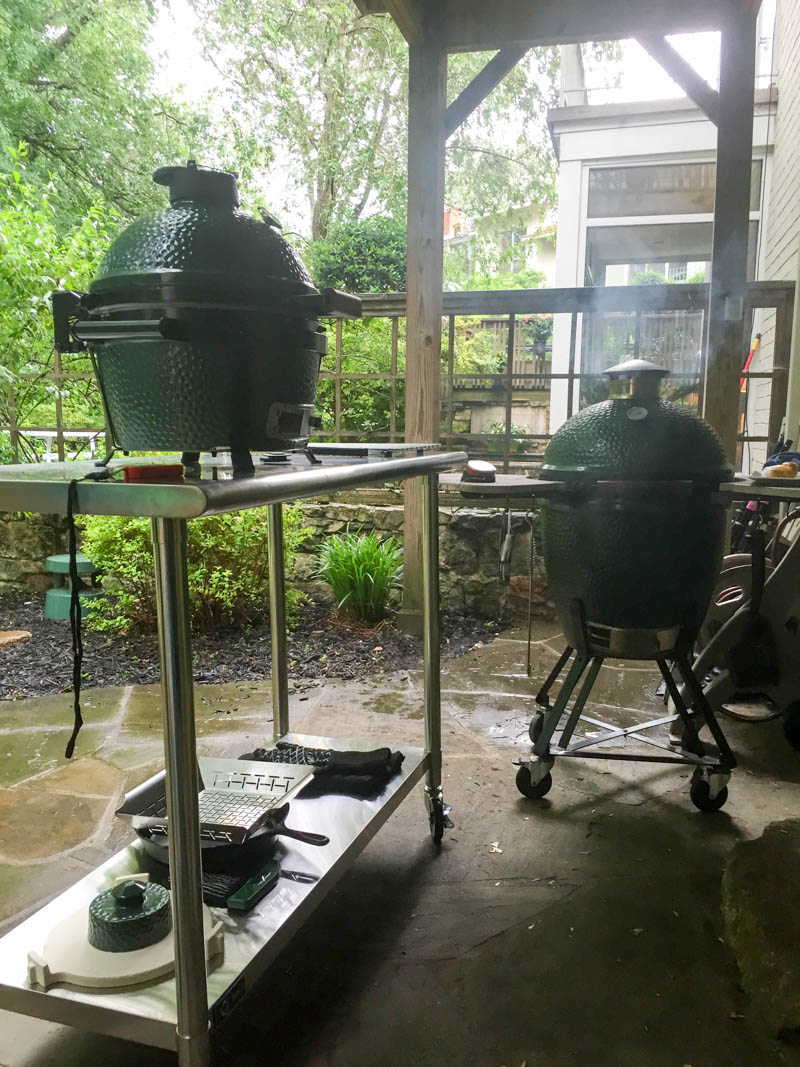
The Two-Grill Strategy
- The Large BGE (The Smoker): I set this up for indirect heat using the convEGGtor (platesetter) with the legs facing up. I stabilized the temperature at 300°F. This slightly higher “low and slow” temp allows the fat to render beautifully while the meat takes on a clean smoke profile.
- The Mini Max (The Sear Station): I set this up for direct heat (no platesetter) and cranked the temperature to 450°F+. This grill is essentially my “finish line.” It stays ready and waiting for the moment the tri-tip hits its internal target.
The Single-EGG Alternative
Don’t worry if you only have one Big Green Egg; you can still master the reverse sear. It just requires a little more agility:
- Start Indirect: Set up your EGG with the convEGGtor at 250°F to 300°F.
- The Pull: When the meat hits its target internal temp, remove it and the grate.
- The Pivot: Use high-heat gloves to carefully pull the hot convEGGtor out.
- The Heat-Up: Open the top and bottom vents wide. Within 5 to 10 minutes, your charcoal will be roaring and ready for the direct sear.
Pro Tip: If you are using a single EGG, keep your meat loosely tented with foil while the grill heats up. This “mid-cook rest” actually helps the juices redistribute before the final sear.
Choosing Your Wood
For tri-tip, you want a wood that can stand up to the beefy flavor. I recommend Oak or Hickory. Oak provides that authentic Santa Maria flavor, while Hickory adds a slightly more aggressive, classic BBQ punch. Add 2 to 3 chunks to the hot coals just before you put the meat on the Large BGE.
Step 4: The Roasting Phase
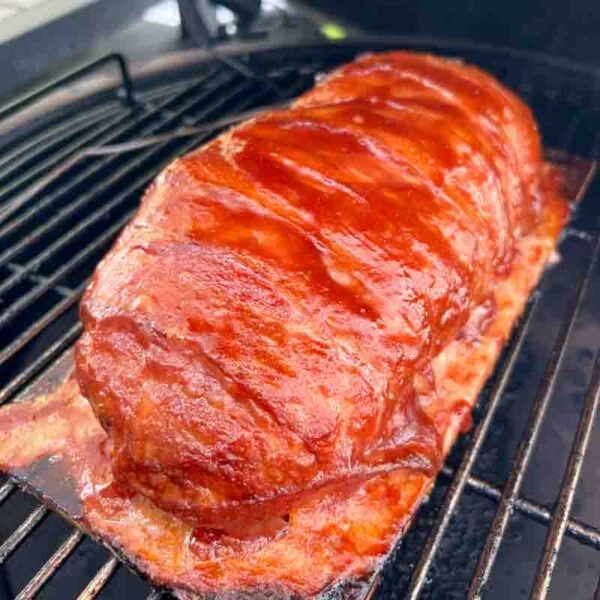
Once your Large BGE is stabilized at 300°F and the smoke is burning clean (look for that thin, blue wispy smoke, not thick white clouds), it’s time to cook.
Setting the Stage
Place the seasoned tri-tip on the grate directly over your drip pan. Using a drip pan is essential here; it catches the rendering fat and prevents it from hitting the hot convEGGtor, which keeps the smoke flavor pure and prevents acrid flare-ups.
The Targeted Internal Temp
Close the dome and let the Big Green Egg work its magic. For this cook, the roasting phase took approximately 45 minutes. However, remember that we cook to temperature, not to time.
You are looking for an internal temperature of 115°F to 120°F if you want a true medium-rare finish, but for this specific cook, I pulled the roast when my instant-read thermometer hit 130°F. This higher pull temp is great for those who prefer a more traditional “medium” finish after the final sear.
Why an Instant-Read Thermometer?
At this stage, a high-quality instant-read thermometer is your best friend. Because tri-tip is tapered, you should check a few different spots. The thickest part of the “boomerang” will be your primary guide, but keep an eye on the thinner tails to ensure they aren’t drying out.
Pitmaster Note: The “Clean” Smoke
Since we are using a beef-forward rub like Holy Cow, you want the wood chunks to complement the meat, not overpower it. Ensure your vents are set so the air is moving steadily. If the smoke smells sweet and looks nearly invisible, you are exactly where you need to be.

The Side Show: Charred Corn and Poblano Salsa
While the tri-tip is finishing its roasting phase on the Large EGG, use the direct heat of the Mini Max to build your salsa base. This isn’t just a garnish; the acidity and heat are designed to cut right through the marbled beef.
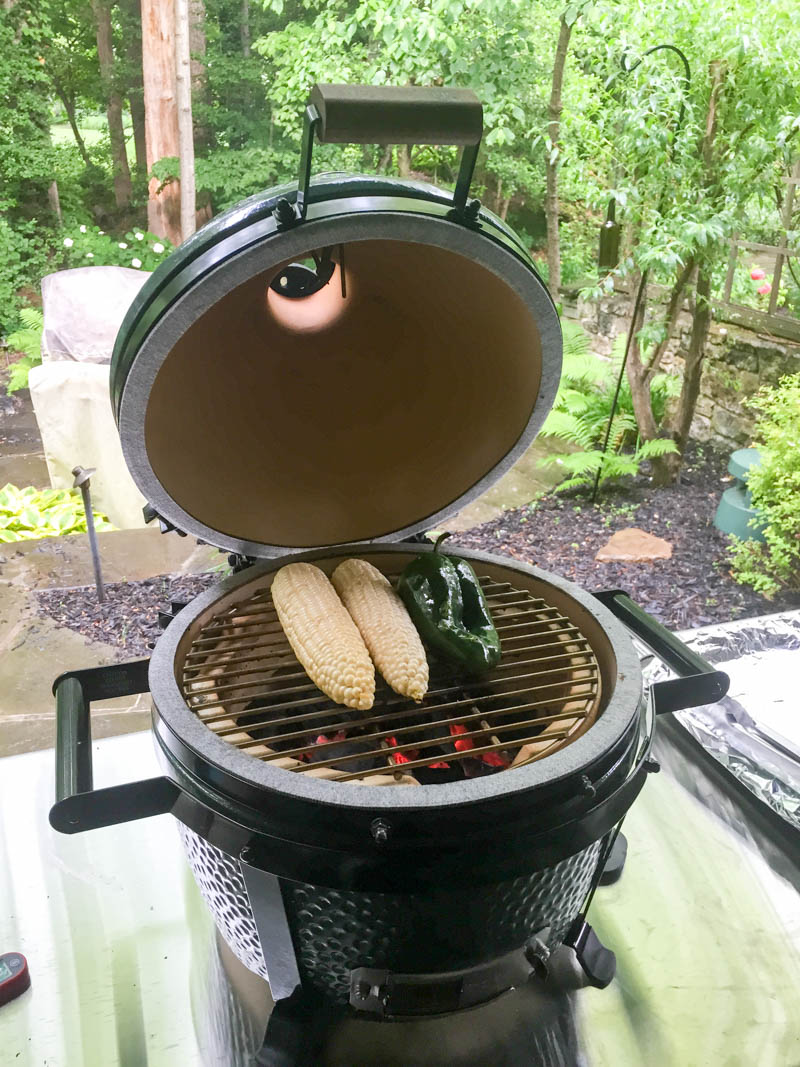
The Char
Place your husked corn and the whole poblano pepper directly over the hot coals.
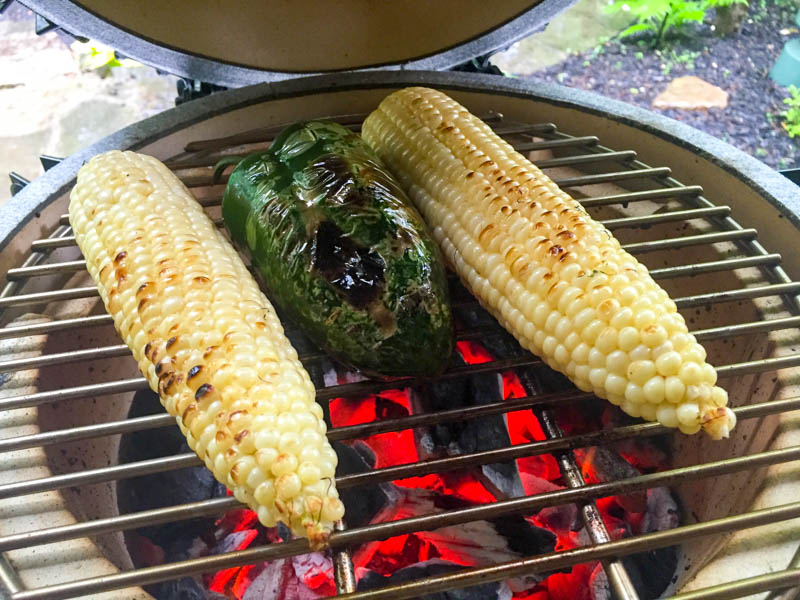
- The Corn: Rotate the ears every minute. You are looking for those beautiful “leopard spots” of black char while keeping the kernels juicy and sweet.
- The Poblano: Let the skin blister and blacken. This isn’t just for color; it softens the pepper and adds a deep, earthy spice that raw peppers just can’t match.
Assembly
Once they have a good char (usually 5 to 8 minutes), pull them off.
- The Prep: Place the hot poblano in a small bowl and cover it with plastic wrap for 5 minutes. This “steams” the skin off, making it easy to peel.
- The Mix: Slice the kernels off the cob and dice the peeled poblano (remove the seeds if you want less heat).
- The Finish: Toss the corn and peppers with a squeeze of fresh lime juice, a pinch of salt, and some chopped cilantro.
The result is a bright, smoky salsa that brings a pop of color and a hit of freshness to every bite of tri-tip.
Efficiency Tip
If you are doing the vegetables at the same time, throw your onion and zucchini slices on the outer edges of the Mini Max grate. They will pick up some of that poblano smoke while they soften.
This is the “money” step. The transition from the slow roast to the cast iron sear is where you build that incredible texture and color that makes the reverse sear so famous.
Step 5: The Sear
The trick to a world-class reverse sear is patience during the roast and aggression during the finish. By the time your tri-tip moves to the Mini Max, it is already perfectly cooked on the inside. Now, we just need to give it that signature “steakhouse” crust.
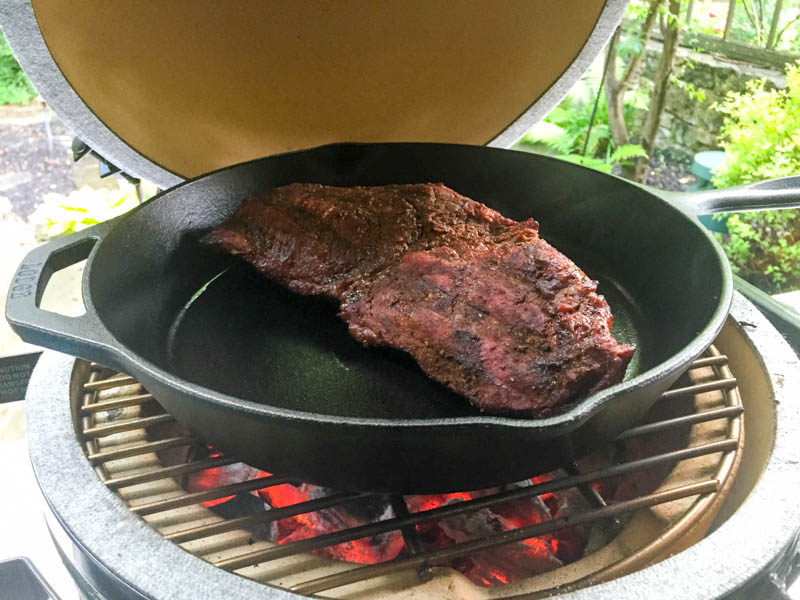
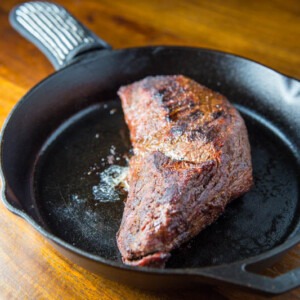
The Cast Iron Method
For this cook, I used a cast iron skillet on the Mini Max. Cast iron is a superior tool for the reverse sear because it provides 100% surface contact, ensuring every millimeter of that tri-tip gets a deep, mahogany crust.
- Get it Ripping Hot: Place the skillet on the Mini Max and let it preheat until it is nearly glowing. You want that pan screaming.
- The Sear: Lay the tri-tip into the dry pan (or use a tiny bit of high-smoke-point oil). Sear it for 2 minutes per side.
- The Result: Because the meat’s surface was already dried out from the roasting phase, it will develop a crust almost instantly. The Mini Max was the perfect tool for this; it held that high heat steadily without breaking a sweat.
Alternative: The Direct Coal Sear
If you don’t have a cast iron pan handy, you can go “Caveman Style” or simply use the stainless steel grates:
- On the Grate: Place the meat directly over the white-hot coals. This will give you those classic, charred grill marks and a slightly more “fire-kissed” flavor. Keep a close eye on it, as the dripping fat can cause flare-ups.
- The “Caveman” Sear: Some enthusiasts sear directly on the lump charcoal. If you try this, make sure you blow off any loose ash first!
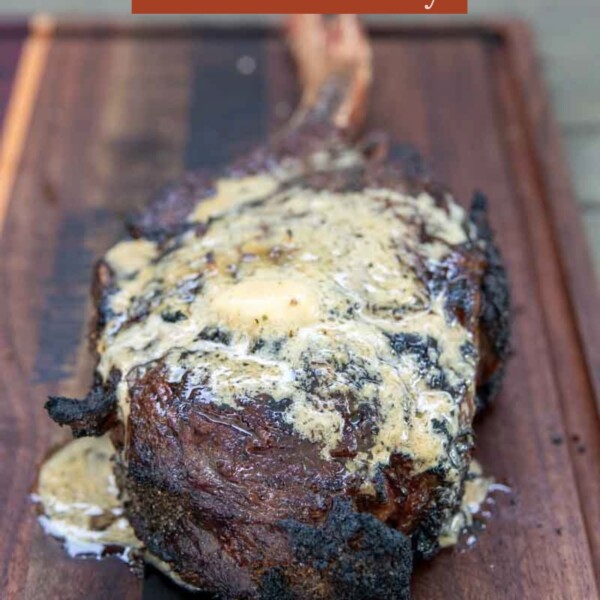
The Rest: Don’t Skip This!
Once you pull that tri-tip off the Mini Max, the temptation to slice it immediately will be overwhelming. Resist it. Transfer the meat to a cutting board and let it rest for at least 10 to 15 minutes. This allows the muscle fibers to relax and reabsorb all those juices. If you slice too soon, all that flavor will end up on your cutting board instead of in your mouth.
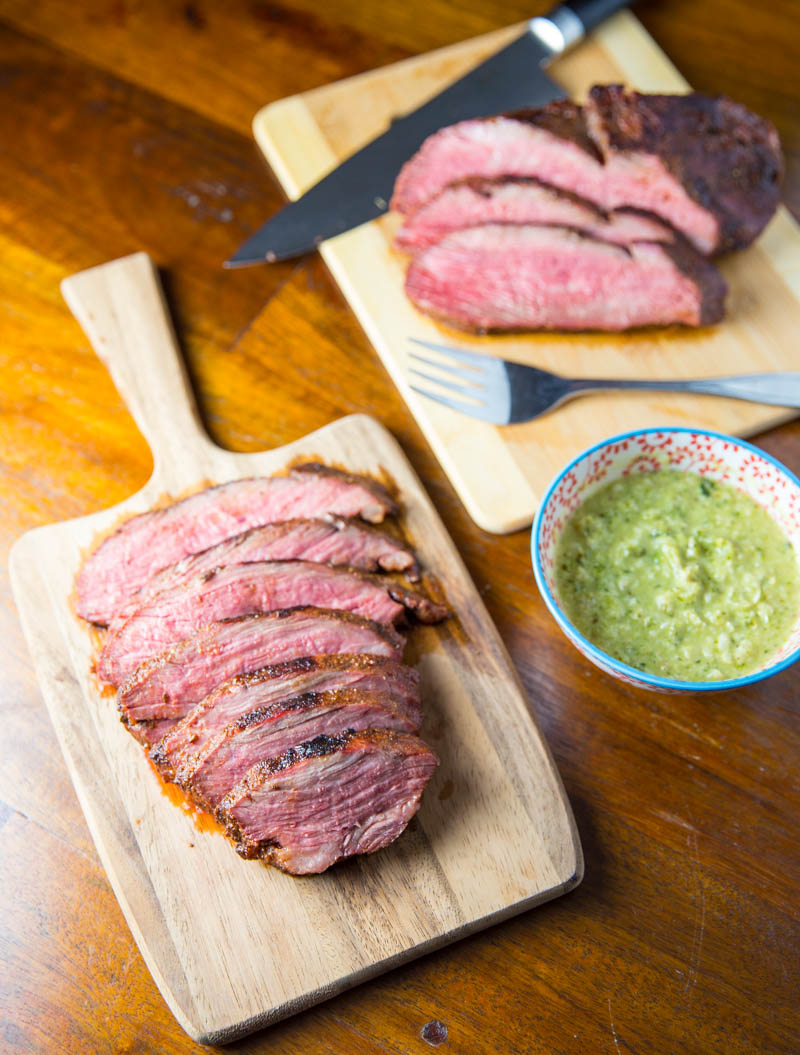
Step 6: The Final Slice
As we mentioned before, tri-tip is unique because the grain runs in two different directions.
The Cut: Slice each half against the grain into thin strips. This ensures every bite is tender and easy to chew.
Identify the Grain: Look at the raw meat before you cook it (or look closely at the crust now) to see which way the lines run.
The Split: Slice the roast in half where the two grain patterns meet.
This is a great opportunity to show your readers that even the pros never stop learning. Framing that 2015 mistake as a “teachable moment” for your 2026 audience adds a ton of credibility to your expertise.
A Note for the Sharp-Eyed: The Slicing Blunder
If you look closely at the photos from this cook back in 2015, you will notice something that makes the 2026 version of myself cringe: I made a classic rookie mistake and sliced the meat with the grain.
Tri-tip is a unique muscle because the grain actually changes direction halfway through the roast. Back then, I didn’t know what I didn’t know. By slicing with the grain (parallel to the muscle fibers), you’re essentially serving up long, chewy strings. For a lean cut like this, you must always slice against the grain to shorten those fibers, which is what gives you that “butter-soft” texture.
Thankfully, the Big Green Egg is so forgiving and the meat was so tender that it didn’t ruin dinner. But let my 11 year old photos be a lesson for your next cook!
How to get it right today:
- Identify the “Crook”: Find the point in the middle of the “boomerang” where the grain shifts.
- Split it: Cut the roast in half at that intersection.
- Rotate and Slice: Turn each half and slice thin strips perpendicular to the grain.
Seeing your own growth from 2015 to 2026 is part of the fun of the BBQ journey. We’ve come a long way since this post was first published, and the results today are better than ever.

The Ultimate Guide to Big Green Egg Reverse Sear Tri-Tip
Equipment
- 12" Cast Iron Pan
Ingredients
Steak Ingredients:
- 2 lbs Tri-Tip Roast
- 2 tbsp Olive Oil
- 4 tbsp BBQ Rub, e.g., Meat Church Holy Cow
Sides Ingredients:
- 1 zucchini
- 1 yellow onion
- 2 ears Corn on the Cob
- 1 Poblano Pepper
Instructions
- Prep and Season: Trim any heavy silver skin from the roast. If there is a thick fat cap, trim it down to 1/8 inch. Apply a light coating of olive oil as a binder and season generously with your beef rub. Let the meat sweat at room temperature for 20 minutes.
- Setup the Big Green Egg: For the roasting phase, set up your Large Big Green Egg for indirect cooking by inserting the convEGGtor with the legs facing up. Stabilize the temperature at 300°F. If you are using two grills, set up your Mini Max for direct heat (no convEGGtor) and stabilize it at 450°F or higher with a cast iron skillet placed on the grate to preheat. If using one grill, see the note below for the transition.
- The Roasting Phase: Place the seasoned tri-tip on the grate of the Large EGG directly over a drip pan. This pan is vital for catching rendered fat and keeping the smoke flavor clean. Close the dome and roast the meat for approximately 45 minutes. Use a high-quality instant-read thermometer to check the internal temperature in the thickest part of the roast. Pull the meat when it reaches 130°F for a medium finish, or 115°F to 120°F if you prefer a traditional medium-rare.
- Prepare the Salsa and Sides: While the beef is roasting, take advantage of the high heat on your Mini Max. Place the corn and the poblano pepper directly over the coals. Rotate the corn frequently until the kernels are charred and sweet, and let the poblano skin blister and blacken completely. Remove the vegetables, peel the charred skin from the poblano, and mix the diced pepper and corn kernels with lime juice and cilantro for a fresh, smoky side dish.
- The Cast Iron Sear: Move the roasted tri-tip over to the ripping hot cast iron skillet on the Mini Max. Sear the roast for exactly 2 minutes per side. You are looking for a deep, dark mahogany crust to form. Since the meat is already cooked through, this step is purely about developing texture and flavor on the surface.
- The Rest and the Master Slice: Transfer the tri-tip to a cutting board and let it rest for at least 15 minutes. This is the most important step for a juicy result. Once rested, look at the grain of the meat. Find the "crook" where the fibers change direction and slice the roast in half at that point. Rotate each half and slice thin strips perpendicular to the grain. This ensures the meat is tender and easy to eat, avoiding the "rookie mistake" of slicing with the grain.
Nutrition information is automatically calculated, so should only be used as an approximation.


Previously from Valencia, CA now living in Tulsa, OK. Loved tri tip at restaurants in California. Tried this receipe on The Green Egg and it brought back memories of Cali. Great receipe. Thanks for helping me bring a little bit of Cali to Okie.
Thanks Rex! Glad I could help you recapture the magic of CA Tri Tip!
I have the small BGE, and I’ve always done the tri-tip with direct heat at about 220°-240° and it’s always turned out perfect. I usually smoke with a handful of soaked hickory and cherry. Try it my way once. It’s so simple it’s ridiculous, and I’ve found tri-tip to be unbelievably forgiving when it comes to overcooking. Probably my fave cut of beef.
Tri-tip is very forgiving and an easy piece of meat to cook for sure. I have cooked it both direct and indirect with success. Thanks for your comment and I hope you enjoy the blog!
Just to let you know this recipe is still getting used 🙂 – did it last night on the egg – served with homemade horseradish sauce and it was fabulous.
Thank you ?
Love your videos and recipes! How did you like the Holy Cow rub? We have used Dizzy Dust (saw it on one of your videos) and thought it was great. Wanted your opinion on Holy Cow before I make the purchase!
Thanks!
The Dizzy Pig rub is named Cow Lick and it is to beef what Dizzy Dust is to pork. The best! If ordering online use code BBQBUDDHA for 15% off any Dizzy Pig order!
This reverse sear tri tip recipe on the Big Green Egg looks amazing! I can’t wait to try it out for our next barbecue. The detailed instructions and tips on temperature management are super helpful. Thanks for sharing!
This reverse-sear method on the Big Green Egg sounds incredible! I can’t wait to try it out for my next BBQ. The tips you’ve shared really make it seem approachable, even for a novice like me. Thanks for sharing this delicious recipe!
This reverse sear method on the Big Green Egg sounds incredible! I love how tender the tri-tip looks in the photos. Can’t wait to try this out for my next BBQ gathering. Thanks for sharing such a detailed guide!
This reverse sear tri tip recipe is a game changer! The method you outlined really brings out the flavors, and I loved how juicy and tender the meat turned out. Can’t wait to try it again with different seasonings! Thanks for sharing!
This reverse sear method for tri tip is a game changer! I tried your technique on my Big Green Egg, and the results were amazing. Perfectly tender and flavorful. Can’t wait to try it with different seasonings next time. Thanks for sharing!