This post contains affiliate links. Please see our disclosure policy.
Table of Contents
- Step 1: Clean and Prep the Tenderloin
- Step 2: The Binder and Seasoning
- Step 3: Big Green Egg Setup (2-Zone Grilling)
- Step 4: Sear the Pork Tenderloin
- Step 5: The Indirect Zone and The Glaze
- Step 6: Setting the Glaze and the Finish
- Step 7: Pull, Rest, and Slice
- Big Green Egg Grilled Asian Pork Tenderloin Recipe
Get My NEW Book
The Ultimate Big Green Egg Cookbook

The Perfect Weeknight Masterpiece: Grilled Asian Pork Tenderloin
Are you looking for an easy recipe for your pork tenderloin that is packed with flavor? Well, you have just found yourself the right recipe. When you need a meal that is elegant enough for guests but fast enough for a Tuesday night, the pork tenderloin is your secret weapon.
Understanding the Cut
The pork tenderloin is often confused with the pork loin, but they are very different animals. The tenderloin is a long, narrow, lean muscle that runs along the backbone. Because this muscle doesn’t do much heavy lifting, it is incredibly tender and lean. In fact, it is the “Filet Mignon” of pork. Because it has very little fat, it takes on marinades beautifully and cooks quickly over high heat, making it the perfect candidate for the Big Green Egg.
The Gold Standard: Kurobuta Pork
In this post, I am featuring Snake River Farms Kurobuta Pork Tenderloin. If you aren’t familiar with Kurobuta, it is the Japanese term for “black hog,” specifically the Berkshire breed. This isn’t your average grocery store pork. It is prized for its intense marbling, short muscle fibers, and incredible juiciness. It represents the absolute best pork you can find.
If you cannot get your hands on Snake River Farms, don’t worry. You can still make this recipe a success with a high quality, “all natural” pork tenderloin from your local butcher or high end grocery store. Just look for a piece that has a nice pink color and avoid anything that has been “enhanced” or pre-marinated in a salt solution.
Why This Recipe Works
The Big Green Egg excels at high heat roasting. By combining the natural wood fire flavor of the Egg with an Asian inspired marinade full of soy, ginger, and garlic, you get a caramelized crust on the outside while the inside stays juicy and tender.
Now sit back, grab a cold glass of your favorite Riesling, and enjoy this post for Big Green Egg Grilled Asian Pork Tenderloin.
Step 1: Clean and Prep the Tenderloin
Preparation is the most important step when working with a cut as lean as the tenderloin. Because there is so little fat to protect the meat, you want to ensure the surface is perfectly prepped to receive the marinade and the heat.
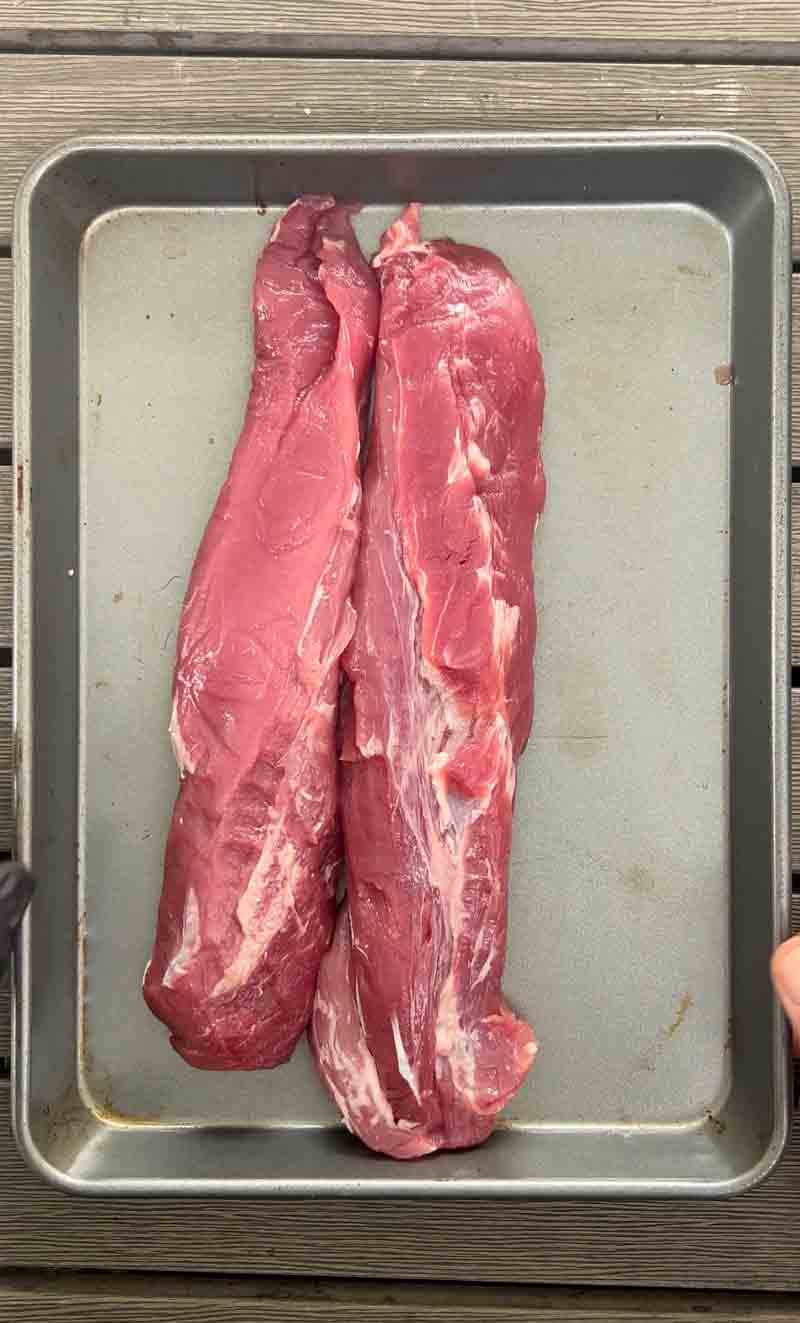
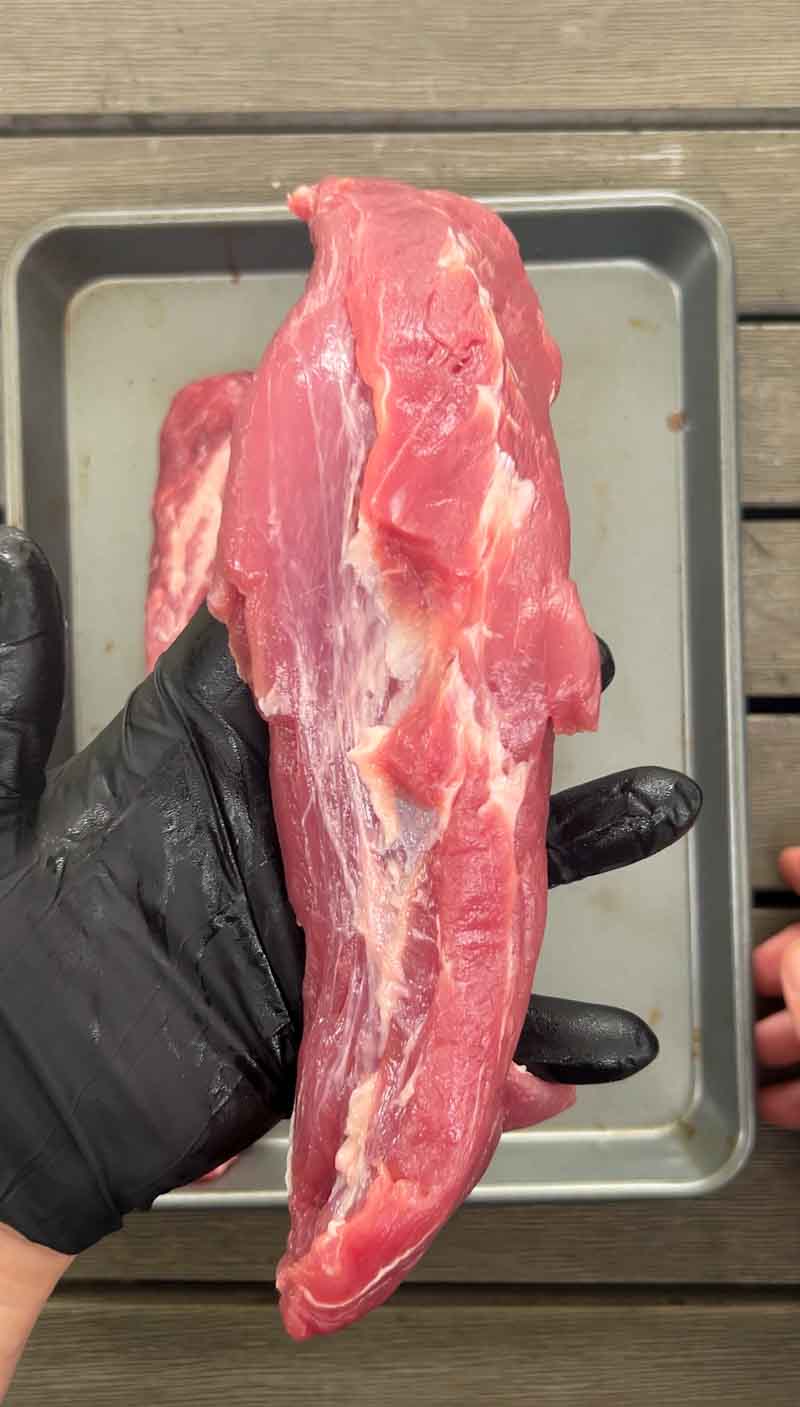
Trimming and Removing Silver Skin
Start by removing the pork tenderloin from the packaging and patting it dry with paper towels. You will notice a thin, pearly white membrane running along the surface of the meat. This is the silver skin. Unlike fat, silver skin does not render down or melt during the cooking process. If you leave it on, it will become tough and chewy, often causing the tenderloin to curl as it hits the heat.
To remove it, slide a sharp boning knife just under the membrane at one end, then glide the blade along the length of the silver skin while pulling upward. Your goal is to remove the membrane without taking too much of that precious meat with it. Once the silver skin is gone, trim away any large pockets of excess fat to leave a clean, uniform piece of pork.
Step 2: The Binder and Seasoning
Once your pork tenderloin has finished marinating, it is time to build a secondary layer of flavor. While the marinade provides the deep, internal seasoning, the binder and dry rub create the “crust” that makes grilled pork so irresistible.
Choosing the Right Binder
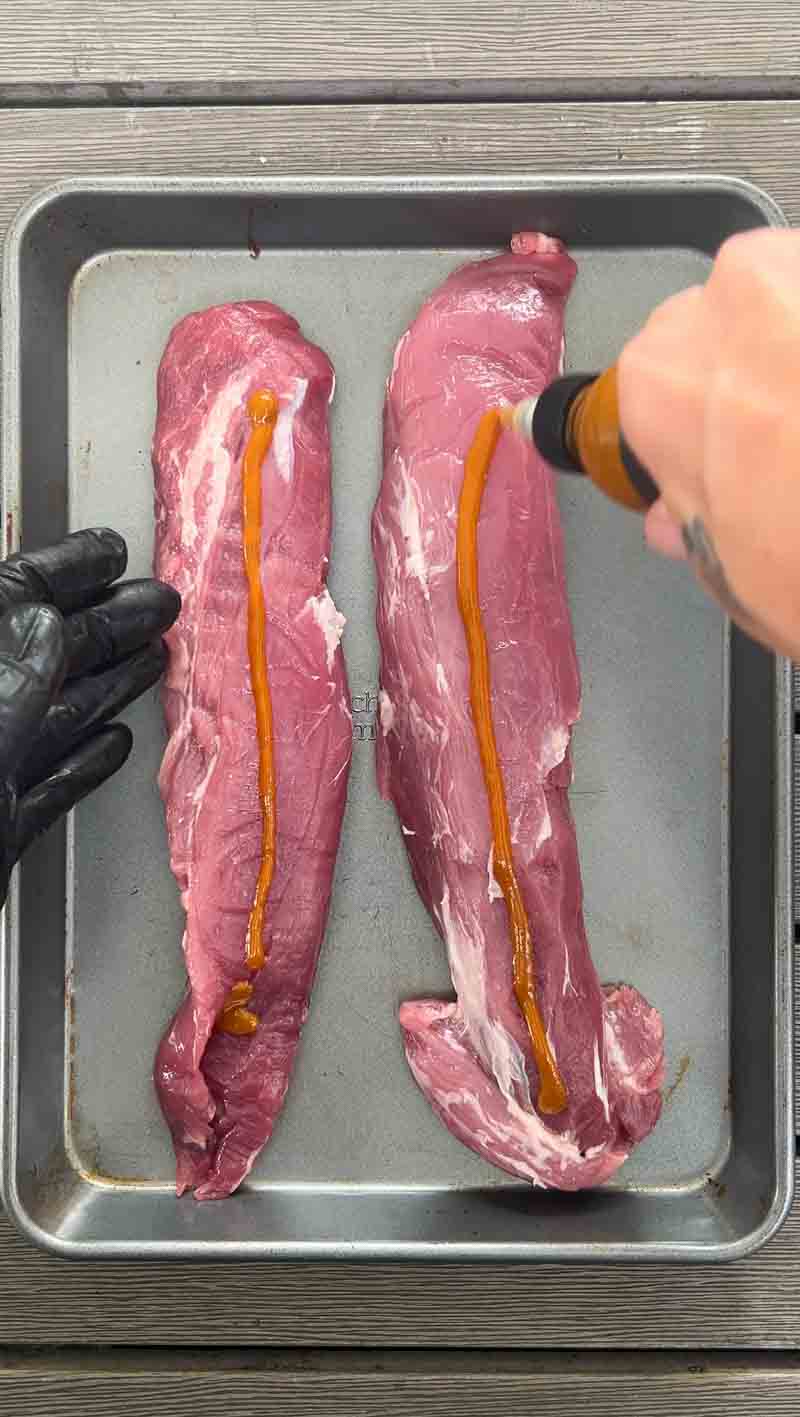
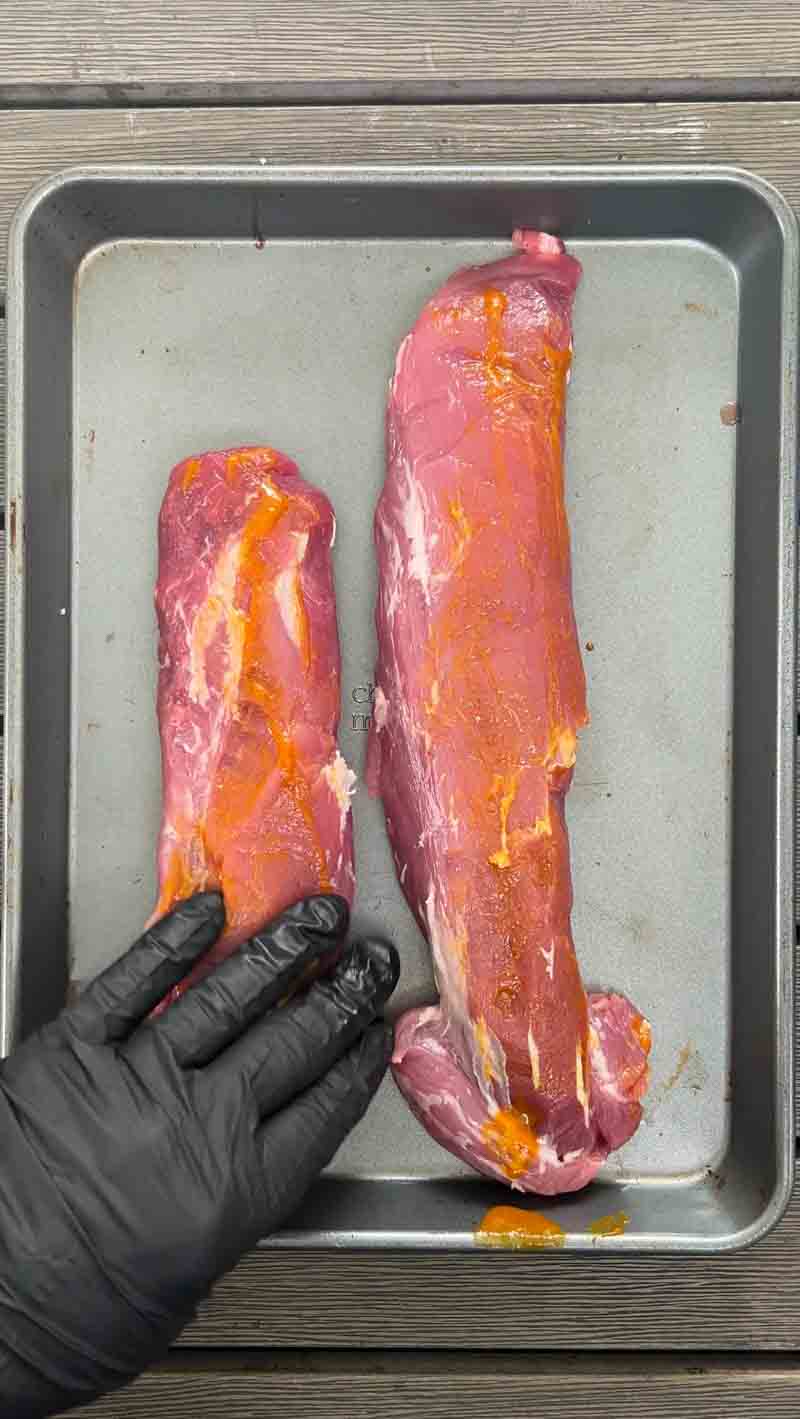
The purpose of a binder is simple: it gives your dry seasoning something to stick to so it doesn’t fall off into the coals. While many people reach for olive oil or mustard, I am using hot sauce.
Using hot sauce as a binder is a pro move because the vinegar in the sauce helps cut through the richness of the pork, and the heat mellows out significantly during the grilling process. It won’t make the dish “melt your face off” spicy, but it adds a subtle tang and a beautiful color to the final bark.
For this cook, I am using FYR Provisions GLD Hot Sauce. This sauce has a bright, golden profile that pairs exceptionally well with the soy and ginger notes from our marinade.
Other Binder Options
If you aren’t a fan of hot sauce, you can easily swap it out for one of these alternatives:
Honey: If you want a sweeter, stickier “char siu” style finish, honey acts as a great glue for your spices.
Sesame Oil: Keeps with the Asian flavor profile and helps the pork brown beautifully.
Dijon Mustard: Adds a sophisticated sharp note that complements pork perfectly.
The Dry Rub: Layering the Flavor
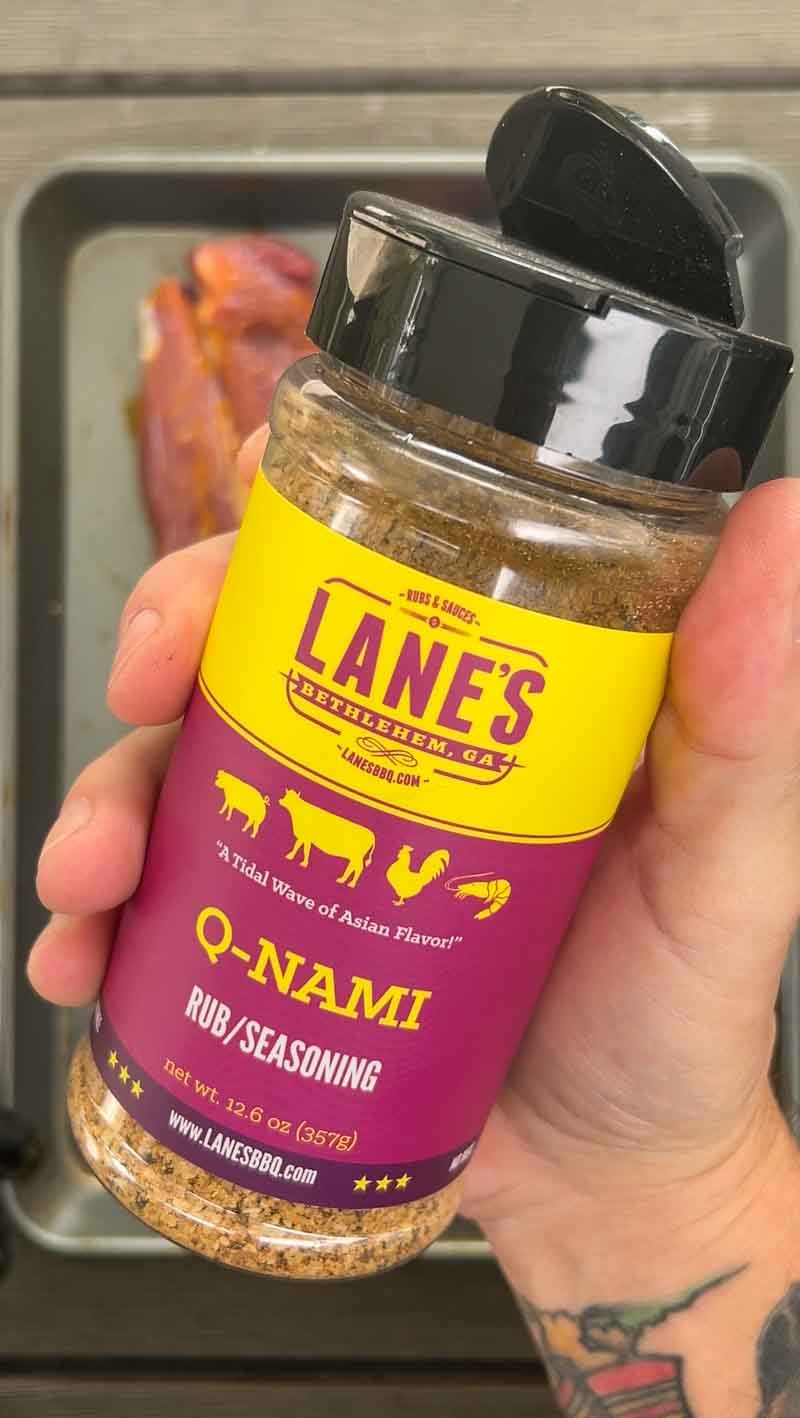
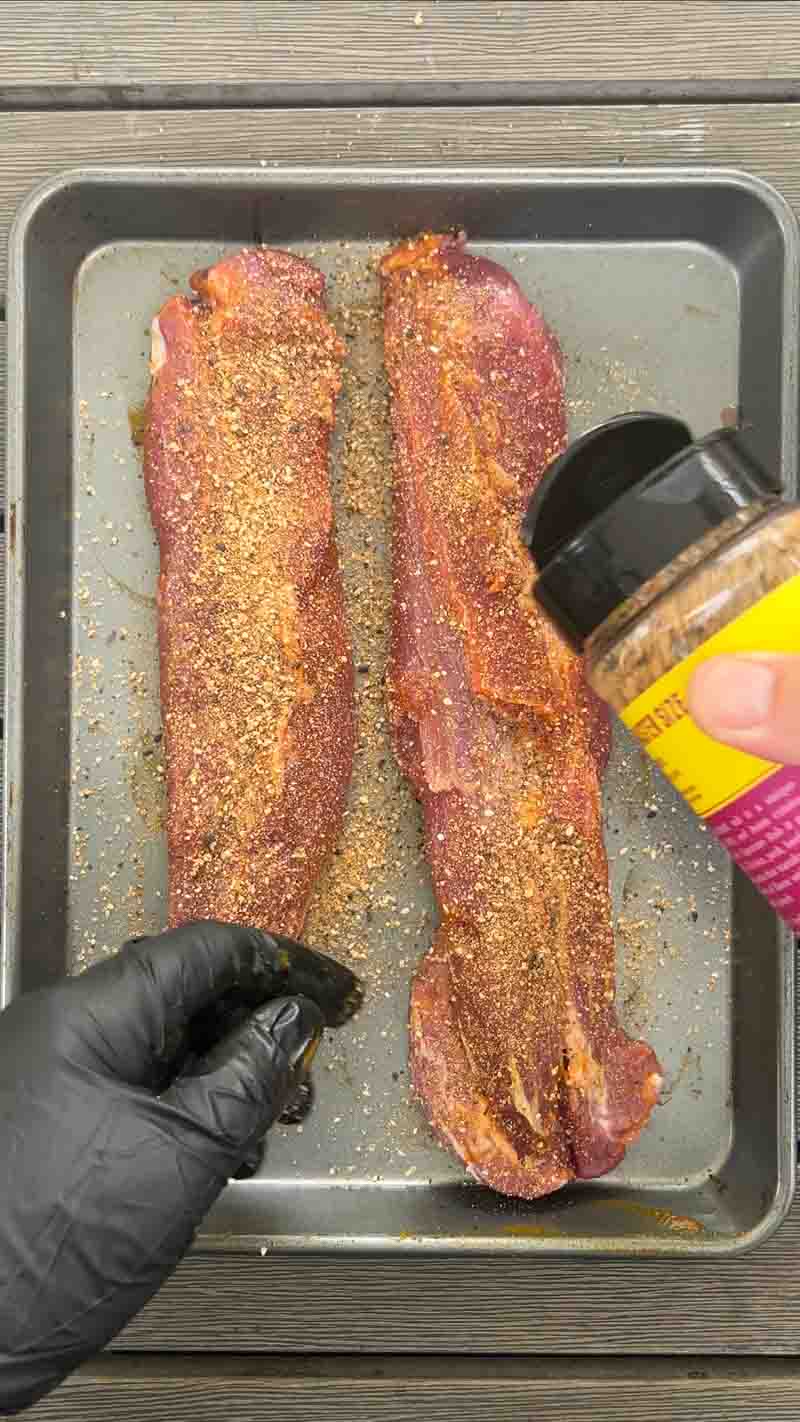
With the FYR GLD Hot Sauce acting as your tacky base, it is time to apply the final layer of seasoning. For this cook, I am using Lane’s BBQ Qnami Rub.
Qnami is a brilliant fusion rub that bridges the gap between traditional Texas BBQ and Japanese soul food. It uses a base of turbinado sugar and kosher salt but adds a unique kick with togarashi, ginger, and garlic. The result is a savory, umami-heavy profile that perfectly complements the Kurobuta pork and the Asian marinade. Apply it liberally all over both pieces of the tenderloin, making sure to hit the ends as well.
Alternative Rub Options
If you don’t have a bottle of Qnami on hand, you can keep the Asian-fusion theme going with these alternatives:
- Meat Church Holy Voodoo: Has a savory, jalapeño-garlic kick that works surprisingly well with soy-based marinades.
- Spiceology Korean BBQ: A great choice if you want a bit more chili flake and toasted sesame flavor.
DIY Buddha Asian Rub
If you want to whip up your own “Buddha Blend” right in your kitchen, try this quick recipe. It provides the perfect balance of sweet, heat, and salt for any grilled pork:
- 2 tablespoons Brown Sugar
- 1 tablespoon Kosher Salt
- 1 teaspoon Coarse Black Pepper
- 1 teaspoon Garlic Powder
- 1 teaspoon Ground Ginger
- 1/2 teaspoon Crushed Red Pepper Flakes (optional for extra heat)
- 1/2 teaspoon Five Spice Powder (optional for deep aromatic flavor)
Shake your chosen rub from about a foot above the meat to ensure you get an even, consistent crust. Let the seasoned tenderloins sit for 10 to 15 minutes while you finalize the temperature on your Big Green Egg. This allows the rub to hydrate and “bond” with the hot sauce binder.
Step 3: Big Green Egg Setup (2-Zone Grilling)
Precision temperature control is where the Big Green Egg truly earns its reputation. For a lean cut like pork tenderloin, you want the best of both worlds: a hard sear for flavor and a gentle finish to maintain juiciness. To achieve this, we are setting up for 2-zone grilling.
The Configuration
Start by getting your Big Green Egg up to 400°F. For this cook, I am using the EGGspander base along with a half-moon ceramic insert (convEGGtor stone).
By placing the ceramic stone on only one side of the EGGspander, you create two distinct cooking environments:
- The Direct Zone: This is the side with open coals. This is your “searing station” where the high heat will caramelize the Qnami rub and the sugars in the marinade.
- The Indirect Zone: This is the side protected by the half-moon stone. It acts as a “safe zone” where the pork can finish roasting without the risk of burning the exterior.
Why 400°F?
At 400°F, you have enough radiant heat to get those professional-looking grill marks and a crispy bark, but it isn’t so hot that the lean Kurobuta pork will dry out in an instant. This temperature allows the honey and sugars in our Asian flavor profile to bubble and char slightly without turning bitter.
Once your Egg has stabilized at 400°F and your grates are hot, you are ready to begin the sear.

Step 4: Sear the Pork Tenderloin
With the Big Green Egg stabilized at 400°F, it is time to put that 2-zone setup to work. This process is all about timing and temperature to ensure that the lean Kurobuta pork stays incredibly juicy.
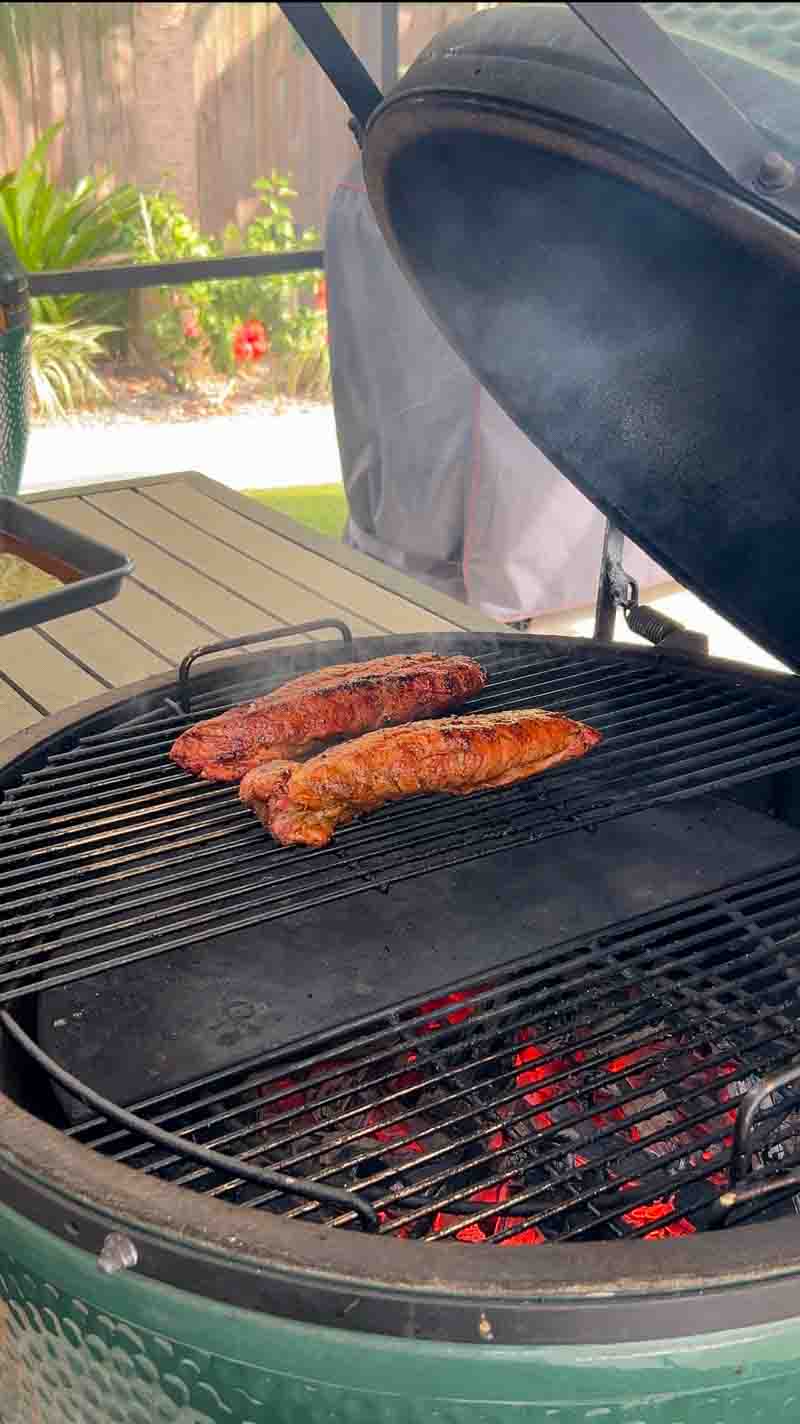
The Initial Sear (Direct Heat)
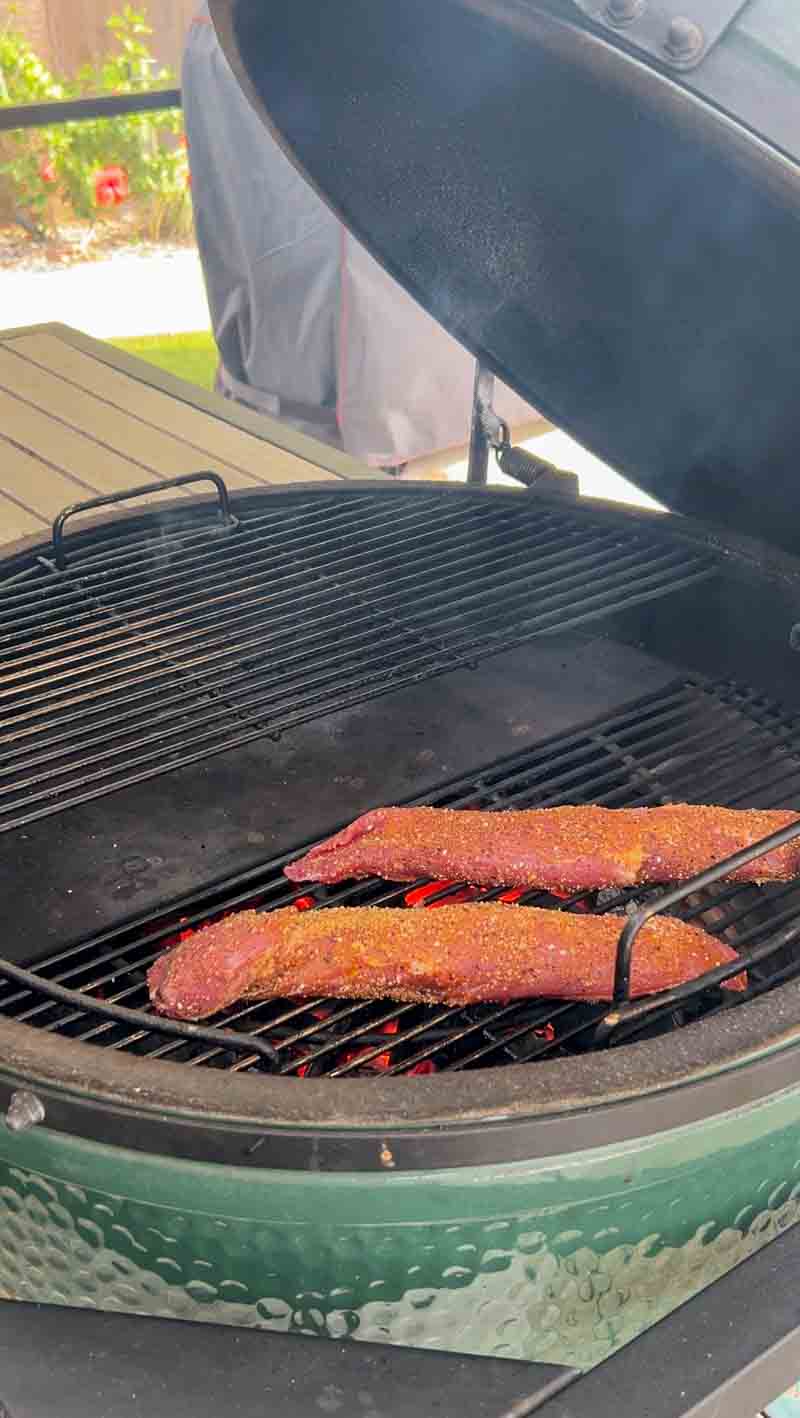
Start by placing the seasoned pork tenderloin pieces onto the direct side of the grill (the side without the ceramic stone). You should hear an immediate sizzle.
Leave the pork for about 3 to 4 minutes per side. You are looking for the Qnami rub and the sugars from the marinade to caramelize, creating a dark, flavorful crust. Don’t be afraid of a little bit of char; that is where the “grilled” Asian flavor really comes from. Rotate the tenderloin to get an even sear on all four “sides” of the muscle.
The “Keep Flipping” Technique
While 2-zone grilling gives you a safety net, the key to an even crust and a juicy center is active management. Instead of just letting the meat sit, I use a frequent flipping rotation.
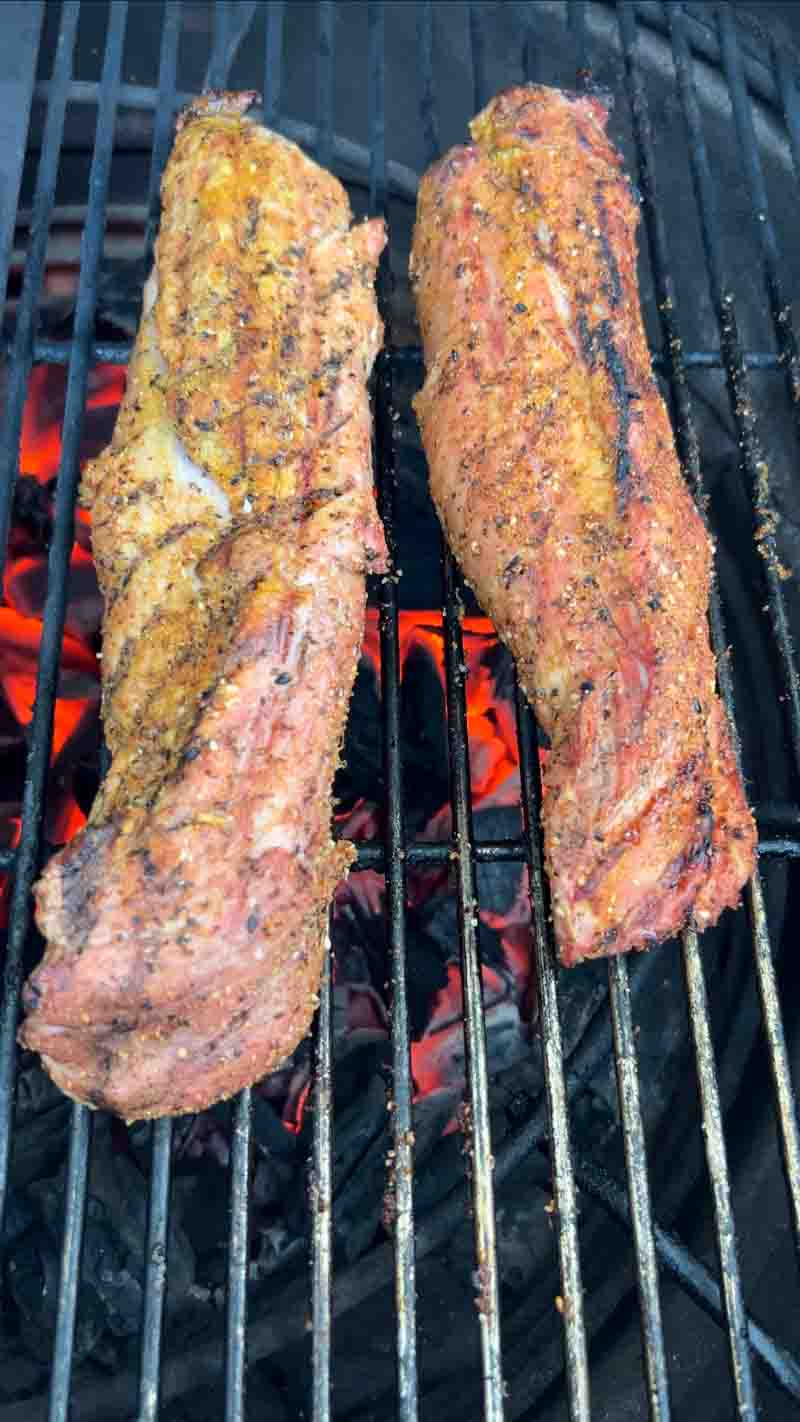
Let the tenderloin cook for 4 minutes on the direct side, then flip. Continue doing this every 4 minutes. This constant rotation prevents any one side from taking on too much heat at once, which can lead to a “grey ring” of overcooked meat just under the surface. It essentially creates a manual rotisserie effect right on your grill grates.
Monitoring the Internal Temp
Continue this flipping process until the internal temperature of the pork measures 120°F. For these Snake River Farms tenderloins, this took me about 12 minutes (three 4-minute intervals).
At this stage, the exterior has a magnificent sear from the direct flames, but the center is still coming up to temp. This is your cue to move the meat to the indirect side of the EGGspander to finish the cook gently.
Step 5: The Indirect Zone and The Glaze
Once the pork reaches that 120°F mark, it is time for the final transformation. This is where we layer on the sticky, sweet, and savory finish that defines a great Asian-style grill.
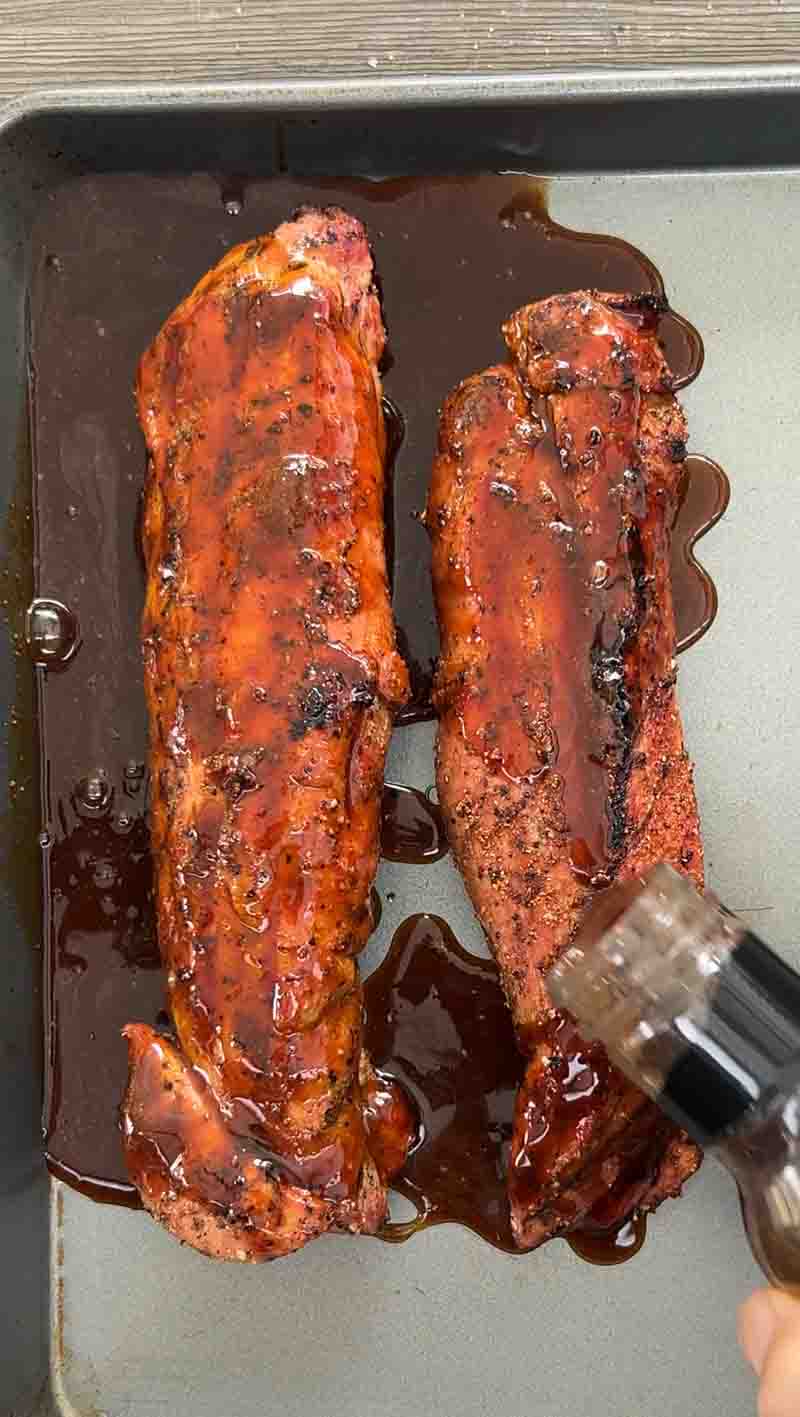
The Glazing Process
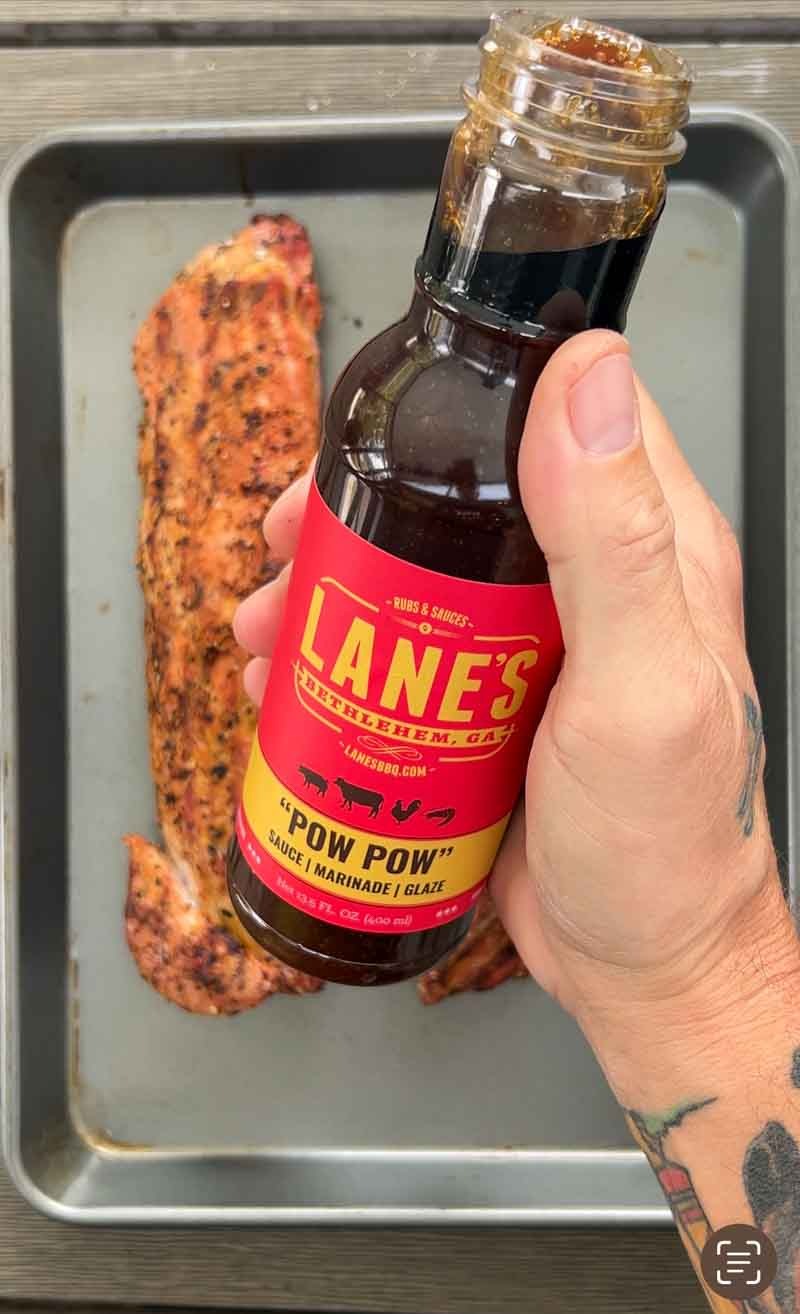
Remove the tenderloin from the direct heat and place it onto a clean baking sheet. For this cook, I am pouring Lane’s BBQ Pow Pow Sauce all over the meat. This sauce is a sweet and spicy powerhouse that provides a beautiful gloss and a final punch of flavor.
After the pork is thoroughly coated, move it back onto the indirect side of your Big Green Egg. Close the lid and let the heat set that glaze into a tacky, finger-licking finish while the internal temperature climbs to your target.
Alternative Glaze Options
If you don’t have Pow Pow sauce in the pantry, here are a few other ways to finish this dish:
- Bachman’s Japanese Barbecue Sauce: A thinner, more savory glaze that leans heavily on soy and toasted sesame.
- Thai Sweet Chili Sauce: A classic choice if you want a milder heat and a very thick, translucent glaze.
- Hoisin Sauce mixed with Honey: A traditional Cantonese approach that gives the pork a deep, dark color.
DIY Buddha Glaze
If you want to make your own glaze from scratch, this “Buddha Glaze” is a simple, high-impact recipe that uses common pantry staples:
- 1/2 cup Apricot Preserves (the secret for a sticky shine)
- 2 tablespoons Soy Sauce
- 1 tablespoon Rice Vinegar
- 1 teaspoon Sriracha (or more if you like it spicy)
- 1/2 teaspoon Toasted Sesame Oil
Whisk these ingredients together in a small saucepan over low heat until smooth before brushing onto the pork.
The Finish Line
Let the glazed tenderloins roast on the indirect side until the internal temperature hits 140°F. Between the 2-zone setup and the frequent flipping, you have ensured that the pork is cooked perfectly from edge to edge.
Step 6: Setting the Glaze and the Finish
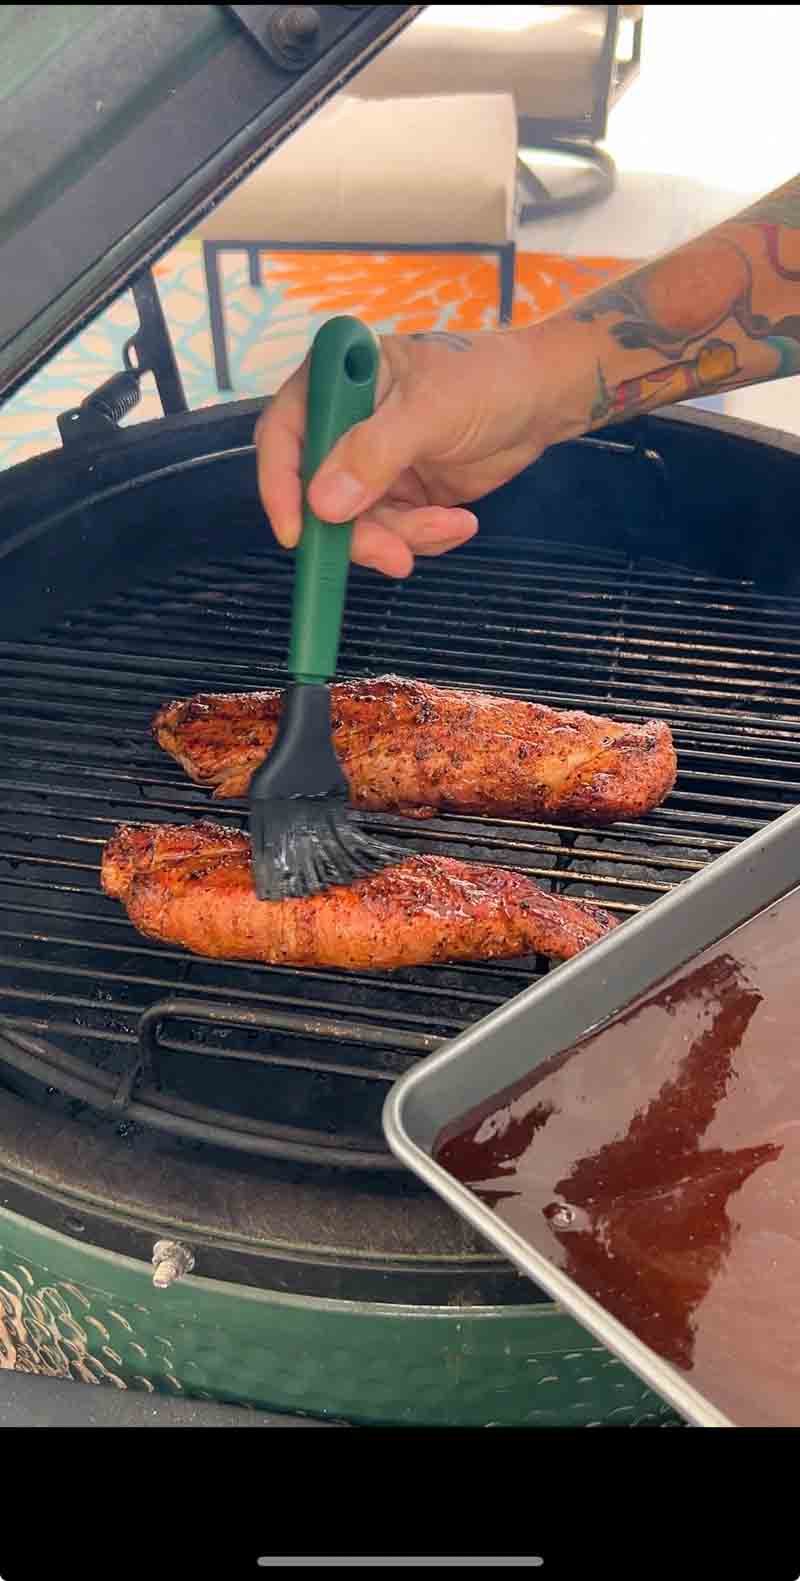
Now that the meat is coated in that vibrant Pow Pow sauce, place the glazed pork tenderloin pieces onto the indirect side of the Big Green Egg. This protected zone is essential at this stage. Since most Asian-style glazes have a high sugar content, placing them directly over the hot coals would cause them to burn and turn bitter before the meat is finished.
Layering the Flavor
Don’t just “set it and forget it.” While the pork finishes its climb to the final temperature, continue to glaze the meat with your reserved sauce every few minutes. By applying multiple thin layers of glaze in the indirect heat, you are essentially “painting” on flavor. Each layer dehydrates slightly in the convection heat of the Egg, creating a thick, tacky, and professional-looking finish that clings to the pork.
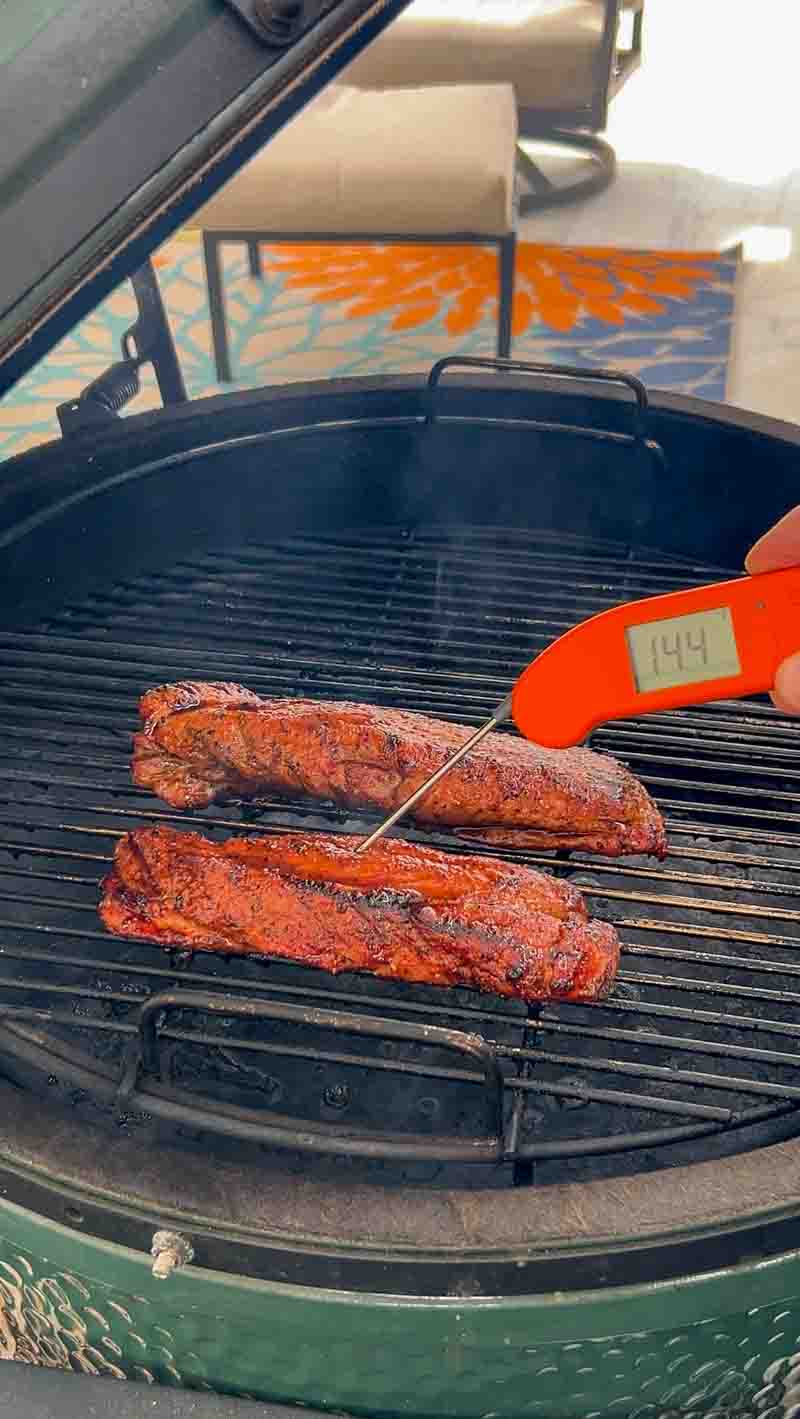
Pulling at the Peak
Keep a close eye on your instant-read thermometer. As soon as the thickest part of the tenderloin hits 140°F, it is time to pull them off. The sugars in the glaze should be bubbling and slightly caramelized around the edges, and the pork will have a beautiful, lacquered appearance.
The indirect heat ensures that while the outside is getting that perfect “sticky” texture, the inside of the Kurobuta pork remains incredibly tender and hasn’t lost a drop of moisture.
Step 7: Pull, Rest, and Slice
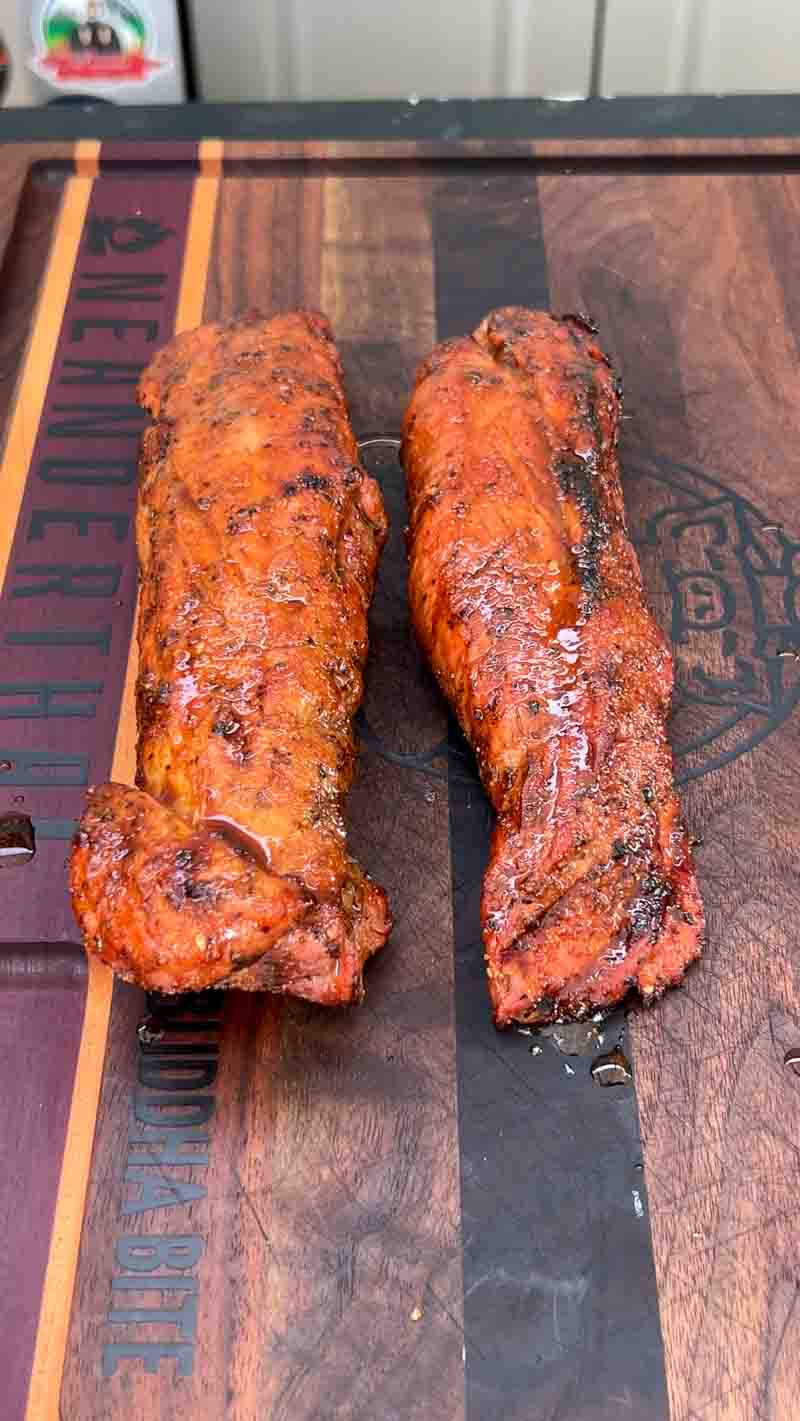
When your instant-read thermometer hits that 140°F mark, the hard work is done. It is time to pull the grilled Asian pork tenderloin off the Big Green Egg. The glaze should be shimmering, and the aroma of the charred ginger and garlic will be incredible.
The Power of the Rest
Resist the urge to slice into the meat immediately. Place the tenderloins on a clean cutting board and let them rest for at least 10 minutes. This is the most critical part of the entire process for three reasons:
- Carryover Cooking: The internal temperature will continue to rise about 5 degrees, landing you at the perfect, food-safe 145°F.
- Moisture Retention: During the cook, the muscle fibers tighten and push juices toward the center. Resting allows those fibers to relax and reabsorb the juices.
- Glaze Setting: A brief rest allows the glaze to cool slightly and “bond” to the crust, ensuring it stays on the meat rather than wiping off on your knife.
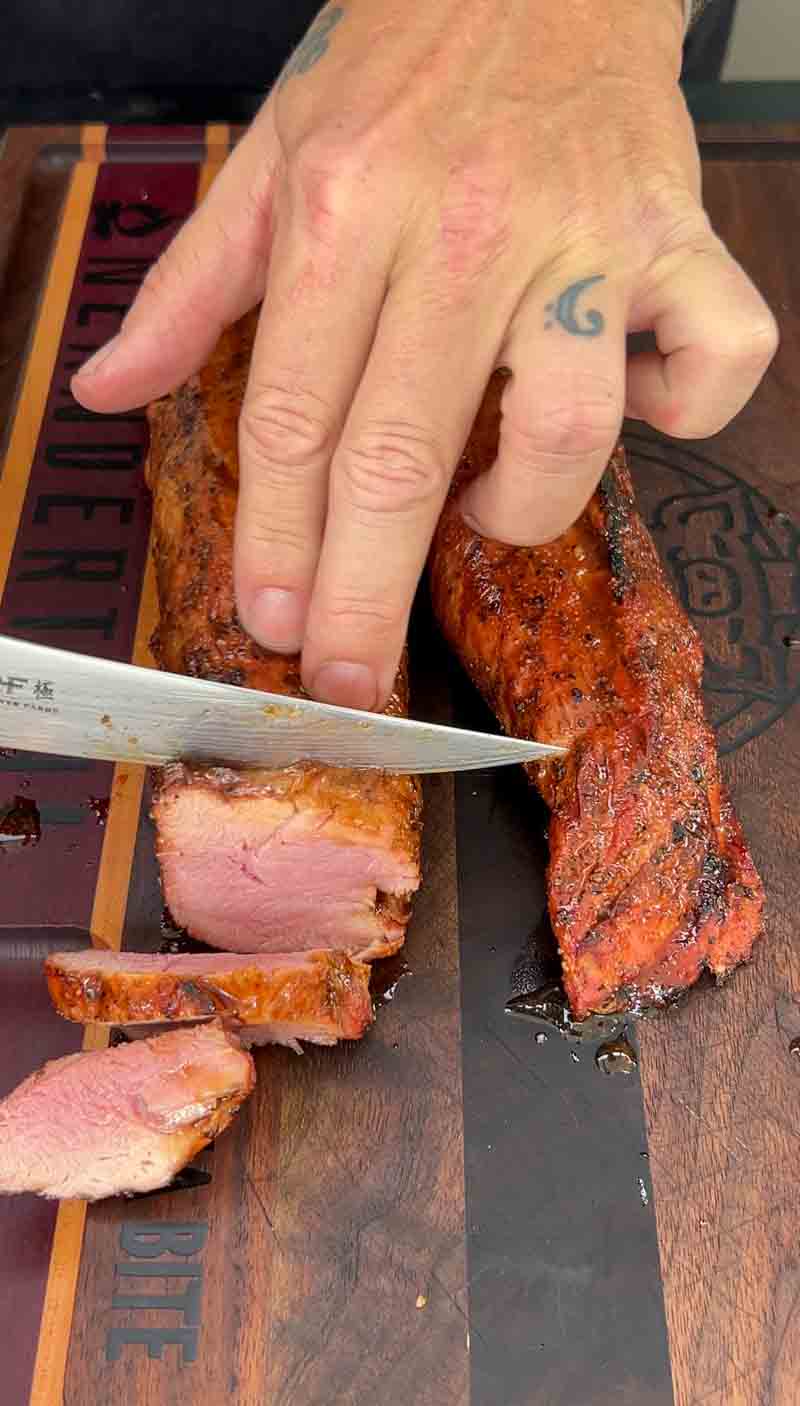
The Perfect Slice
When you are ready to serve, use a sharp carving knife or a long chef’s knife. Slice the tenderloin into medallions about 1/2 inch to 3/4 inch thick. Because of the 3-1-1-style flipping and the 2-zone finish, you should see a beautiful, uniform pink color from edge to edge.
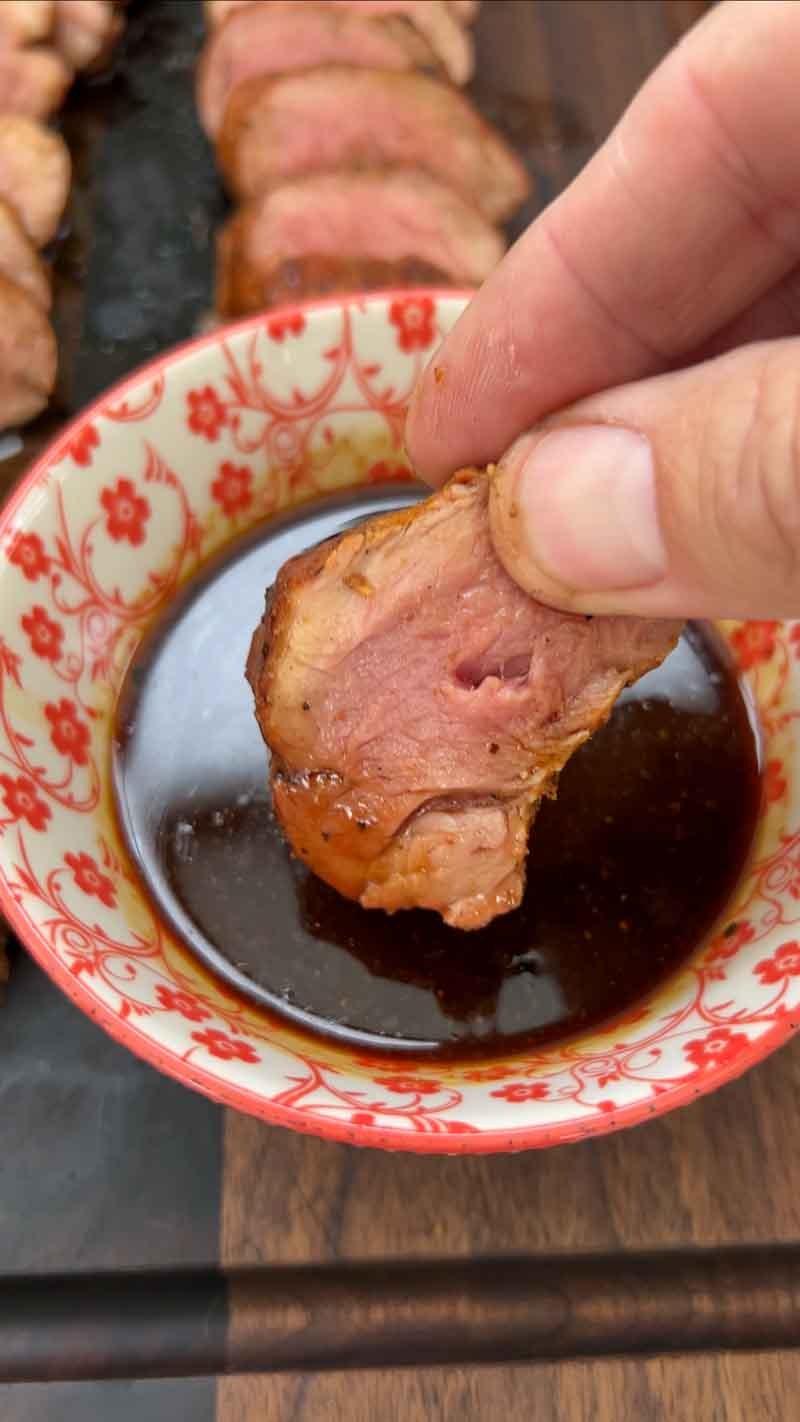
Final Presentation
Arrange the medallions on a platter, overlapping them slightly to show off that juicy interior and the lacquered bark. Pour any juices that accumulated on the cutting board back over the meat. For a final touch of “Buddha” flair, garnish with a sprinkle of toasted sesame seeds and some thinly sliced green onions.
This Snake River Farms Kurobuta pork, paired with the kick of the FYR hot sauce and the sweetness of the Pow Pow glaze, is a flavor profile that will have your guests asking for the recipe before they even finish their first plate.
Big Green Egg Grilled Asian Pork Tenderloin
Ingredients
- 1 pkg Pork Tenderloin (about 2-pounds)
- 2 Tsp Hot sauce, used for binder
- 1 Tbsp Lane's BBQ Qnami Rub
- 1/2 cup Lane's BBQ Pow Pow Sauce
Instructions
- Preheat your Big Green Egg to 400°F setup for 2-zone grilling using your EGGSpander base with a halfmoon ceramic insert.
- Remove the extra fat and silver skin from the pork tenderloin.
- Use the hot sauce as a binder and rub it all over the pork tenderloin.
- Apply the Lane's BBQ Qnami rub all over the pork tenderloin.
- Place the seasoned pork tenderloins on the direct side of the grill and cook for 4-minutes then flip. Keep doing this until the internal temperature measures 120°F.
- Pull the pork tenderloin off the direct side and let rest on a clean baking sheet. While the pork is resting, pour the Lane's BBQ Pow Pow sauce all over the pork tenderloin.
- Place the glazed pork tenderloin on the indirect side of the Big Green Egg and let cook, continuing to glaze with reserved sauce, until the internal temperature measures 145°F.
- Pull the pork tenderloin off the Big Green Egg and rest on a cutting board for 10 minutes before slicing and serving with the reserved sauce for dipping. Enjoy!
Nutrition information is automatically calculated, so should only be used as an approximation.