This post contains affiliate links. Please see our disclosure policy.
Welcome back and happy New Year! To kick things off, I am tackling a topic that lands in my inbox more than almost any other: the secret to achieving a steakhouse-quality finish on a thick-cut steak. Specifically, I am showing you exactly how to grill the perfect Filet Mignon on the Big Green Egg.
While the filet is prized for its incredible tenderness, its lack of fat makes it easy to overcook if you aren’t careful. Whether you are splurging on a high-end Wagyu cut or picking up a beautiful choice selection from your local butcher, the method is the most important ingredient.
In this guide, we are moving away from guesswork and focusing on a precise, two-zone cooking technique. This ensures a mouthwatering, crusty sear on the outside while maintaining a perfect edge-to-edge pink interior. By leveraging the superior heat retention of the Big Green Egg, you can master this lean cut with total confidence.
So, sit back, grab a glass of your favorite Cabernet Sauvignon, and let’s dive into the ultimate guide for grilling a world-class filet mignon.
Table of Contents
Get My NEW Book
The Ultimate Big Green Egg Cookbook

Why the Big Green Egg is Perfect for Filet Mignon
Cooking a thick filet requires two different types of heat, and the Big Green Egg is uniquely designed to handle both:
- Radiant Heat: The ceramic walls hold onto heat, acting like a high-end convection oven to cook the steak gently.
- Direct Sear: When you open up the vents, the Egg can reach the scorching temperatures needed to create a Maillard reaction (that delicious crust) in seconds.
The Secret: Two-Zone Grilling
To get consistent results every time, we utilize two-zone grilling. This means we create a “hot side” for searing and a “cool side” for finishing the steak to the exact internal temperature. This prevents the outside from burning before the middle is done, giving you that buttery, melt-in-your-mouth texture that makes filet mignon the king of steaks.
Step 1: Selecting the Right Cut
For this cook, I am using 6oz American Wagyu filets from Snake River Farms. If you aren’t familiar with the term, “American Wagyu” refers to a crossbreed between Japanese Wagyu bulls and traditional American Angus cows. This combination gives you the best of both worlds: the intense, buttery marbling of Japanese beef and the robust, beefy flavor that American Angus is known for.
Specifically, these are Gold Grade filets, which measure a 9 or higher on the BMS (Beef Marbling Scale). To put that in perspective, a standard USDA Prime steak usually lands around a 4 or 5.
Choosing the Best Filet at Your Local Market
If you aren’t using Wagyu, don’t worry. This technique works for any filet mignon. When you are at your local butcher or grocery store, look for these three things to ensure you get the best possible result:
- Thickness is Key: Look for steaks that are at least 1.5 to 2 inches thick. Thinner steaks cook too quickly, making it nearly impossible to get a great sear without overcooking the center.
- Check the Grade: Aim for USDA Prime if your budget allows, as it will have the most intramuscular fat (marbling). If you choose Choice, look for the specific individual steak with the most white flecks of fat running through the red meat.
- The “Feel” Test: The meat should be firm to the touch and a bright, vibrant red. Avoid any steaks that look “wet” in the package or have a dull, greyish hue.
Buddha Note: Keep in mind that a leaner, store-bought filet will cook slightly faster than a heavily marbled Wagyu steak. Fat acts as an insulator, so if your steak is lean, start checking your internal temperatures a few minutes early.
Step 2: Tempering and Surface Prep
Before the first spark hits the charcoal, you need to prepare the meat. Taking a steak straight from the cold refrigerator to a scorching hot grill is a recipe for an uneven cook.
The One-Hour Rule
Remove the filets from their packaging about one hour before you plan to start cooking. This process, known as tempering, allows the internal temperature of the meat to rise slightly.
Why this matters: A tempered steak cooks more evenly and efficiently. If the center is ice-cold when it hits the heat, the exterior will often become overcooked or charred before the middle reaches a perfect medium-rare.
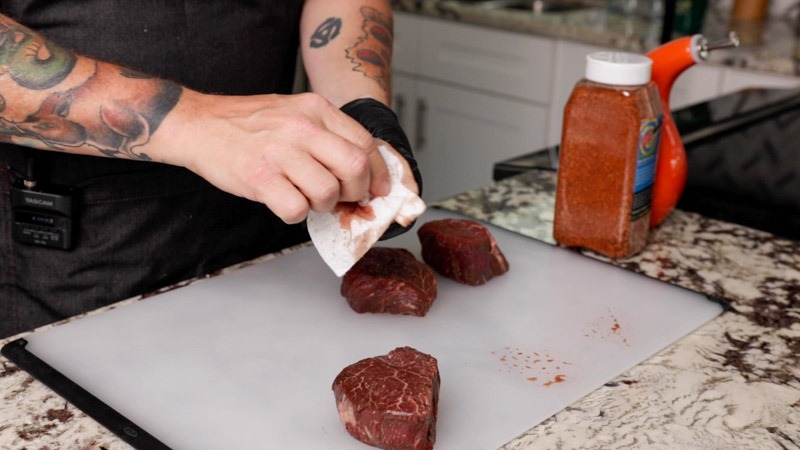
Dry the Surface
As soon as you take the filets out of the packaging, pat them thoroughly dry with a paper towel on all sides. * The Science of the Sear: Moisture is the enemy of a good crust. If there is water on the surface of the meat, the grill’s energy has to work on evaporating that liquid before it can start the Maillard reaction (the browning process).
The Result: A bone-dry steak surface ensures you get that world-class, mahogany-colored crust in a fraction of the time, keeping the interior tender and juicy.
Step 3: The Binder and Seasoning
Once your filets are dry, it is time to prep the surface so your seasoning stays exactly where it belongs.
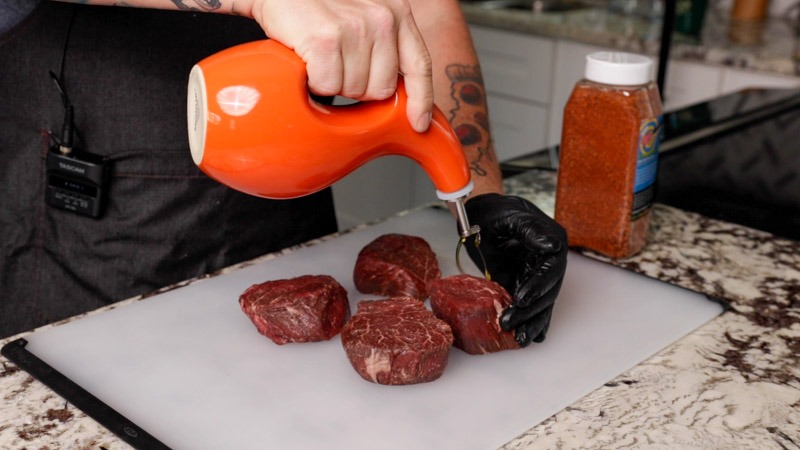
Apply a Binder
Apply a small amount of olive oil to each filet. You don’t want the meat swimming in oil; you just need a light coating to act as a “binder.” This helps the seasoning stick to the meat and aids in heat transfer once the steak touches the grill grates.
- Alternatives: If you don’t want to use olive oil, a very thin coat of Worcestershire sauce or even a light brush of melted tallow works beautifully to add an extra layer of savory “umami” flavor.
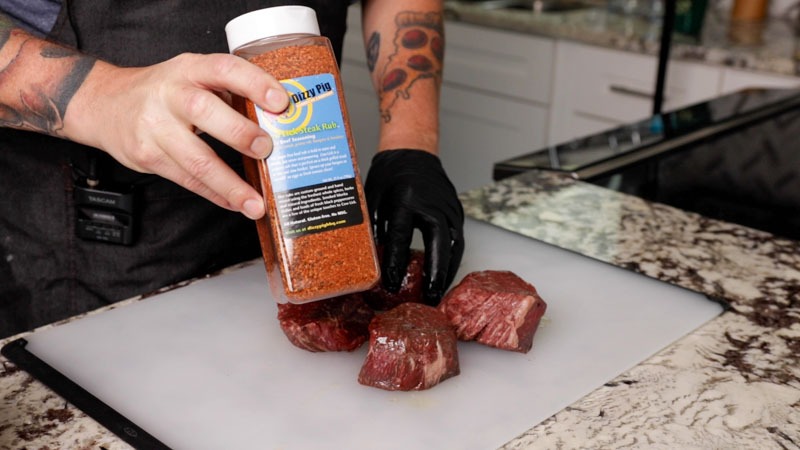
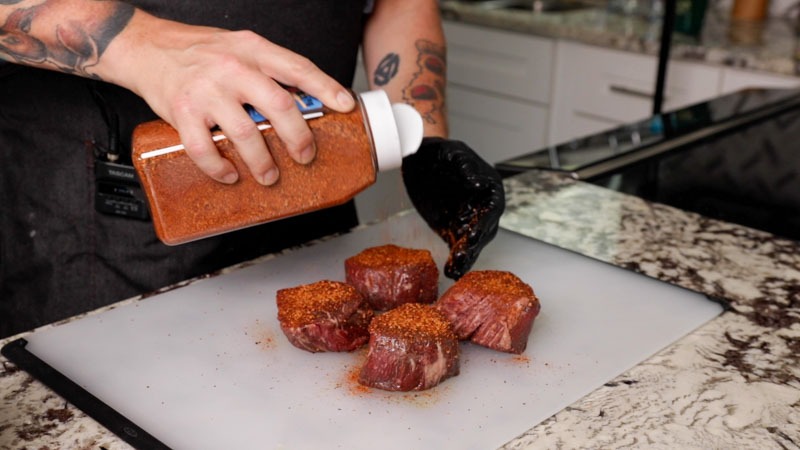
Choosing Your Seasoning
For these filets, I am using Dizzy Pig Seasoning’s Cow Lick rub. It is a fantastic blend that isn’t too sweet, allowing it to withstand high heat while creating a deep, savory crust that complements the richness of the beef.
If you don’t have Cow Lick on hand, you have plenty of great options:
- The Purist Approach: Use a simple blend of Kosher salt and freshly cracked black pepper. This allows the natural flavor of the beef (especially if you are using Wagyu) to be the absolute star.
- The DIY Steakhouse Rub: If you want to mix your own, combine:
- 2 parts Kosher Salt
- 2 parts Coarse Black Pepper
- 1 part Garlic Powder
- 1/2 part Onion Powder
- The Herb Infusion: Adding a little dried thyme or rosemary to your salt and pepper mix can add a sophisticated aroma that pairs perfectly with a glass of Cabernet.
Regardless of which seasoning you choose, be generous. These are thick steaks, and you want to make sure the sides are seasoned just as well as the top and bottom.
Step 4: Setting Up Your Two-Zone Environment
While your filets are tempering and the seasoning is working its way into the meat, it is time to prep the Big Green Egg. For thick steaks, we utilize two-zone grilling.
What is Two-Zone Grilling?
Quite simply, it is the practice of dividing your grill into a “Hot Side” for direct searing and a “Cool Side” for gentle, indirect cooking. This gives you total control, allowing you to get that perfect crust without charring the outside of your steak into a hockey puck while the middle stays raw.
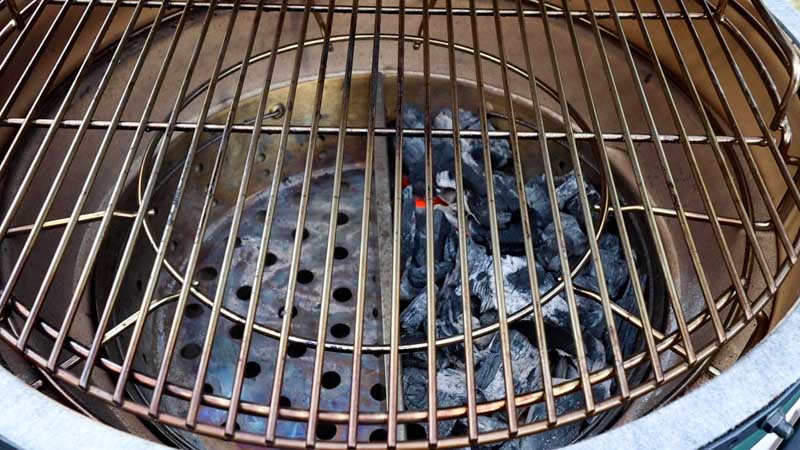
How to Configure Your Egg
There are a few ways to achieve this setup depending on your gear:
- The EGGspander System: This is my preferred method. Use the EGGspander rack with a ceramic half-moon convEGGtor stone on one side. The side with the stone is your “cool” indirect zone, and the open side is your “hot” direct zone.
- The Fire Bowl / Kick Ash Basket System: If you use a Kick Ash Basket with a divider, you can bank all your charcoal to one side of the Egg. This creates a scorching hot direct zone over the coals and a secondary indirect zone on the empty side.
- The Classic Way: If you don’t have the fancy inserts, you can simply stack your lump charcoal in a sloped pile so it is high on one side and shallow on the other, though using a physical barrier like a half-stone provides the most consistent temperature separation.
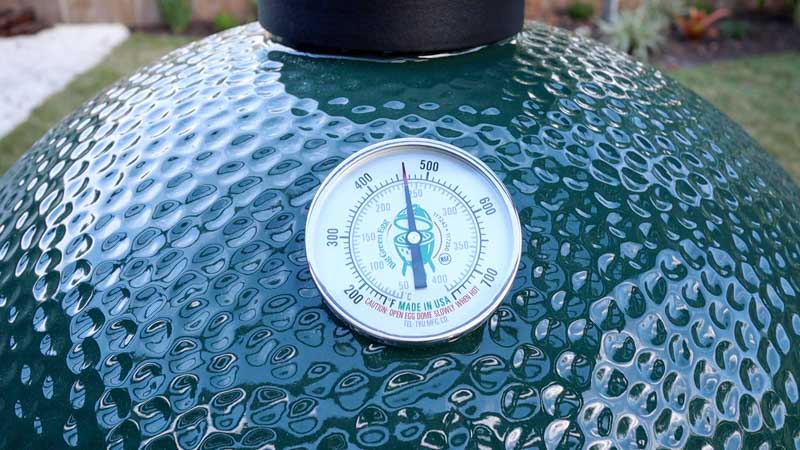
Target Temperature
You are looking to stabilize your Big Green Egg at 400°F to 450°F. This range is the “sweet spot” because it is hot enough to sear the meat effectively but not so hot that you lose control of the internal temperature during the indirect phase.
Step 5: The Sear
With your Big Green Egg stabilized and the grates preheated, it is time for the most rewarding part of the process.
Prep the Surface
Before the meat touches the grill, wipe the cooking grate with a small amount of oil. You can use a paper towel dipped in vegetable oil or grapeseed oil held with long tongs. This ensures the steak releases easily and helps produce those clean, professional-looking grill marks.
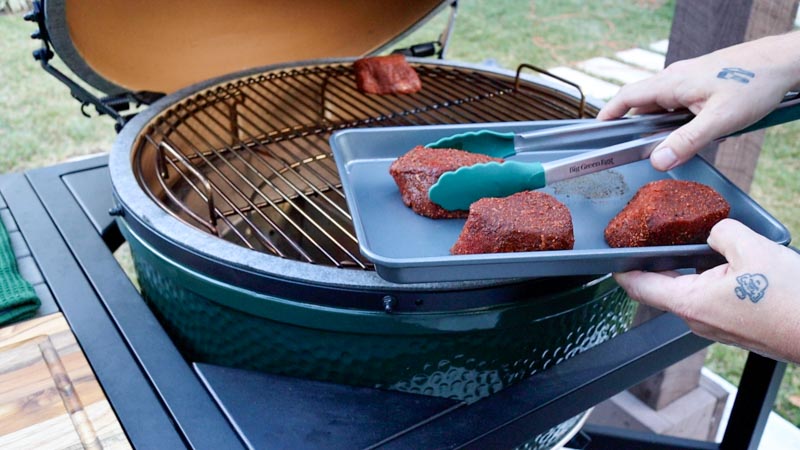
Commit to the Heat
Place your seasoned filets onto the direct side of the grill (the side with the open coals). You should hear an immediate, aggressive sizzle.
- The Timing: For a thick-cut filet, you are looking for about 2 to 3 minutes per side.
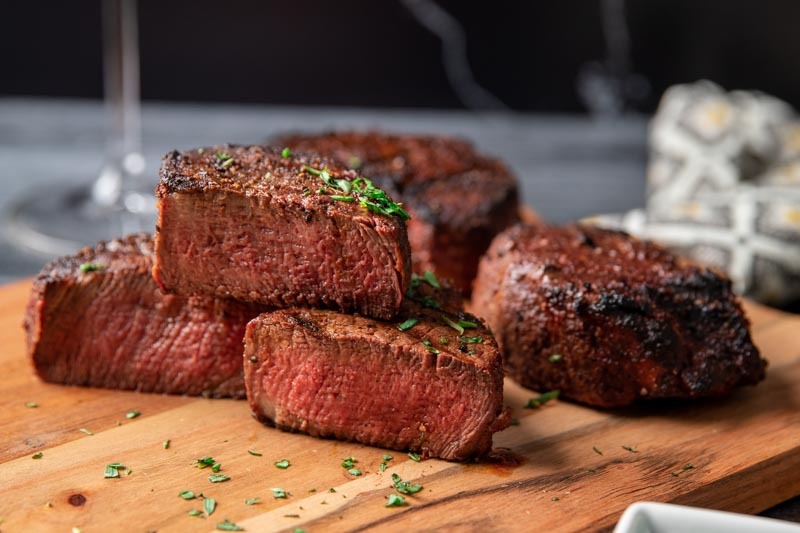
- The Goal: At this stage, we aren’t worried about the internal temperature yet. We are strictly focused on the “crust.” You want a deep, mahogany color that indicates the Maillard reaction has worked its magic on the salt, pepper, and beef fats.
- Don’t Crowd the Grate: Leave enough space between the steaks so that the heat can circulate around the sides, ensuring an even sear.
Pro Tip: Keep the dome closed as much as possible, even during the searing phase. The Big Green Egg is designed to cook from all sides using radiant heat. Opening the lid too often causes temperature spikes and can lead to flare-ups from the dripping Wagyu fat.

Step 6: The Slide and Slow Finish
Once you have achieved that perfect, mahogany crust, it is time to transition from searing to roasting. This is where the magic of the “Two-Zone” method really pays off.
Cooling the Jets
Move the filets over to the indirect side of the grill (over the ceramic insert). Immediately shut your vents down all the way.
- If you are finished cooking: Shutting the vents completely allows the residual heat of the ceramic to gently finish the steaks while starting the process of extinguishing the charcoal.
- If you have more to cook: If you are planning to grill sides or a second round of meat, shut the vents down about 90%. This kills the intense heat while keeping the coals alive.
The Final Roast
Closing the vents drops the temperature and stops the exterior from burning, allowing the heat to penetrate the center of the steak gently. Let the filets roast for another 5 to 10 minutes.
Targeting the Perfect Internal Temp
Don’t guess at this stage. Use a high-quality instant-read thermometer to check the center of the thickest steak.
| Desired Doneness | Pull Temperature | Final Temp (After Rest) |
| Rare | 120°F | 125°F |
| Medium-Rare | 125°F to 130°F | 135°F |
| Medium | 135°F to 140°F | 145°F |
Buddha Note: The Pull Point
For the perfect medium-rare, pull the steaks when they hit 130°F. Remember that carryover cooking will cause the temperature to rise another 5 degrees while the meat rests.

Step 7: The Rest
The hardest part of the entire cook is right now: Waiting. Remove the filets from the Big Green Egg and place them on a warm plate or a cutting board. Let them rest for at least 10 minutes. This allows the muscle fibers to relax and the juices to redistribute throughout the meat. If you cut into it too early, all that delicious moisture will end up on the board instead of in your mouth.

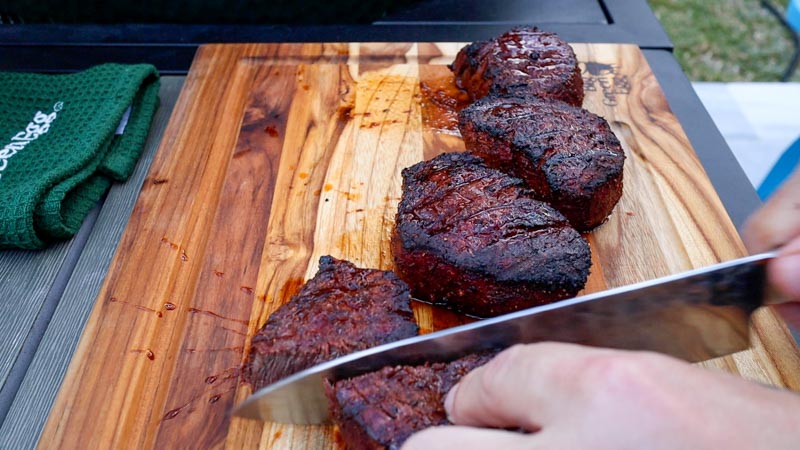
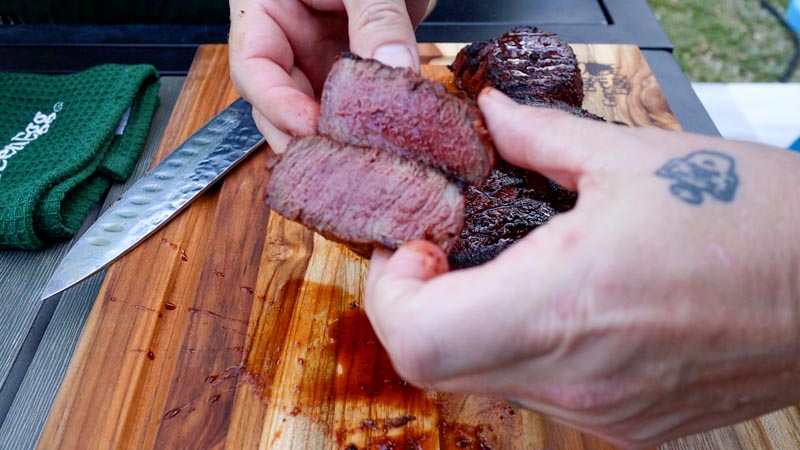
The Final Reveal: Resting and Serving
The hardest part of the entire process is the ten minutes after you pull the steaks off the grill. As tempting as it is to slice into that crust immediately, patience is your best friend.
When you remove the filets from the Big Green Egg, place them on a warm plate or a cutting board and let them rest for at least 10 minutes. This allows the muscle fibers to relax and the juices to redistribute. If you cut into the meat too soon, all that moisture, and the buttery fat of the Wagyu, will end up on the board instead of in your mouth.
The Perfect Pairing: Cabernet Sauvignon
To do justice to a steak this rich, you need a wine that can stand up to the bold flavors and high fat content. A Cabernet Sauvignon is the classic choice for a reason.
- Why it works: The high tannins in a Cabernet act as a palate cleanser, cutting through the intense richness of the Wagyu. The dark fruit notes of blackberry and plum, along with the oak-aged hints of vanilla, complement the smoky crust from the Big Green Egg perfectly.
- Selection Tip: Look for a bottle from Napa Valley or Paso Robles for a bolder, fruit-forward profile, or a Bordeaux if you prefer something with more earthy and mineral undertones.
Final Thoughts
Grilling the perfect Filet Mignon isn’t about luck; it’s about mastering the heat of the Big Green Egg and respecting the meat. By using the two-zone method, tempering your steaks, and letting them rest, you can turn a high-end cut of beef into a dining experience that rivals any five-star steakhouse.
Whether it is a New Year’s celebration or a quiet weekend dinner, this is the technique that will make you the hero of the backyard.
Enjoy your steak, and happy grilling!


How to Grill the Perfect Filet Mignon on the Big Green Egg
Ingredients
- 2 Filet Mignons, 6 oz each (preferably 1.5 to 2 inches thick)
- 1 tbsp Extra Virgin Olive Oil
- 2 tbsp Dizzy Pig Cow Lick seasoning, or a 2:1 ratio of Kosher salt and coarse black pepper
Instructions
- Tempering: Pat the filets dry with paper towels and let them sit at room temperature for one hour to ensure an even cook.
- Seasoning: Apply a light slather of olive oil as a binder and coat all sides generously with your preferred steak rub.
- BGE Setup: Stabilize your Big Green Egg at 400°F to 450°F configured for two-zone grilling with a direct and indirect side.
- The Sear: Place the filets on the direct heat side for 2 to 3 minutes per side until a deep, mahogany crust has formed.
- The Roast: Move the steaks to the indirect side and close the vents 90-100% to roast for 5 to 10 minutes until the internal temperature hits 130°F.
- The Rest: Remove the filets from the grill and let them rest on a warm plate for at least 10 minutes before serving.
Nutrition information is automatically calculated, so should only be used as an approximation.