
This post contains affiliate links. Please see our disclosure policy.
If you’ve found your way here, you’re ready to tackle the “Everest” of backyard barbecue: the Whole Packer Brisket. There’s no sugar-coating it, smoking a brisket is the ultimate test of a pitmaster’s skill. It’s a cook that demands respect, a fair amount of gear, and an unwavering commitment to time and patience. But if you give it the focus it deserves, you won’t just be serving dinner; you’ll be serving a legendary Central Texas-style masterpiece right from your own backyard.
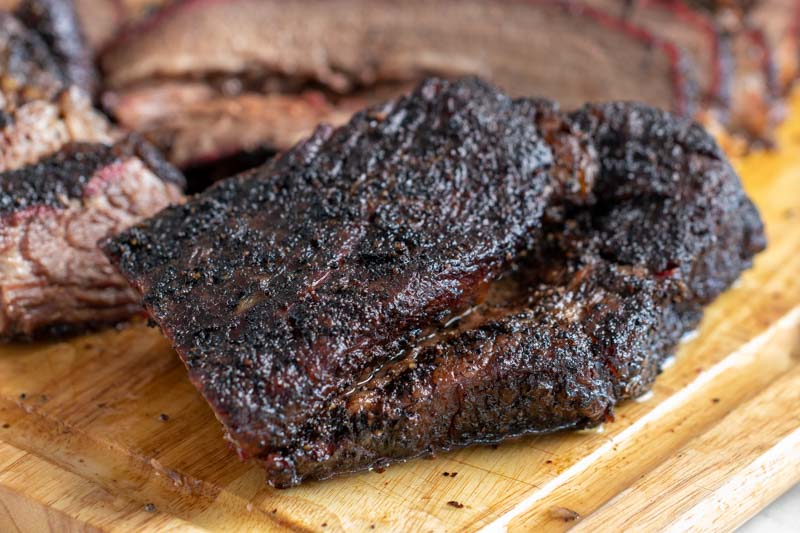
To win the game, you have to understand the anatomy. A “whole packer” isn’t just one piece of meat; it’s two distinct muscles working together. You have the Flat, which is lean, uniform, and produces those iconic, perfect slices. Sitting on top of that is the Point, a marbleized, bulging mound of fat and muscle that provides those decadent, “melt-in-your-mouth” burnt ends. While you can find brisket flats at any grocery store, we’re after the full experience… the whole packer is the only way to achieve true BBQ greatness.
What makes this recipe the gold standard is its simplicity. We aren’t hiding behind heavy sauces or complex injections. This is Central Texas-style BBQ, which means we rely on the “Holy Trinity” of Texas brisket: a coarse salt-and-pepper rub, the clean smoke of Post Oak, and the steady, humid environment of the Big Green Egg.
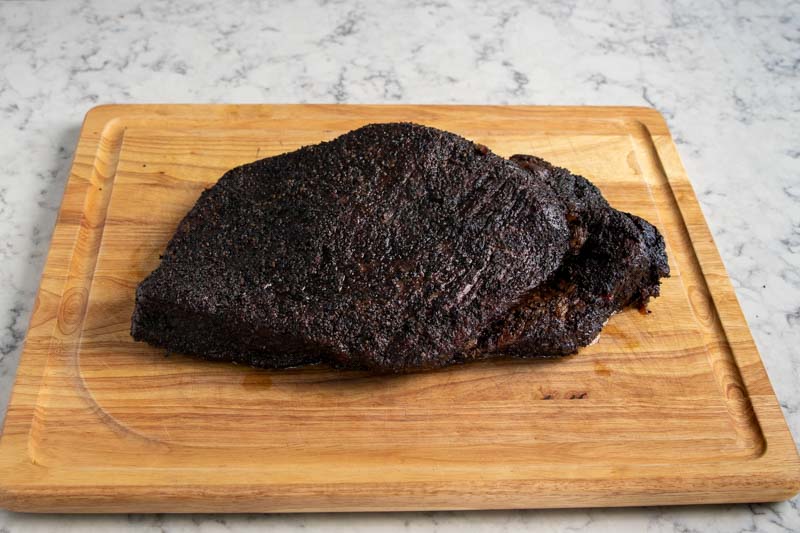
After a 10-to-14-hour journey in the ceramic dome, you will be rewarded with a jiggling, bark-covered brisket that pulls apart with the slightest tug. It is, quite simply, the best BBQ you will ever cook. So, let’s get that fire started. Pop the cap off an ice-cold Shiner Bock, find your favorite lawn chair, and let’s master the art of the Big Green Egg Brisket.
Table of Contents
- Trimming The Brisket
- Using a Binder for the Seasoning
- Seasoning the Brisket
- Setup and Lighting the Big Green Egg
- Smoking the brisket
- Spritzing the brisket
- Managing the Stall
- Wrapping the brisket
- Finishing the brisket – When is it Done?!
- Troubleshooting the Flat
- Resting the brisket
- Slicing the brisket
- FAQ
- How to Smoke a Brisket on the Big Green Egg Recipe
Get My NEW Book
The Ultimate Big Green Egg Cookbook

The Brisket Blueprint
The Rest: Why a cooler is your most important tool for a tender finish.
The Trim: How to shape your brisket like a pro for maximum airflow.
The Rub: Mastering the 50/50 “Dalmatian” blend.
The Fire: Dialing in the Egg for a 225°F-250°F “low and slow” marathon.
The Wrap: When to use butcher paper to power through the stall.
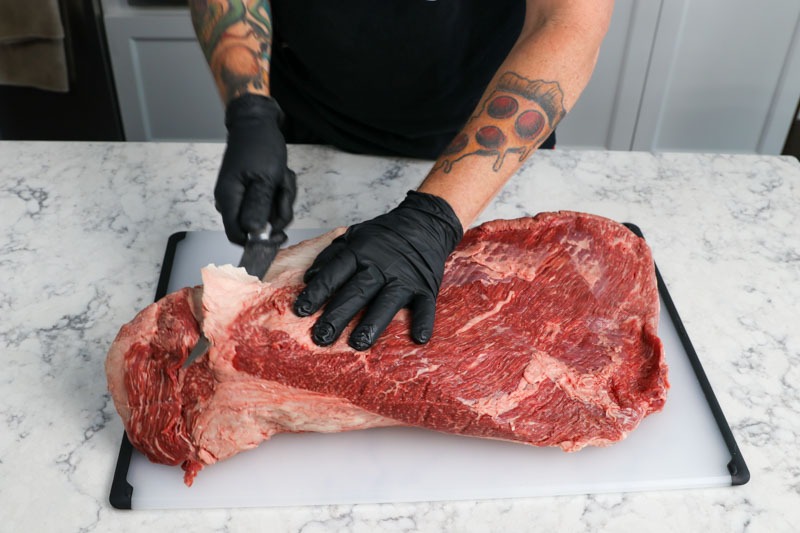
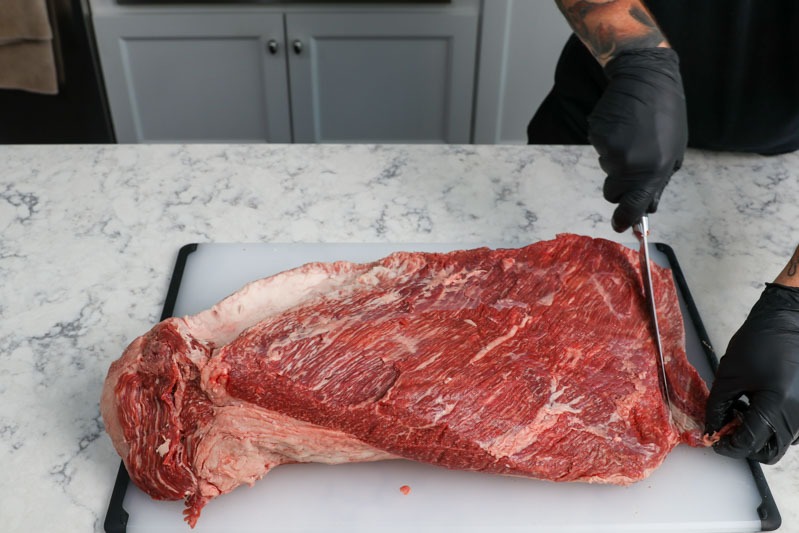
Trimming The Brisket
Trimming a brisket can be the most intimidating part of the whole process, but think of it like a sculptor prepping a masterpiece, you’re just clearing away the “noise” to let that beautiful beef shine. I always start with a cold brisket right out of the fridge, as that fat is much easier to slice when it’s firm.
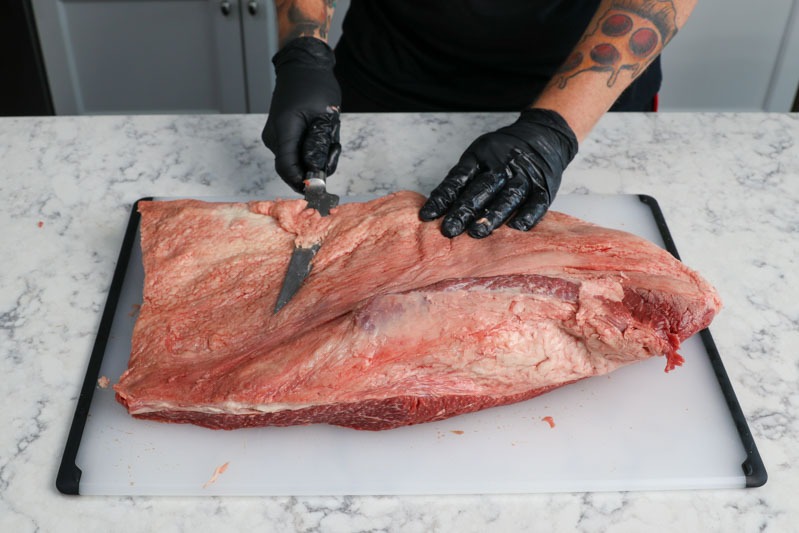
My goal is to trim the fat cap down to a uniform quarter-inch; this is the sweet spot that protects the meat while still allowing it to render beautifully into the bark. Don’t forget to carve out that large, hard chunk of “deckle” fat between the point and the flat, as it’ll never fully break down during the cook. Finally, I round off any sharp corners and thin edges to create a smooth, aerodynamic shape. This ensures the smoke flows evenly over the meat, preventing those thin ends from getting scorched while the rest of the packer reaches perfection.

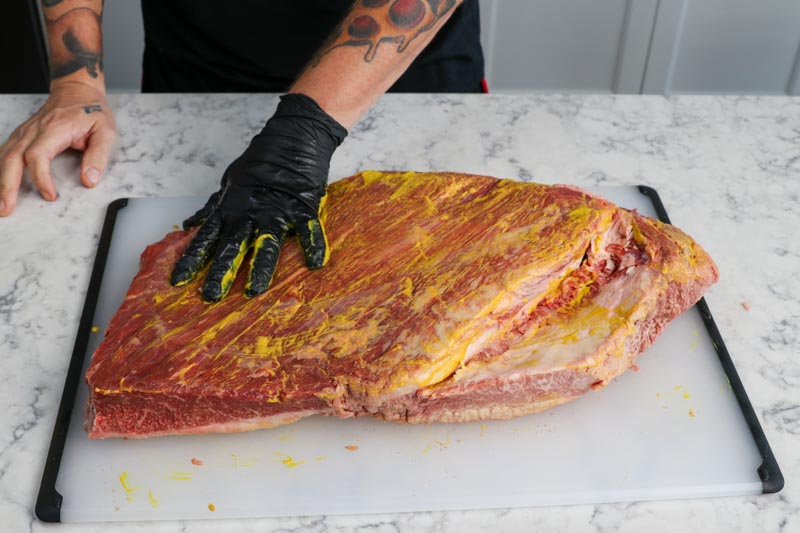
Using a Binder for the Seasoning
When it comes to using a binder, I’m a big believer in keeping things simple usually just a thin coat of yellow mustard or even a light splash of Worcestershire sauce. Don’t worry, you won’t actually taste the mustard once the cook is done; its only job is to act as a “glue” to ensure that heavy layer of rub stays exactly where you put it. While some guys swear by a dry rub on naked meat, I find that a binder helps build a more consistent, rugged bark that really locks in those juices over a long 12-hour smoke.

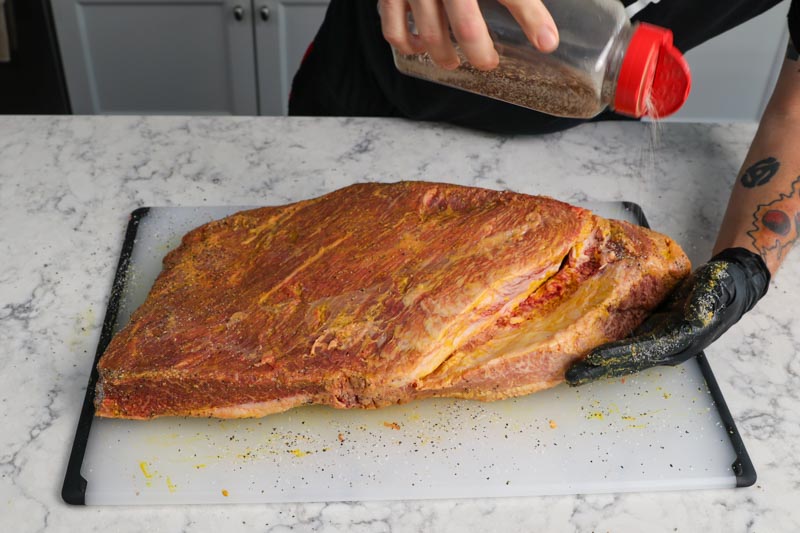
Seasoning the Brisket
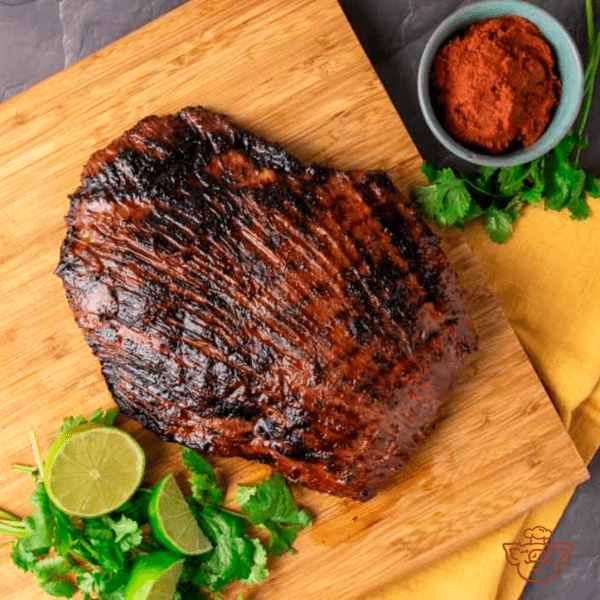
When it comes to seasoning, we’re going with that classic Texas-style heavy hit of salt and pepper, but with a little extra Buddha flair. For a big packer brisket, don’t be shy, you want a thick, even coating of the rub to help build that legendary crust.
I start by shaking a generous layer over the entire brisket, making sure to get the sides and those hard-to-reach nooks and crannies. Give it a light pat (don’t rub!) to help it stick to your binder. Since we’re using coarse 16-mesh black pepper and kosher salt, it’s going to create a beautiful, pebbly texture that catches the smoke and eventually transforms into that dark, mahogany bark we’re after. Let the seasoned meat sit for about 30 minutes while the Big Green Egg comes up to temp; this lets the salt start working its way into the meat, ensuring every slice is seasoned to perfection from the first bite to the last.

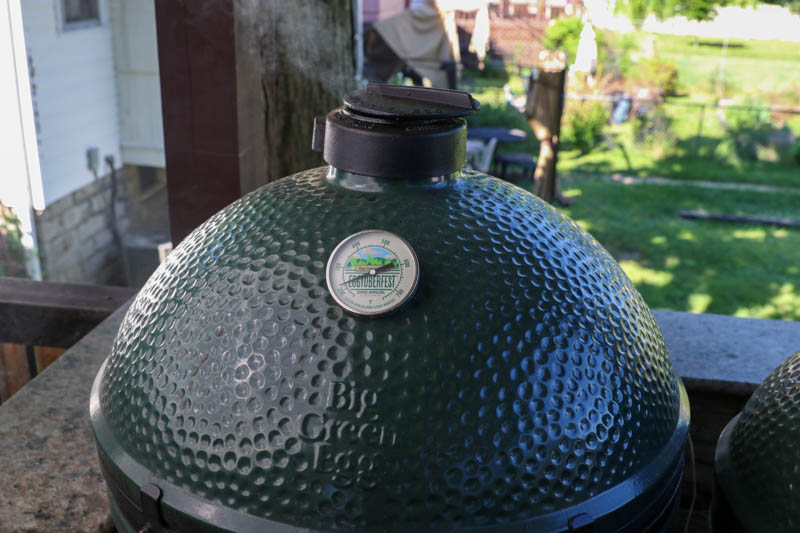
Setup and Lighting the Big Green Egg
To get your Egg ready for the long haul, start by filling the firebowl with a base layer of high-quality lump charcoal and nesting 4–5 chunks of oak smoking wood right on top. Cover those chunks with more lump charcoal and light your fire; this “layering” technique ensures a steady, clean smoke that lasts for the entire cook.
Why use oak for your smoking wood? Oak is widely considered the “gold standard” for brisket because it provides a clean, medium-bodied smoke that stands up to the rich, beefy flavor of a packer without overpowering it. Unlike fruitwoods that can be a bit too subtle or mesquite which can turn bitter over a long cook, oak delivers that steady, iconic Texas profile that helps develop a deep, dark bark and a classic smoke ring.
If you need a refresher on the best way to light your coals, check out my guide on How to set up your Big Green Egg for Low and Slow Cooking. Once your fire is established, preheat the Egg to 250°F and drop in your ConvEGGtor (or your half-moon stones if you’re using the EGGspander). Be patient and wait for that heavy white smoke to transition into a thin, beautiful light blue… that’s the signal that you’re ready to put the beef on.

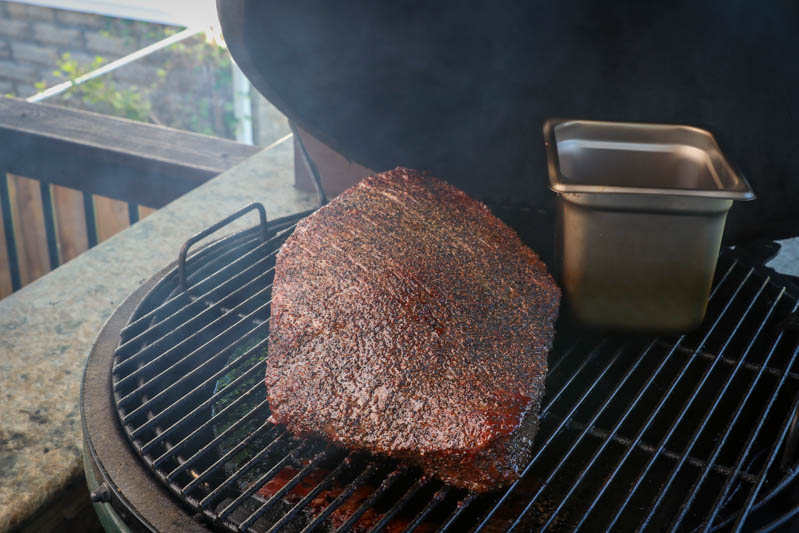
Smoking the brisket
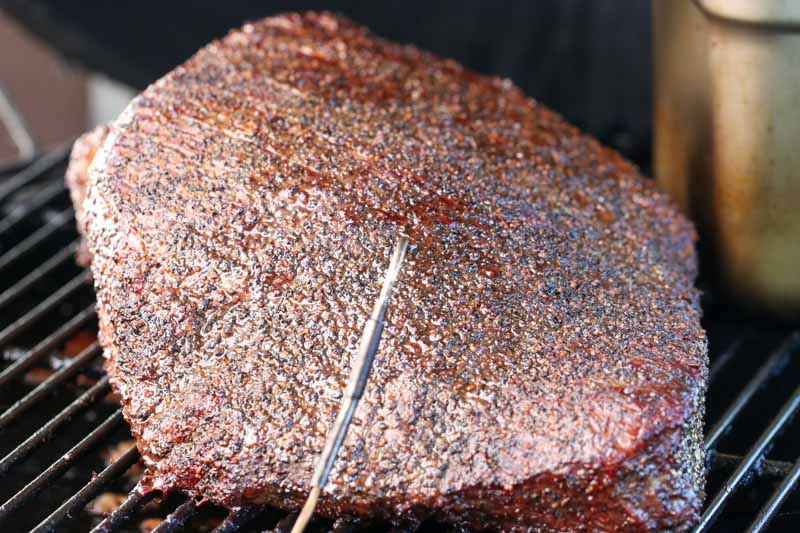
Once the temperature is stable at 250°F and the smoke is clean, place your brisket inside. I like do 2 things when smoking a brisket on my Big Green Egg: First, I place a small lump of smoking wood on the grate and place the brisket on top of that so the brisket bows. This allows the fat and moisture to run off the surface of the brisket preserving the bark. I got this tip from Henry Soo at Slap Yo’ Daddy BBQ. Second, I use a 1/4 steam table pan filled with warm water to keep the environment nice and humid for this long cook.
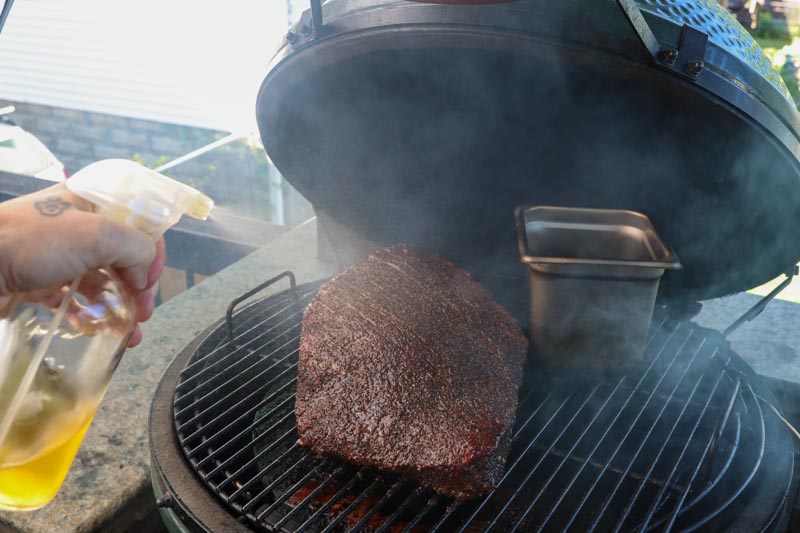
Spritzing the brisket
After the first 3 hours of the smoke, start spritzing the brisket every 45 minutes whenever you see dry spots forming. My go-to blend for this is 3 parts water to 1 part apple cider vinegar, with a healthy dash of Worcestershire and a splash of your favorite hot sauce for a little extra kick.
I keep a close eye on the edges and any spots that look like they’re starting to get “ashy.” That hit of moisture keeps the surface cool and tacky, which is exactly what you want for the smoke to keep sticking and the bark to keep building. The vinegar and Worcestershire add a great layer of savory complexity, while the water ensures the meat stays hydrated without overpowering the natural beef flavor. Just a quick mist is all it takes to keep things moving in the right direction!
Managing the Stall
Right around that 160°F to 170°F mark, you’re going to hit “The Stall.” This is where the evaporation of moisture from the surface of the meat cools the brisket down as fast as the Egg is heating it up, causing the internal temperature to plateau for hours. It can be a little nerve-wracking if you’re on a schedule, but don’t panic it’s a totally natural part of the process.
At this point, you have two choices: you can power through it for the ultimate crunchy bark, or you can use the “Texas Crutch.” Wrapping the brisket in peach butcher paper at this stage helps trap just enough heat to push through the stall faster while still allowing the meat to breathe, ensuring your bark stays intact without getting soggy. Whatever you do, resist the urge to crank up the heat; patience is the secret ingredient to a world-class brisket.
When the bark is set and the stall has started to break (typically 5 to 6 hours into the cook with an internal temperature around 165°F), it’s time to pull the brisket and wrap it. I’m a huge fan of using pink butcher paper for this step because it’s porous enough to let the meat breathe while still trapping enough heat and rendered fat to keep the brisket incredibly moist.
Wrapping the brisket
When you’re ready to wrap, you’ve got two main options: pink butcher paper or aluminum foil. This is what pitmasters call the “Texas Crutch,” and each one brings something different to the table.
Here’s the breakdown so you can choose the right tool for your cook:
- Pink Butcher Paper (My Go-To): I love butcher paper because it’s breathable. It traps enough heat to push you through the stall, but it lets just enough steam escape so you don’t ruin that beautiful, crunchy bark you’ve been building for hours. It also soaks up some of the rendered fat, essentially “braising” the brisket in its own juices while keeping the exterior intact.
- Aluminum Foil: If you’re in a time crunch, foil is your best friend. It creates a total seal, which traps every bit of heat and moisture, speeding up the cook significantly. The trade-off? It creates a lot of steam, which can make your bark a little soft or “pot-roasty.” If you use foil, just be sure your bark is 100% set and dark before you wrap it.
The Verdict: If you want that competition-style, “superhero” bark, go with the paper. If you’re running behind and need to get dinner on the table without sacrificing moisture, foil will get you across the finish line faster.
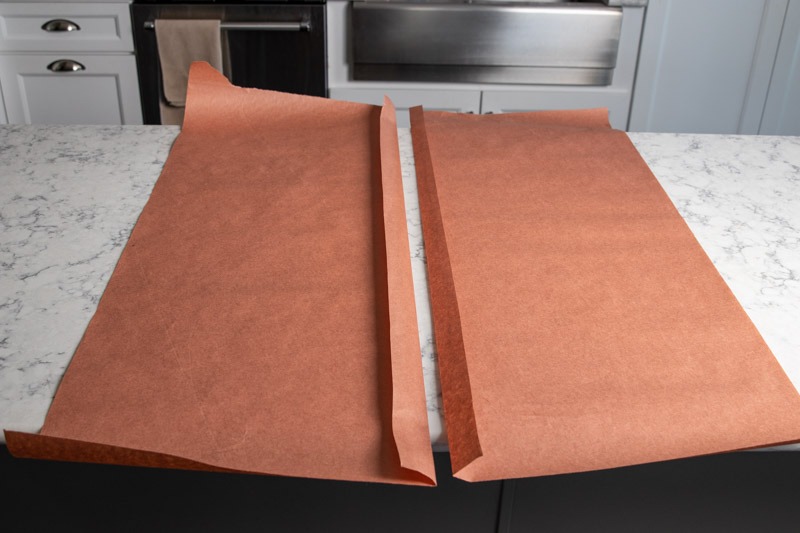
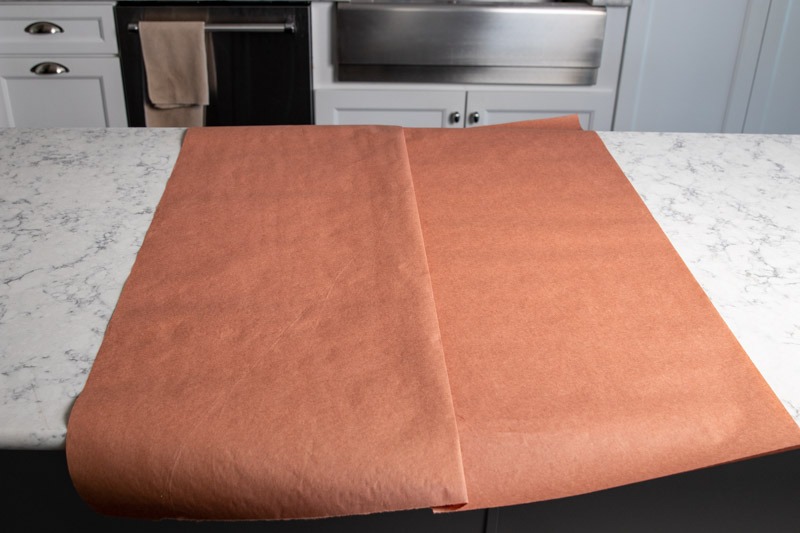
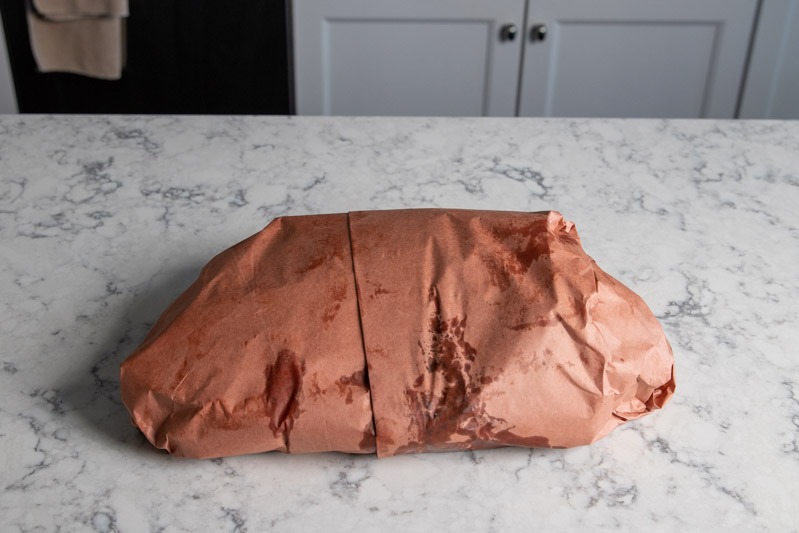
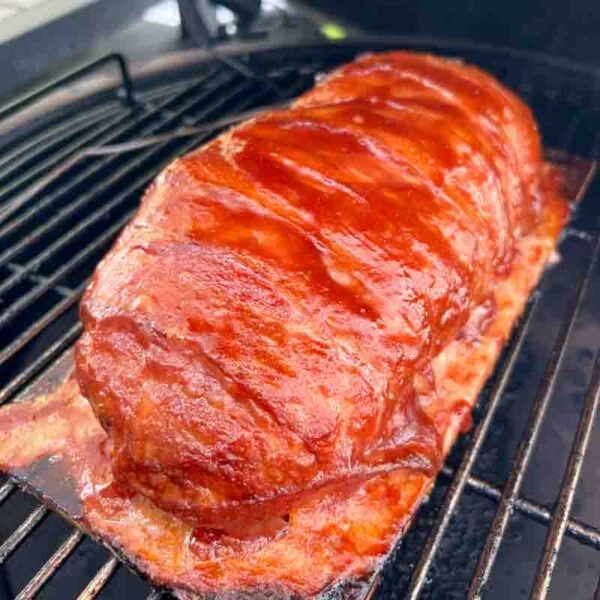
If you go with butcher paper, lay out two long, overlapping sheets of paper, place your brisket in the center, and wrap it up tight like a present, making sure there are no air pockets. This “Texas Crutch” not only speeds up the rest of the cook but also protects that beautiful mahogany bark you’ve worked so hard to build.
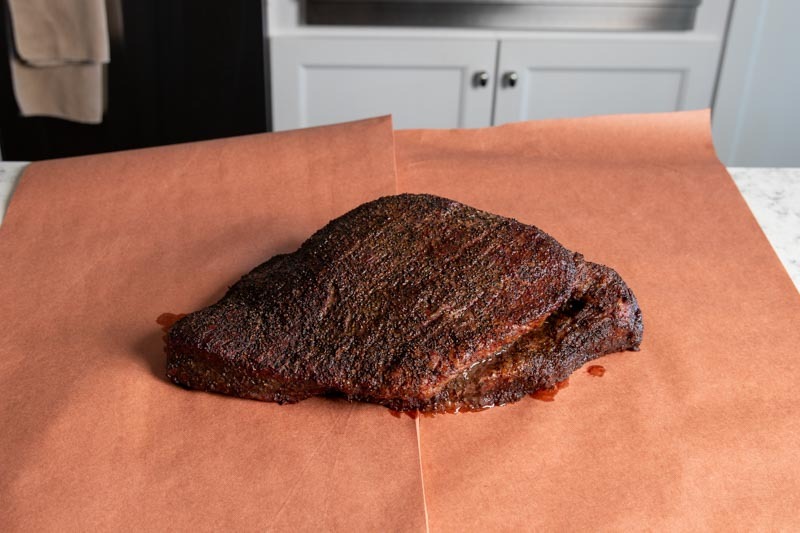
Place the brisket about 1/3rd of the way up the overlapping butcher paper and spritz one more time with water. Add a few shakes of the spice mixture to the surface of the meat then wrap the brisket up in the paper. Once it’s tucked in, get it back on the Big Green Egg and let it ride until it reaches that “probe-tender” perfection.

Finishing the brisket – When is it Done?!
Placed the wrapped brisket back in the Big Green Egg and let it continue to cook. From this point, it is a waiting game as the brisket will rise in temperature from 170°F to 190° – 210°F.
Here are the cues to look for with the actions to take letting you know when the brisket is ready to come off the Big Green Egg:
Temperature: brisket is two muscles joined together with a thick layer of fat. One muscle is large and fatty while the other is long, flat and lean. Both muscles will not reach temperatures at the same time. So, I like to take my cues from the flat as that is the hardest part to get right. Once your flat starts measuring 190° to 210° you are ready to move on to the final test to know if the brisket is done.
Feel: now that your flat is measuring between 190° – 210°, use the thermometer probe to check the flat and point for tenderness. You want the thermometer to go in and out of the brisket with little to no resistance. Think of it like poking a bag of mashed potatoes. That probe needs to slide in and out with ease. If you do not feel that, leave the brisket in your smoker and check every 30 minutes until that is the texture you feel when taking the temperature. Once you get that you are done but you are not ready to eat yet. Remove the brisket from the smoker and get ready for it to rest.
Troubleshooting the Flat
One of the most common “oh no” moments in a brisket cook is when you realize the thinner flat is sitting at 200°F while the thick point is still hanging out at 185°F. Don’t sweat it, since we’re cooking on the Big Green Egg, we have a few tricks to even things out.
The “Flat is Fast” Fix
If that flat is getting ahead of the rest of the meat, simply rotate the brisket so the point is facing the hottest part of your fire (usually toward the back or over the gaps in your ConvEGGtor). If it’s still racing ahead, you can take a small piece of foil and “tent” just the flat; this deflects some of the direct heat while the point finishes rendering out.
Resting the brisket
Now that the brisket is off the Big Green Egg, keep it wrapped in your butcher paper, wrap that in an old towel, and place it in an empty cooler (like a Yeti) for 1–4 hours. This resting period is the “secret sauce” to getting your brisket as juicy as possible. It gives all that rendered fat and collagen time to settle and redistribute back into the meat fibers rather than spilling out onto your cutting board. Trust me, be patient and let it rest before you even think about slicing… you’ll thank me later.
Slicing the brisket
Slicing Like a Pro
The hardest part of a brisket to slice is navigating the two different muscles. The grains in the flat and the point actually run in different directions.
Turn and Slice: Rotate that point section 90 degrees and slice it down the middle. This ensures you are always cutting against the grain, which is the difference between a slice that pulls apart perfectly and one that feels tough and stringy.
Start with the Flat: Slice the lean part of the brisket into pencil-thick strips, working your way from the thin end toward the middle.
Find the Junction: Once you hit the fatty “point” (where the brisket gets much thicker), stop.
FAQ
1. General Big Green Egg Setup
- Question: Do I need a water pan for brisket on a Big Green Egg?
- Content: No. Unlike kettle or offset smokers, the Big Green Egg is so well-insulated that it retains moisture naturally. You should aim for a humidity range of 70%–80%, which the Egg maintains without the need for an extra water pan.
- Question: What is the best temperature to smoke a brisket on a Big Green Egg?
- Content: Target a stable temperature of 250°F. Once the smoke transitions from white to a light blue/gray color, the grill is ready for the meat.
2. Cooking Technique (The “Buddha” Method)
- Question: Should I cook brisket fat side up or down on a Big Green Egg?
- Content: Fat side down. Because the heat source in a Big Green Egg comes from directly below the meat, the fat cap acts as a protective barrier, preventing the bottom of the brisket from drying out.
- Question: What is the “brisket bow” technique?
- Content: To prevent pooling on the surface and ensure even airflow, place a small chunk of smoking wood on the grate and set the brisket on top of it so the meat “bows.” This allows juices to run off and the bark to set evenly.
- Question: How often should I spritz a brisket on the Egg?
- Content: Leave the brisket alone for the first 3 hours. After that, spritz every 45 minutes whenever you see dry spots forming on the flat. A good mixture includes water, apple cider vinegar, Worcestershire, and hot sauce.
3. Doneness & Troubleshooting
- Question: When should I wrap my brisket?
- Content: Wrap the brisket when the bark is firmly set and the “stall” has started to break. This typically occurs 5–6 hours into the cook when the internal temperature hits approximately 165°F.
- Question: How do I know when my brisket is finished?
- Content: Don’t rely solely on temperature; use the “probe test.” The thermometer should slide in and out of the flat with little to no resistance—similar to poking a bag of mashed potatoes. This usually happens around 200°F–205°F.
4. Comparisons & Alternatives
- Question: What is a “Turbo” brisket?
- Content: A turbo brisket involves cooking at a higher temperature (around 350°F) to significantly reduce the cook time. While a traditional low-and-slow brisket takes 12+ hours, a turbo brisket can be finished in about 5–6 hours.
- Question: What wood is best for smoking brisket on the Big Green Egg?
- Content: Post Oak or Hickory are ideal choices. Aim for 4–5 large chunks mixed into the lump charcoal to provide a steady stream of clean, blue smoke.


How to Smoke a Brisket on the Big Green Egg
Ingredients
- 12-15 lb whole packer brisket
- 1 tbsp mustard
- ½ cup cracked black pepper
- ¼ cup Lawry’s Seasoned Salt
- ¼ cup kosher salt
- 1 cup beef broth
Instructions
- Trim the fat cap of the brisket down to ¼”. Trim the large chunk of hard fat that sits between the point and flat muscles on the meat side of the brisket. Trim the sides and ends to be uniform in shape. Add the mustard to the entire surface of the brisket creating a light slather for the spices to adhere to. Mix together the Kosher Salt, Lawry’s Seasoned Salt, and cracked pepper together in a shaker. Now, shake the spice mix evenly across all surfaces of the brisket. Let the meat sit out at room temperature for at least an hour before putting it on the smoker (this allows the meat to start cooking faster at the lower temperature. If you put a large cut of meat like this in the smoker cold, it will add up to an hour or more to your total cook time).
- Load the lump charcoal, light a small fire, set temperature to 250°F and add 2-3 chunks of smoking wood (preferably Hickory or Post Oak). In kettle smokers you will need to add a water pan to help keep humidity at that 70%-80% range. A Big Green Egg is so well insulated that you do not need to add a water pan to help manage humidity.
- Once you see the smoke turn from white to blueish gray, it is time to put your meat inside. Place the brisket fat side down in the Big Green Egg. The fat cap renders slowly during the long cook and will act as a barrier between the meat and the heat source helping to keep surface area from drying out. There is much debate on fat side up or down. For me, it depends on which cooker you are using. I have found when the heat source is below the meat, fat side down is the way to go.
- For the first 3 hours of the brisket cook, leave the brisket alone. Do not open the Big Green Egg for any reason. This first phase is where the pellicle is forming, and the most important smoke absorption occurs. After 3 hours that’s when the fun begins.
- As you are waiting to check in on the brisket after the 3-hour mark, now is the time to prepare a spray bottle to mist the brisket with for the next part of the cook. Fill your spray bottle with 3 parts water, 1 part apple cider vinegar, a dash of Worcestershire sauce, and a dash of your favorite hot sauce.
- Once you have made it through the first 3 hours of the cook you should have decent color forming on the outside of the brisket. You want to ensure your pellicle is not too dry or too wet. At this part of the cook, you may need to spray the outside of the brisket with the spritz mixture. To know, look inside the Big Green Egg and touch the surface area of the flat part of the brisket with your fingertip. Do not move or pick up the brisket as you do not want to interrupt the bark formation. You want the surface to be slightly sticky to the touch but not wet. If it is dry and streaky, spray the surface with a spray bottle full of the mixture. This will help the formation of the bark more than anything else. At this stage in the cook, most if not all of the smoke flavor has been absorbed into the meat. But the gases and oils being released from the wood smoldering inside the firebox need to adhere to the surface of the meat in order to form that dark color you want. To ensure that happens, making sure the surface area stays moist is key. You will want to do this every 30 minutes or so until you wrap the brisket after it breaks stall.
- Brisket is a very large, dense cut of beef. Over time as it cooks slowly inside the Big Green Egg, the fat and collagen break down releasing liquid. After 4 – 5 hours of total cooking time, the internal temperature will stick at one spot usually between 150° and 160°F. This temperature “stall” can last several hours and be frustrating. I suggest using a digital instant read thermometer to check the temperature of both the point and flat muscles. Make sure you are not putting the tip of the thermometer into the deckle (fat layer) as that will not give you accurate results. The best time to check the temperature is when you are looking at the brisket’s bark formation every 30 minutes or so. Open your Big Green Egg, observe the bark formation, take a temperature and note the changes.
- NOTE: My guidance to you is wait until the brisket breaks stall i.e. the temperature starts rising again before wrapping. In my experience, wrapping is not designed to break the stall but rather help tenderize the meat in the finally stages of the cook. Waiting until stall is broke helps you develop that deep, rich and dark bark you want.
- Once the internal temperature starts climbing by more than a degree from the stalled temperature, and your bark is a dark mahogany color and not streaking when you mist it, it is time to take off the Big Green Egg and wrap.
- You have a choice at this point to wrap in aluminum foil or butcher paper. To be direct, I have had success with both methods. However, I usually wrap in butcher paper now as it gives you a slight advantage to bark formation. Basically, paper allows the steam inside to release without getting trapped inside. This helps the bark get darker and provides the texture you want. Wrapping with foil usually speeds up the time to get the brisket probe tender but can impact bark formation. That is why most pit masters today wrap with the butcher paper. When you remove the brisket from the smoker, have two pieces of butcher paper roughly 30” long a piece overlapping and set aside for you to place the brisket on. Place the brisket about 1/3rd of the way up the overlapping butcher paper and spritz one more time with water. Add a few shakes of the spice mixture to the surface of the meat then wrap the brisket up in the paper. Place the wrapped brisket in a large aluminum pan with a cup of beef broth in the bottom. Place the pan with the brisket back in the smoker and let it cook until it is done.
- From this point it is a waiting game as the brisket will rise in temperature from 170°F to 190° – 210°F. Here are the cues to look for with the actions to take letting you know when the brisket is ready to come off the cooker:
- Temperature: brisket is two muscles joined together with a thick layer of fat. One muscle is large and fatty while the other is long, flat and lean. Both muscles will not reach temperatures at the same time. So, I like to take my cues from the flat as that is the hardest part to get right. Once your flat starts measuring 190°F to 210°F you are ready to move on to the final test to know if the brisket is done.
- Feel: now that your flat is measuring between 190° – 210°F, use the thermometer probe to check the flat and point for tenderness. You want the thermometer to go in and out of the brisket with little to no resistance. Think of it like poking a bag of mashed potatoes. That probe needs to slide in and out with ease. If you do not feel that, leave the brisket in your smoker and check every 30 minutes until that is the texture you feel when taking the temperature. Once you get that you are done… but you are not ready to eat yet. Remove the pan with the brisket from the smoker and get ready for it to rest.
- Now that the brisket is off the Big Green Egg, keep it wrapped in your butcher paper, wrap that in an old towel, and place it in an empty cooler (like a Yeti) for 1–4 hours. This resting period is the "secret sauce" to getting your brisket as juicy as possible. It gives all that rendered fat and collagen time to settle and redistribute back into the meat fibers rather than spilling out onto your cutting board. Trust me, be patient and let it rest before you even think about slicing… you’ll thank me later.
- NOTE: I say 1 – 4 hours as the longer the brisket rests, the more the juices settle, and the collagen breaks down. The sweet spot for most people is 2 hours but you can wait and extra 2 as needed if it accommodates your serving time.
- Finally, take the brisket out of the cooler and wrapping then place it on a cutting board. Separate the point from the flat by cutting through the deckle (fatty layer between each muscle). Now slice the flat in to pencil thin slices and the point can be cubed for burnt ends (recipe on page xxx) or slice against the grain for juicy fatty slices of brisket deliciousness.
Nutrition information is automatically calculated, so should only be used as an approximation.


This is an excellent guide to smoking a Brisket on the BGE, containing the right amount of detail and directions. Great Job!
Greg
Thanks Greg!