This post contains affiliate links. Please see our disclosure policy.
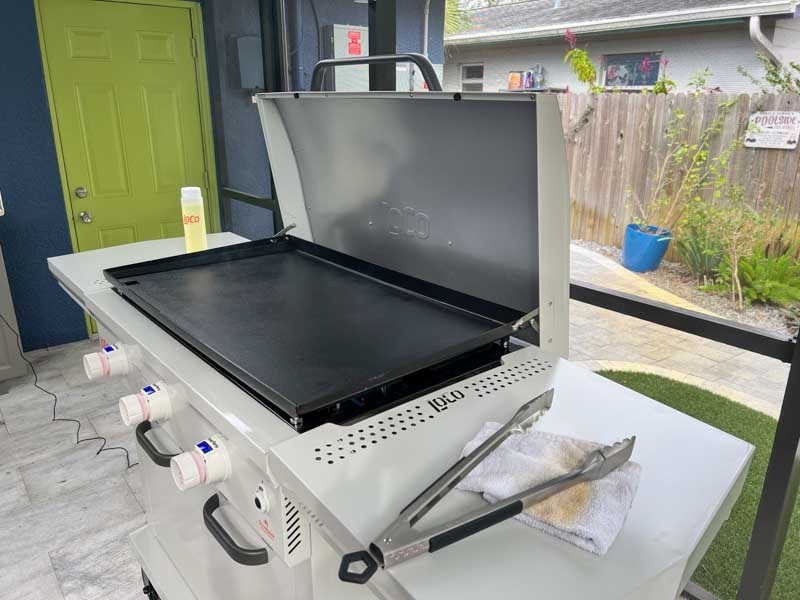
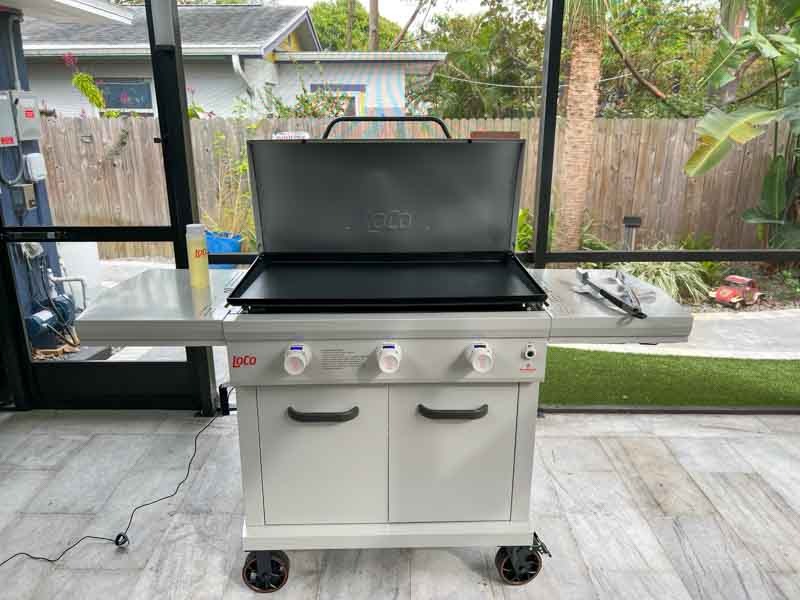
Are you ready to fire up your brand new LoCo 36″ SmartTemp 3-Burner Griddle for the first time? Before you throw down any bacon or smash burgers, you must prepare the steel surface properly. The cooktop of a professional griddle is exactly like a raw cast iron skillet. Because the metal is porous, you need to season it well to prevent rust and to build up a durable non-stick surface. Do not worry about the complexity, as this process is incredibly simple and will have you cooking in no time.
By taking the time to do this correctly now, you ensure a lifetime of easy cleanup and superior food release. This process provides the foundation for every meal you will ever cook on this machine. While the LoCo is a heavy-duty piece of equipment, it still requires that initial polymer layer to reach its full potential. So, grab a bottle of cooking oil, a clean rag, and a set of tongs. Now sit back and enjoy this post for How to Season a LoCo Griddle: The Ultimate Step-by-Step Guide.
Table of Contents
Get My NEW Book
The Ultimate Big Green Egg Cookbook

Step 1: The Initial Cleaning and Burn-In
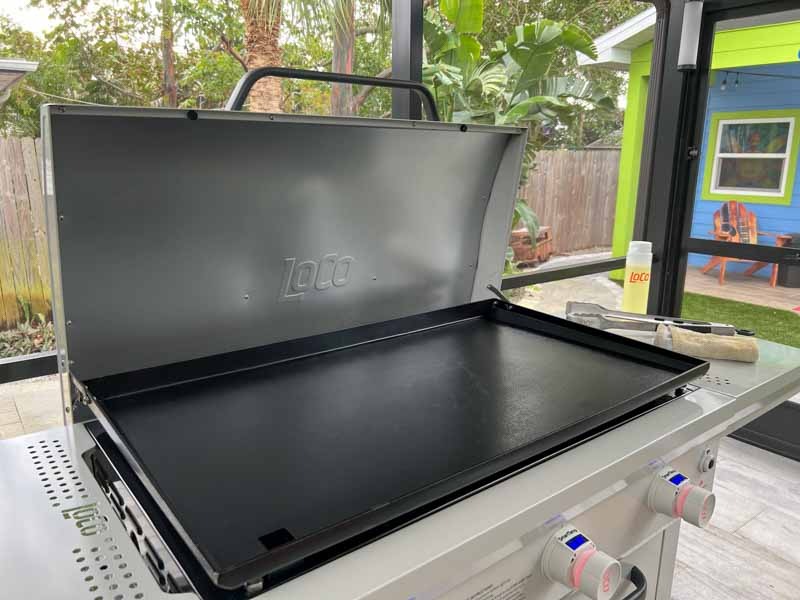
Preparing your new steel surface requires a clean slate to ensure the seasoning bond is permanent. By wiping the cooktop with a damp towel after you finish the assembly, you remove any dust or factory residues from the manufacturing process. This process provides a sterile surface that allows your seasoning oil to penetrate the pores of the metal more effectively. Once the cooktop is clean and dry, you are ready to begin the thermal preparation of the LoCo SmartTemp system.
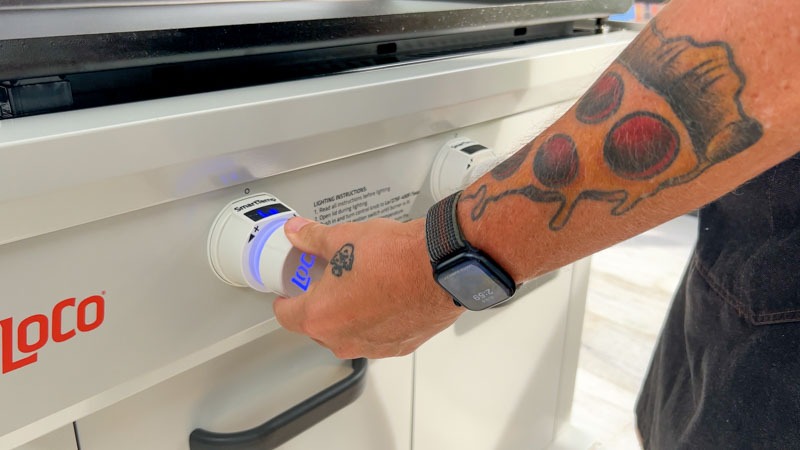
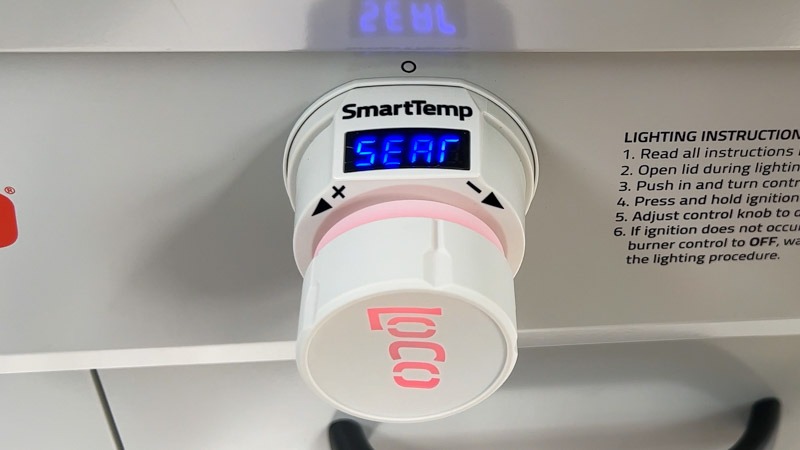
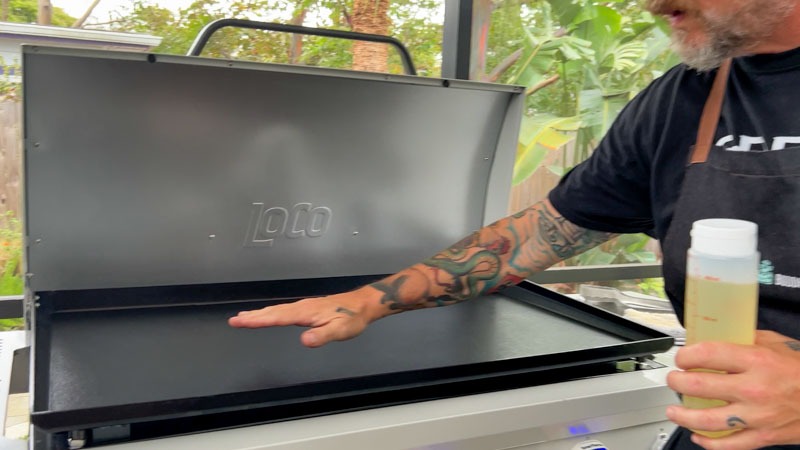
Now, turn your propane gas on and plug the griddle into a power source to activate the digital controls. You should light the griddle and set all three temperature dials to the Sear setting. Let the griddle sit for a full 15 minutes at this high temperature before you apply any oil. Because the heat opens up the grain of the steel, this burn-in period is vital for a successful non-stick finish. While the surface might begin to discolor or turn blue, this is a normal sign that the metal is ready for its first layer of oil.
Step 2: Applying the First Layer of Oil
Creating a non-stick surface starts with thin, controlled layers of fat that bond directly to the hot steel. By waiting for the full 15-minute burn-in to complete, you ensure the metal is hot enough to facilitate the polymerization process. This process provides the foundation of the dark, seasoned patina that every griddle owner desires. Once the timer is up and the surface is screaming hot, you are ready to begin the transformation of your LoCo cooktop.
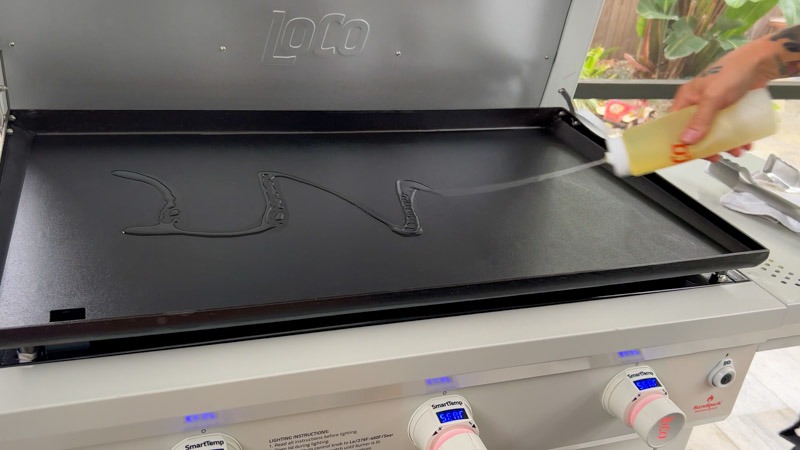
Now, squirt a small amount of vegetable oil onto the center of the hot cooking surface. You should start with a modest amount because a thin layer is much more effective than a thick, sticky one. While it might be tempting to use a lot of oil, excess fat can lead to pooling and an uneven finish. Because vegetable oil has a high smoke point, it is a reliable choice for the intense heat of the SmartTemp sear setting. Once the oil hits the steel, you will notice it begin to shimmer and smoke almost immediately.
Step 3: Working the Oil into the Steel
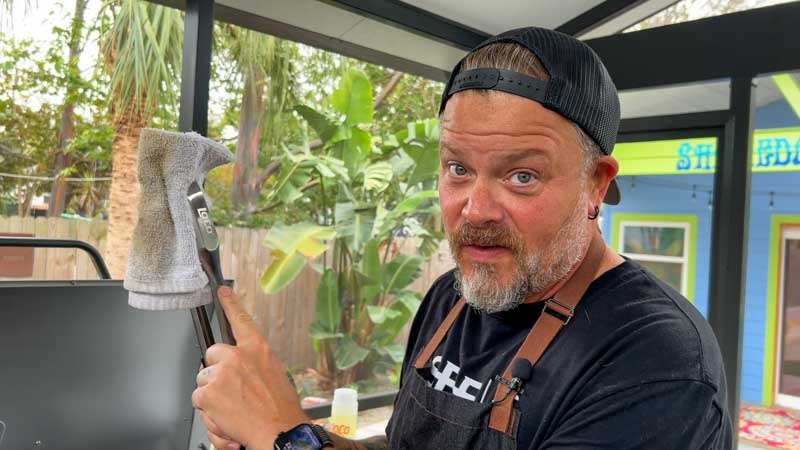
Spreading the oil evenly is the most critical part of achieving a smooth and professional finish. By using a set of tongs to hold a clean towel, you protect your hands from the intense heat of the sear setting. This process provides a safe way to ensure every square inch of the cooking surface receives a consistent coating of fat. You should focus on creating a thin, almost invisible film of oil rather than a heavy pool.
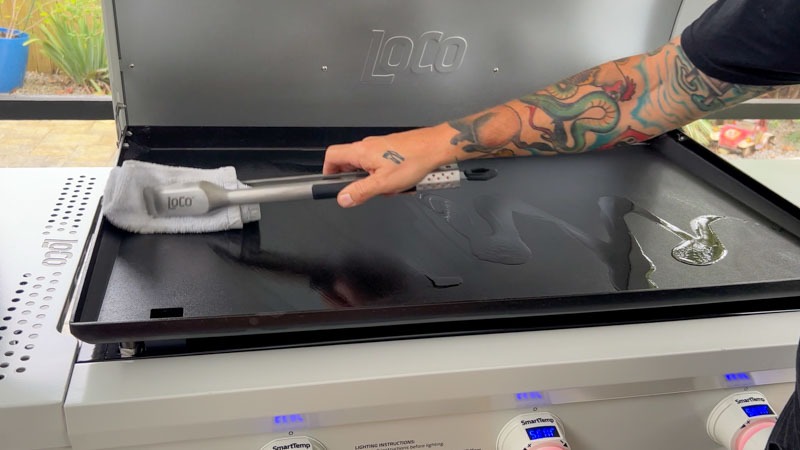
Work the oil into every corner of the griddle cooktop, including the side walls and the back splash. You should use long, sweeping motions to buff the oil into the pores of the hot steel. While the metal absorbs the heat, the oil will begin to smoke and darken as it bonds to the surface. Because the LoCo 36″ has such a large cooking area, moving quickly ensures the oil does not sit too long in one spot and become tacky. Once you have a uniform sheen across the entire top, let it smoke out completely until the surface looks dry again.
A Critical Step: Total Surface Protection
Preventing corrosion on a new steel cooktop requires full coverage of every exposed area. By wiping the oil into ALL of the surfaces (including the front, sides, and the back of the griddle) you create a comprehensive moisture barrier. This process provides the ultimate defense against rust, especially if you store your LoCo outdoors in humid environments. You should treat the exterior edges with the same care as the main cooking area to ensure the entire unit remains in pristine condition.
Use your tongs and rag to reach the vertical walls and the outer lip of the griddle plate. You should ensure that no bare metal is left exposed to the air during this high-heat phase. While many people only focus on the center where they cook, the corners and back are often where rust begins to take hold. Because the SmartTemp system heats the entire plate so evenly, these peripheral areas will also reach the temperature needed for the oil to polymerize. Once every surface has a thin, dark sheen, you have successfully armored your griddle against the elements.
Step 4: The Final Smoke-Out
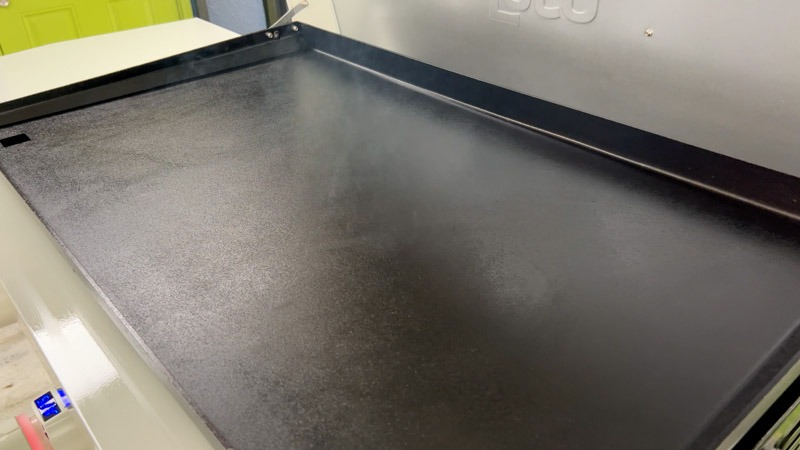
Finishing each layer correctly is the secret to a hard, durable finish that will not peel or flake. By letting the griddle sit on the highest temperature setting until all the smoke clears, you ensure the oil has fully transformed into a solid polymer. This process provides a smooth, glass-like surface that is ready for the next round of seasoning or your very first cook. You should resist the urge to add more oil while the current layer is still actively producing smoke.
Keep the temperature dials on the Sear setting and observe the cooktop closely. You should notice that the oil you just rubbed into the surface will produce a consistent stream of smoke for several minutes. While this happens, the heat is forcing the oil to bond permanently with the steel. Because the LoCo SmartTemp system maintains such a high, steady heat, this transition happens more efficiently than on a standard gas griddle. Once the visible smoke has completely dissipated and the surface looks dry and dark, you have successfully set your first layer.
Step 5: Repeating for a Durable Finish
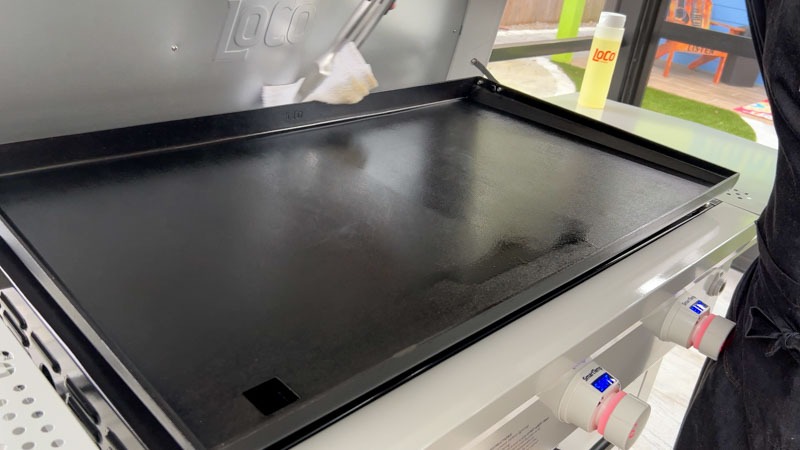
Building a long-lasting, non-stick surface requires patience and multiple thin layers of polymerized oil. By repeating the oiling and smoking process again and again for a total of five times, you create a thick, protective patina on your new LoCo griddle. This process provides a deep, dark finish that only gets better the more you cook. You should notice the silver steel transforming into a beautiful, bronzed black as you progress through each round.
Once the smoke clears from your first layer, squirt another small amount of oil and work it in just like before. You should continue this cycle until you have completed all five applications of oil. While it might seem time-consuming, this initial investment of effort prevents food from sticking and protects the metal from moisture for years. Because the LoCo SmartTemp system maintains a consistent 550°F, each subsequent layer will bond even more tightly to the previous one. Once you finish the fifth and final round, you have properly seasoned your cooktop and are ready to enjoy the ultimate outdoor cooking experience.
The Finish and Final Thoughts
Completing the fifth and final seasoning cycle is the most satisfying part of the entire setup process. By waiting for that last bit of smoke to clear, you officially seal the steel and create a professional-grade cooking surface. This process provides a beautiful, dark, and shiny patina that signifies your LoCo 36″ SmartTemp 3-Burner Griddle is ready for action. You should take a moment to stand back and admire your well-seasoned machine because it will never look this pristine again.
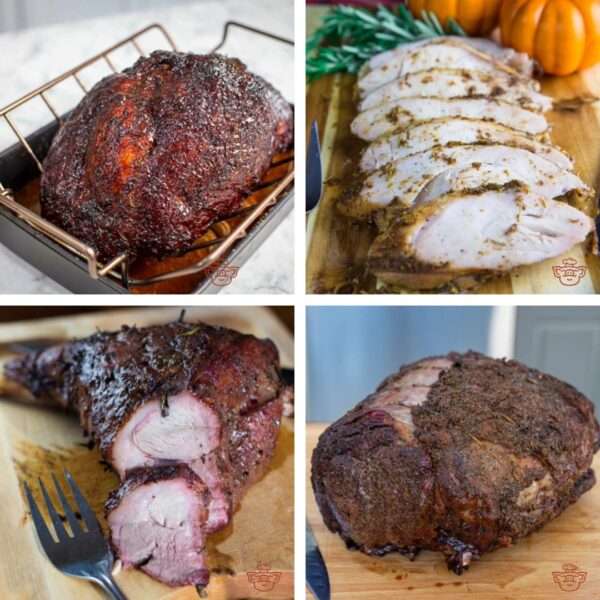
Now that the metal has reached its optimal state, you are prepared to cook everything from delicate eggs to crusty smash burgers. While the initial seasoning is complete, you should remember that every meal you cook adds another microscopic layer of protection. Because you took the time to do this correctly, you will enjoy a non-stick experience that rivals any high-end cast iron skillet. Once the griddle cools down slightly, you can prepare for your very first cook and start building those legendary backyard flavors.