
This post contains affiliate links. Please see our disclosure policy.
When the air turns crisp and the leaves start to fall, my cooking naturally shifts toward heartier, soul-warming meals. There is nothing that defines comfort food quite like beef short ribs, especially when they are treated to a long bath of hickory smoke before being braised to tender perfection. This recipe for Braised Smoked Beef Short Ribs on the Big Green Egg is the ultimate weekend project for anyone looking to elevate their outdoor cooking game.
While these ribs require patience and a bit of time, the result is a rich, succulent meat that literally falls off the bone. By combining the deep, wood-fired essence of the smoker with the moist heat of a braise, you get the best of both worlds: a smoky bark and a melt-in-your-mouth interior. Even if you do not have a smoker, I will guide you through how to achieve incredible results using your oven at home.
So, pour yourself a glass of McManis Family Vineyards Cabernet Sauvignon, settle in, and let’s get into the details of this cold-weather classic.
Table of Contents
- Step 1: Understanding Beef Short Ribs
- Step 2: The Seasoning — Building a Beefy Bark
- Step 3: The Setup — Low and Slow Smoke
- Step 4: Preparing the Braise — Elevating the Flavor
- Step 5: The Braise — Slow-Roasted Perfection
- Step 6: The Reveal and Serving
- Braised Smoked Beef Short Ribs on the Big Green Egg Recipe
Get My NEW Book
The Ultimate Big Green Egg Cookbook

Why Smoke AND Braise?
You might wonder why we bother with a two-step process. If you only smoke short ribs, they can sometimes be a bit tough if not handled perfectly. If you only braise them, you miss out on that incredible layer of smoke flavor. By smoking them first for a few hours, we develop a beautiful crust and deep flavor. Then, by finishing them in a covered braise with aromatics and wine, we guarantee that every bite is juicy and tender. It is a foolproof way to get five-star restaurant results in your own backyard.
Step 1: Understanding Beef Short Ribs
Before we light the charcoal, it is important to understand exactly what we are working with. Beef short ribs are sourced from the brisket, chuck, or plate areas of the cattle. This particular cut is famous for its deep, beefy flavor and rich marbling. However, because these muscles do a lot of work, the meat is naturally tough. To unlock that signature “butter-like” texture, you must cook them for a long period at a low temperature to break down the connective tissue.
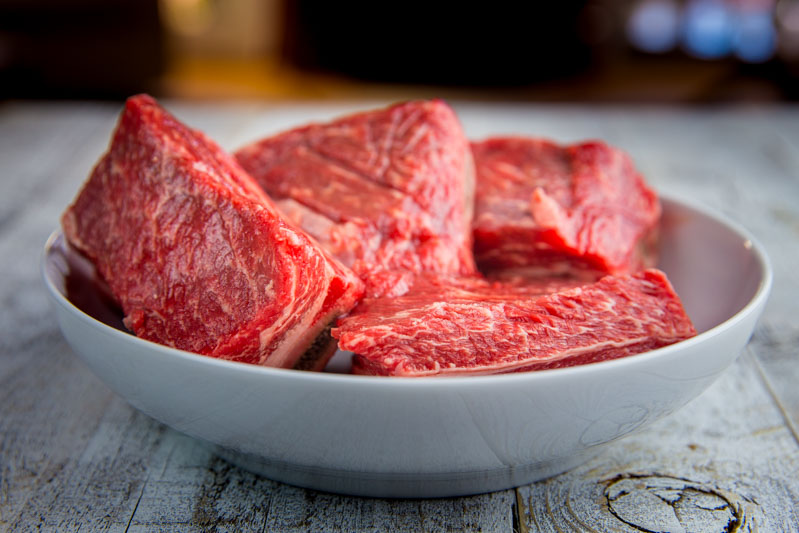
Flanken vs. English Cut
When you head to the butcher, you will typically see short ribs prepared in two different ways:
- English Style: These are cut parallel to the bone. You will see one thick piece of meat sitting on top of a single, long bone (up to 6 inches in length).
- Flanken Style: These are cut across the bone. Each piece is typically 1 to 2 inches thick and contains three or four small cross-sections of bone.
While many people associate the Big Green Egg with the large, “dinosaur-sized” English ribs, this recipe focuses on Flanken-style beef short ribs. This cut is fantastic because the thinner profile allows the smoke and the braising liquid to penetrate the meat more quickly, resulting in an incredible depth of flavor in every bite.
Where to Find the Best Ribs
Because this is a long cook, the quality of the meat matters. Look for ribs with heavy marbling (the white flecks of fat within the red meat) rather than just large chunks of exterior fat. While your local grocery store likely carries these, a dedicated butcher will often give you a more consistent thickness, which is key for even cooking.
Step 2: The Seasoning — Building a Beefy Bark
Beef short ribs are a robust cut of meat that can handle a lot of seasoning. Because we are both smoking and braising, you need a rub that provides a strong foundation of flavor that won’t get lost in the liquid later.
My Top Pick: Meat Church Holy Cow
For this cook, I used Meat Church Holy Cow. This rub is specifically designed for beef and it screams Texas. It is a perfectly balanced blend that leans heavily on salt, pepper, and a distinct hint of garlic. It creates a dark, peppery bark that is the gold standard for short ribs and brisket.
Popular Alternatives
If you don’t have Holy Cow on your shelf, look for a “Texas-style” rub that is heavy on the savory side and light on the sugar:
- Big Poppa’s Double Eagle: A very beef-forward rub that provides a great crust.
- Hardcore Carnivore Black: This uses food-grade activated charcoal to give your ribs a stunning jet-black appearance.
- Killer Hogs TX Brisket Rub: A classic blend of salt, pepper, and garlic with a little extra kick.
DIY “Texas Trio” Blend
Short ribs thrive on simplicity. If you want to mix your own at home, use this straightforward ratio to mimic that authentic smokehouse flavor:
- 2 parts Coarse Black Pepper (16 mesh is best for bark)
- 1 part Kosher Salt
- 1/2 part Granulated Garlic
- Optional: A pinch of Onion Powder or Celery Seed
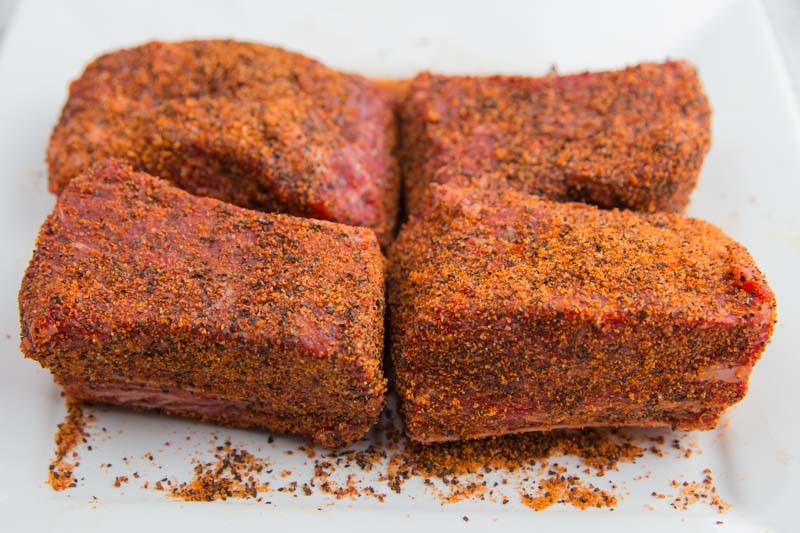
Applying the Rub
Don’t be shy with the seasoning. Coat all sides of the flanken ribs thoroughly. Since these ribs are rich in fat, they can take a heavy application. I recommend seasoning them at least 30 minutes before they hit the grill to let the salt penetrate the meat and help the spices stick during the smoke phase.

Step 3: The Setup — Low and Slow Smoke
Now that the ribs are seasoned and tacky, it is time to fire up the Big Green Egg. This phase is all about building flavor and color before we move into the braise.
The Indirect Configuration
For this cook, set up your Egg for indirect cooking. Place the ConvEGGtor (plate setter) with the legs facing up and put your cooking grid on top.
- The Temperature: Target a steady dome temperature of 225°F. This low heat allows the fat to begin rendering slowly without drying out the meat.
- The Moisture Secret: Place a drip pan filled with water on top of the ConvEGGtor. The evaporating water creates a humid environment inside the dome, which helps the smoke “stick” to the meat and keeps the ribs moist during the two hour smoke.
The Wood Choice
I chose Pecan wood for this recipe. Pecan provides a rich, sweet, and nutty smoke profile that is less aggressive than hickory but more distinct than fruitwoods like apple. It is the perfect middle ground for beef, adding a deep mahogany color to the ribs without overpowering the natural flavor of the meat.
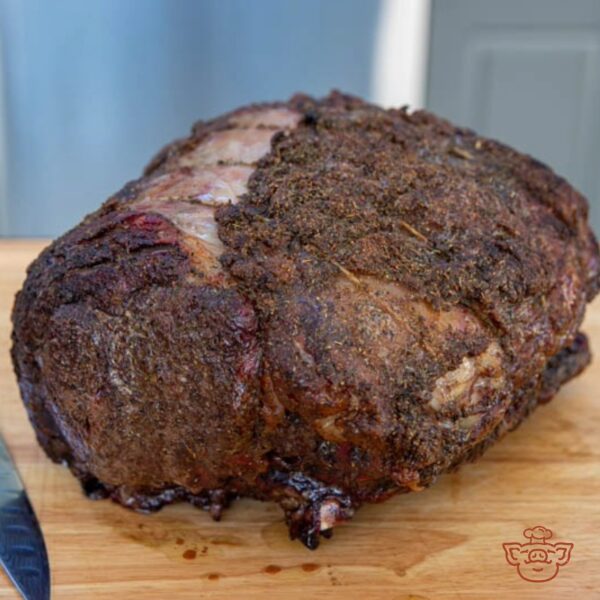
The First Phase: The Two-Hour Smoke
Place the ribs on the grid and close the dome. Let them bathe in that pecan smoke for about 2 hours. Your goal here isn’t to finish the ribs, but to set the bark and internalize that smoke flavor.
You are looking for an internal temperature of 175°F measured with an instant-read thermometer. Once they hit that mark, pull the ribs from the Egg and let them rest on a tray while you transition to the braising setup.

Step 4: Preparing the Braise — Elevating the Flavor
With the ribs infused with pecan smoke, it is time to transition into the braising phase. This is where we turn comfort food into a gourmet experience. The goal is to create a rich, aromatic liquid that will tenderize the beef while creating a built-in sauce.
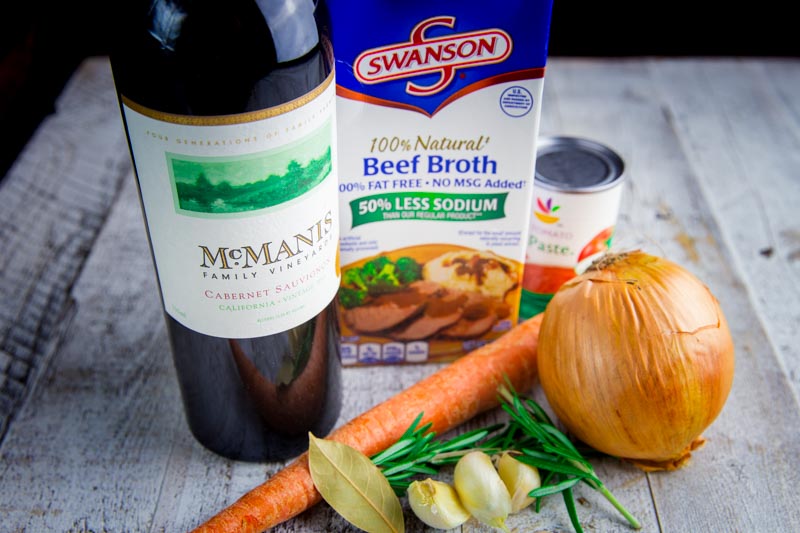
The Foundation: Cabernet Sauvignon
The star of this braising liquid is a nice bottle of Cabernet Sauvignon. The bold tannins and dark fruit notes of the wine act as a natural tenderizer for the beef and provide a sophisticated depth that water or broth alone cannot achieve.
Aromatics and Vegetables
To build a complex flavor profile, add the following to your braising pot (a heavy Dutch oven is ideal for this):
- The Trinity: Roughly chopped onions and carrots provide a natural sweetness that balances the acidity of the wine.
- The Depth: Fresh cloves of smashed garlic and several sprigs of fresh rosemary. The rosemary adds an earthy, piney aroma that pairs perfectly with wood smoke.
- The Body: A healthy dollop of tomato paste to thicken the liquid and add umami, followed by high-quality beef broth to ensure the ribs are mostly submerged.
The Assembly
Place your smoked ribs into the Dutch oven with the vegetables and herbs. Pour in the wine and beef broth until the ribs are nestled comfortably in the liquid. This mixture will slowly reduce over the next few hours, transforming into a silky, savory jus that carries the essence of the pecan smoke and the richness of the beef.
Step 5: The Braise — Slow-Roasted Perfection
While you can certainly finish these on the Big Green Egg, transitioning to the oven is a great way to maintain a perfectly steady temperature for the long haul.
Bringing the Braise to Life
- The Boil: Mix your braising liquid in a Dutch oven on the stovetop. Bring the wine, broth, and aromatics to a boil.
- The Submerge: Carefully place your smoked beef ribs into the liquid. You want the liquid to barely cover the ribs. If it is sitting a little low, simply add a bit of water until they are properly nestled.
- The Roast: Cover the Dutch oven with a tight-fitting lid and place it into a preheated 325°F oven. Let the ribs roast for 3 hours.
- The Rotation: To ensure every inch of the meat becomes equally tender, open the pot and turn the ribs every 30 minutes or so. This keeps the exposed tops from drying out and allows them to soak up that rich Cabernet reduction.
Buddha’s Note: The Oven-Only Method
If you do not have a smoker or simply want to save some time, you can still achieve incredible results. Skip the smoking phase and instead sear the seasoned beef ribs directly in the Dutch oven over medium-high heat. Brown them for about 2 minutes per side until they have a deep, crusty sear. Set the ribs aside, prepare your braising liquid in that same pot to capture all the brown bits, then follow the roasting directions above.

Step 6: The Reveal and Serving
After three hours in the braise, the transformation is complete. The connective tissue has fully rendered, leaving the beef incredibly tender and infused with the flavors of the Cabernet and aromatics.
The Finish
Carefully remove the Dutch oven from the heat. At this stage, the meat should be so tender that it effortlessly separates from the bone. Discard the bones and any large herb sprigs. You are left with succulent chunks of beef and a rich, concentrated braising liquid that has become a thick, savory sauce.
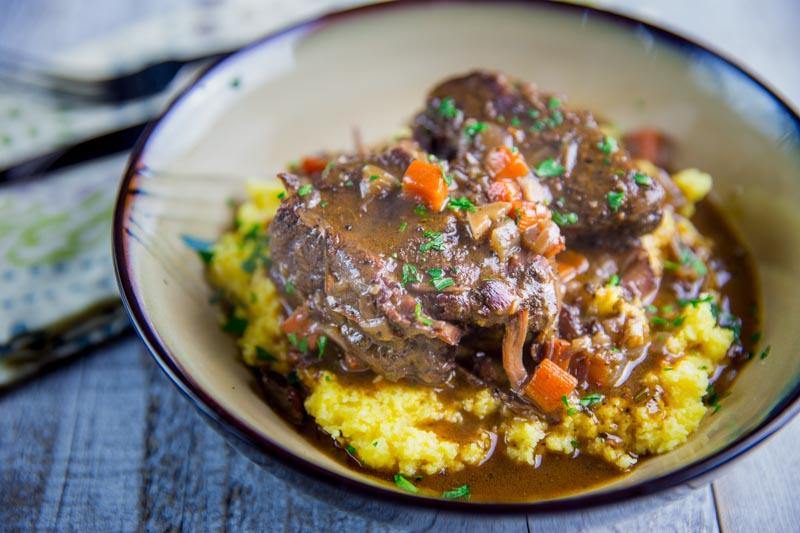
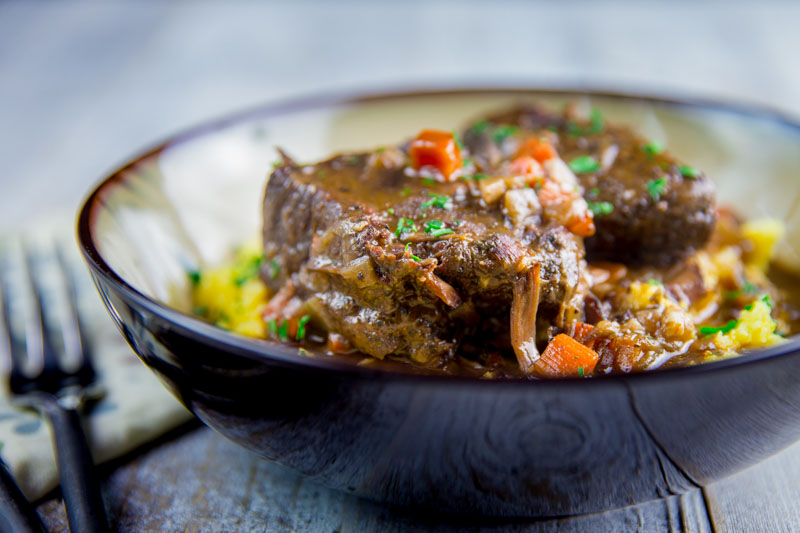
The Perfect Pairing: Creamy Polenta
To serve, prepare a batch of creamy polenta. The smooth, buttery texture of the polenta is the ideal canvas for the bold, smoky flavors of the beef. Spoon a generous portion of polenta into a wide bowl, top it with the shredded short ribs, and drizzle a few spoonfuls of that dark braising liquid over the top.
Why This Dish Wins
This meal is the definition of “slow and low” success. The two hour smoke session provides the depth, while the three hour braise provides the texture. It is a time-intensive process, but the first bite of that smoky, wine-braised beef tells you it was worth every minute of the wait. It is a hearty, elevated comfort dish that turns any chilly Fall evening into a special occasion.


Braised Smoked Beef Short Ribs on the Big Green Egg
Equipment
- 1 Dutch Oven
Ingredients
Beef Ribs Ingredients:
- 3 pounds Flanken-style beef short ribs
- 4 tbsp Meat Church Holy Cow Rub
Braise Ingredients:
- 1 bottle Cabernet Sauvignon
- 2 cups Beef broth
- 2.5 tbsp All-purpose flour
- 1 tbsp Olive oil
- 2 tbsp Tomato paste
- 2 Carrots, diced
- 1 Yellow onion, chopped
- 4 cloves Garlic, chopped
- 1 tsp Kosher salt
- 1 Bay leaf
- 1/2 tbsp minced fresh rosemary
Instructions
- Season: Trim the ribs and apply a heavy coating of Holy Cow rub to all sides.
- Smoke: Set your Big Green Egg to 225°F for indirect cooking with pecan wood and a water pan; smoke the ribs for 2 hours until they hit 175°F.
- Mix: While ribs smoke, whisk the flour into the wine and broth on the stovetop; add the olive oil, salt, tomato paste, carrots, onion, garlic, bay leaf, and rosemary and bring to a boil.
- Braise: Place the smoked ribs into the boiling liquid, cover with a tight lid, and transfer to a 325°F oven.
- Roast: Roast for 3 hours, turning the ribs every 30 minutes to keep them submerged in the thickening sauce.
- Serve: Remove the meat from the bones and serve over creamy polenta with a generous ladle of the braising jus.
Nutrition information is automatically calculated, so should only be used as an approximation.


Turned out perfect the last time. 3rd time was the charm. So tender and delicious
Awesome! Thanks for the note 🙏