
This post contains affiliate links. Please see our disclosure policy.
Double smoking a spiral ham is the ultimate “holiday hack” for any backyard pitmaster. While most people simply toss a store-bought ham into the kitchen oven, using the Big Green Egg transforms a standard grocery store find into a wood-fired masterpiece.
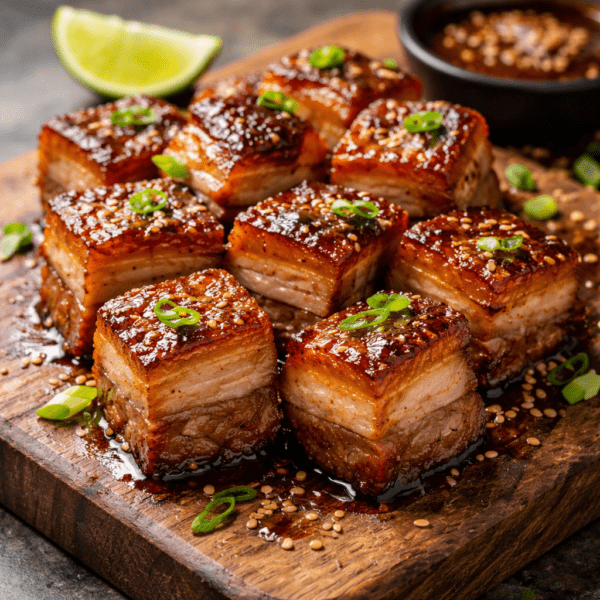
The concept is simple but effective. Because most spiral hams are already precooked and smoked once at the factory, we are adding a second layer of smoke to deepen the color and flavor. This “Double Smoked” technique allows the meat to absorb those clean, sweet wood notes while staying incredibly juicy. The real magic happens when the smoke meets a custom glaze, creating a sticky, caramelized crust that you just can’t achieve in a traditional oven.
Whether you are hosting a large family gathering or looking for the perfect centerpiece for a holiday meal, this process is surprisingly low-stress. It frees up your kitchen oven for side dishes and delivers a ham with a complex, sweet, and savory profile. Best of all, it results in plenty of leftovers that are arguably better the next day.
Grab a nice glass of apple cider and let’s dive into how to elevate your holiday table with a Big Green Egg Smoked Spiral Ham.
Table of Contents
Get My NEW Book
The Ultimate Big Green Egg Cookbook

Step 1: Selecting Your Ham
Finding the right ham is the foundation of this cook. While you can find a spiral-sliced ham at almost any grocery store during the holidays, knowing what to look for on the label will ensure you start with the highest quality protein.
What to Look For
When you are browsing the meat case, pay close attention to the labeling. These hams are generally sold “fully cooked,” but the water content and the cut of the meat vary significantly.
- The “City Ham” Style: Most spiral hams are “City” hams, meaning they have been wet-brined and smoked. This is exactly what you want for the Big Green Egg because the moisture helps the ham withstand the second round of smoking without drying out.
- The “Water Added” Rule: Look for a ham labeled “Ham with Natural Juices.” Try to avoid hams labeled “Ham, Water Added” or “Ham and Water Product.” These lower-tier options contain a high percentage of water weight, which can lead to a spongy texture rather than a firm, meaty bite.
- Shank vs. Butt End:
- The Shank (Lower Leg): This is the classic “holiday” look with the single bone. It is easier to carve and tends to be leaner.
- The Butt (Upper Leg): This cut is rounder and more marbled with fat. It can be a bit trickier to carve due to the hip bone, but it offers a richer flavor.
Sizing it Up
For a holiday gathering, you want to ensure everyone leaves full with enough left over for the legendary “day-after” sandwiches.
| Crowd Size | Recommended Weight |
| 4 – 6 People | 7 – 8 lbs |
| 8 – 10 People | 10 – 12 lbs |
| 12+ People | 14+ lbs (or two smaller hams) |
The Bone-In Advantage
Always choose a bone-in spiral ham. The bone acts as a conductor for heat, helping the ham warm more evenly from the inside out. It also provides a significant boost in flavor during the double-smoking process. As an added bonus, you can save the ham bone for a world-class split pea soup or a pot of beans the next day.
Skip the Packet
Most store-bought hams come with a foil packet of glaze. You can set that aside or toss it out. We are going to build our own flavor profile using a custom rub and a homemade glaze that will far surpass the factory-made sugar packet.
Step 2: Seasoning the Spiral Ham
Prepping the Ham: The Binder and Seasoning
Once you have your ham home and unpacked, the first step is to prepare the surface for the smoke. Since a spiral ham is already sliced, you have a unique opportunity to get flavor deep into the meat.
The Binder: Making it Stick
To ensure your seasoning adheres to the ham and doesn’t just slide off, you need a binder. A light coating of Yellow Mustard or Dijon Mustard is the industry standard. Don’t worry, the vinegar and mustard flavor will cook off, leaving behind a tacky surface that holds the rub in place. For a sweeter profile, some pitmasters prefer a light coat of Maple Syrup or Honey as a binder.
Seasoning Options
For this cook, I am using a base of Sucklebusters Texas Pecan BBQ Rub mixed with an equal part of Brown Sugar. To lean into the holiday spirit, I also added a pinch of Cinnamon and Nutmeg. This combination provides a nutty, sweet, and aromatic crust that perfectly complements the salty ham.
If you are looking for other ways to flavor your ham, here are three great paths:
- The “Buddha Blend” (DIY Holiday Rub):
- 1/2 Cup Brown Sugar
- 1 Tablespoon Kosher Salt
- 1 Tablespoon Smoked Paprika
- 1 Teaspoon Black Pepper
- 1/2 Teaspoon Cinnamon
- 1/4 Teaspoon Ground Clove
- Meat Church Honey Hog: This is a very popular commercial option. It is a honey-forward rub that creates a beautiful reddish hue and a sweet, savory balance that kids and adults both love.
- Dizzy Pig Pineapple Head: This is a unique, fruit-forward seasoning designed for high-sugar foods. it contains pineapple solids and spices that work incredibly well with the natural juices of a pork roast.
The Application
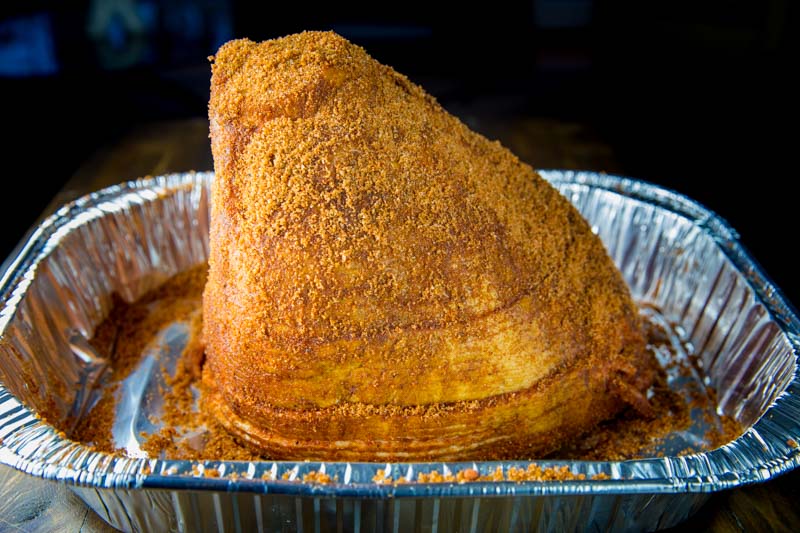
When applying the rub, don’t just coat the outside. Use your hands to gently fan out the spiral slices and let some of the seasoning fall into the gaps. You want those “peaks and valleys” of the ham to be seasoned so that every bite has a bit of that sweet, spiced bark. Be generous with the application; the ham is a large, salty piece of meat and can handle a heavy coating of sweetness.

Step 3: Place Spiral Ham in Aluminum Pan
The Aluminum Pan: Your Secret Weapon
Before the ham goes onto the Big Green Egg, you need to place it in a disposable aluminum roasting pan. While we often cook meats directly on the grate, the pan is a crucial component for a successful double smoked ham for several reasons.
Positioning for Success
Place the spiral ham upright in the pan, sitting it on its flat, cut side. This orientation is important because it allows the smoke and heat to penetrate the ham from the top and sides, following the natural lines of the spiral slices.
Final Seasoning Application
With the ham sitting in the pan, apply your rub mixture until the meat is fully covered. Using the pan for this step is much cleaner, as it catches all the excess sugar and spice that would otherwise fall into your charcoal. Make sure you get the seasoning into the nooks and crannies. The pan will eventually catch all the rendering juices and melting sugars, which we will use later to help baste the meat and create a rich, flavorful environment.
Why the Pan is Essential
- Moisture Retention: As the ham warms, it releases juices. In a pan, the ham sits in its own liquid, which prevents the bottom slices from drying out or becoming tough.
- The Glaze Reservoir: Later in the cook, when we apply the final glaze, the pan will collect the drippings. You can use a basting brush to scoop that liquid back over the ham, intensifying the flavor.
- Easy Cleanup: Holiday cooking is busy enough without having to scrub a grease-coated ConvEGGtor. The pan keeps your grill clean and makes transporting the ham from the Egg to the kitchen a breeze.
Step 4: Setup the Big Green Egg
Big Green Egg Setup: The Art of the Low and Slow
To achieve a perfect double smoked ham, your setup must prioritize moisture and gentle heat. Unlike a steak that thrives on high flames, this ham needs a stable, indirect environment to warm through without drying out the delicate spiral slices.
Indirect Configuration
Start by setting up your Big Green Egg for indirect cooking.
- The ConvEGGerator: Place the heat deflector in the “legs up” position and set your stainless steel grate on top. This creates a barrier between the fire and the ham, allowing the heat to circulate like a convection oven.
- The Temperature: Target a steady 250°F. This lower temperature is ideal for double smoking because it allows the ham to absorb smoke for a longer period before it reaches its final serving temperature.
Selecting the Wood Profile
Since the ham has already been smoked once, the choice of wood for the second round is all about subtlety and sweetness. You want to avoid heavy woods like mesquite or hickory, which can make the ham taste bitter.
- Pecan and Apple: This is the ultimate combination for pork. The pecan offers a rich, nutty depth, while the apple provides a light, fruity sweetness.
- The Smoke Quality: Wait until your Egg has stabilized and the smoke coming from the top vent is thin and blue. Thick, white smoke can leave an acrid taste on the sugar-based rub, so patience is key here.
Set It and Forget It: Using a Flame Boss
For a long holiday cook, managing your vents manually can be a bit of a chore when you have guests to entertain. If you want a “set it and forget it” experience, using a temperature controller like the Flame Boss is a game-changer.
Precision Airflow
The Flame Boss works by attaching a small variable-speed blower to your bottom vent. A pit probe stays inside the Egg and tells the controller exactly what the temperature is. If the heat dips even a degree below 250°F, the fan kicks on to stoke the coals. If it gets too hot, the fan shuts off.
Benefits for the Pitmaster
- Rock-Solid Stability: It eliminates the “yo-yo” effect of temperature swings, ensuring the ham warms at a perfectly even pace.
- Remote Monitoring: You can check the progress of your ham from your phone while you are in the kitchen prepping sides or enjoying a drink with family.
- Alarms: You can set an internal meat alarm so the Flame Boss alerts you the moment the ham is ready for the glaze, or when it hits the final serving temperature.
While not strictly necessary for a successful cook, a Flame Boss provides peace of mind, knowing that your Big Green Egg will stay locked in at your target temperature throughout the entire double-smoking process.
Placing the Ham
Once the smoke is clean and the temp is locked in at 250°F, place the entire aluminum pan directly onto the center of the grate.
Pitmaster Note: Keep the ham in the pan for the entire duration of the cook. As the ham warms and the fat renders, the pan will collect those precious juices. Later, when we apply the glaze, the pan acts as a reservoir, catching the sweet drippings so they don’t burn on the ConvEGGerator. This makes for a much more flavorful final product and a much easier cleanup.

Step 5: Smoke the Glaze the Spiral Ham
The Smoke Phase and the Art of the Glaze
With the Big Green Egg locked in at 250°F, your primary job is to monitor the internal temperature. Since the ham is already fully cooked, we aren’t cooking the meat in the traditional sense; we are gently reheating it while allowing the smoke to penetrate and the rub to set.
Targeting 140°F
The golden rule for a juicy spiral ham is to reach an internal temperature of 140°F. This is the sweet spot where the ham is hot throughout but hasn’t begun to lose its moisture.
Because spiral hams are pre-sliced, they have a lot of surface area. If you go much higher than 140°F, those slices will begin to curl and dry out, turning your holiday centerpiece into something resembling jerky. Use a reliable digital probe to ensure you pull the ham at the perfect moment.
Estimated Cook Times
While you should always cook to temperature rather than time, you can use the following table to plan your holiday schedule. These estimates are based on a steady pit temperature of 250°F.
| Ham Weight | Estimated Cook Time |
| 6 – 8 lbs | 1.5 – 2 hours |
| 8 – 10 lbs | 2 – 2.5 hours |
| 10 – 12 lbs | 2.5 – 3 hours |
| 12 – 14+ lbs | 3 – 4 hours |
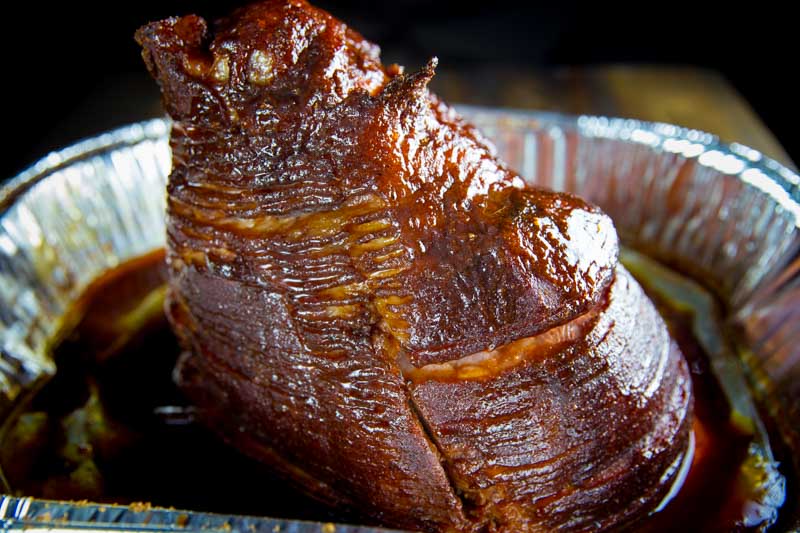
Layering the Flavor: Glazing Options
About an hour into the cook, once the rub has formed a tacky crust, it is time to start glazing. This adds a glossy, sticky finish and builds layers of sweetness. For this recipe, I applied Sucklebusters Honey BBQ Glaze every 30 minutes until the ham reached its target temperature.
If you want to try a different flavor profile, here are a few excellent options:
- The “Buddha” Maple Pineapple Glaze:
- 1 Cup Brown Sugar
- 1/4 Cup Apple Cider or Pineapple Juice
- 2 Tablespoons Maple Syrup
- 1 Teaspoon Dijon Mustard
- A pinch of Cinnamon and Clove
- Simmer in a small saucepan until the sugar is fully dissolved and the liquid is syrupy.
- Blues Hog Raspberry Chipotle: For those who want a bit of a “kick,” this commercial glaze offers a beautiful fruit-forward sweetness with a very mild pepper finish.
- Kosmos Q Apple Cherry Habanero: This is a fantastic choice if you want a bright red color and a complex fruit profile that stands out on the table.
The Final Rest
When your thermometer hits 140°F, carefully remove the aluminum pan from the Egg. Let the ham rest in the pan for about 10 to 15 minutes. This allows the glaze to set into a sticky lacquer and gives the juices a chance to redistribute.
When you are ready to serve, spoon some of the warm glaze and ham juices from the bottom of the pan back over the top. The result is a smoky, sweet, and incredibly tender ham that will have your guests asking for your “secret” recipe.
Step 6: Rest, Slice, and Serve
The Final Rest and Carving the Perfect Slice
Once the ham reaches that internal temperature of 140°F, the hardest part begins: waiting. It is tempting to move the ham straight to a platter and start serving, but a short rest is the difference between a good ham and a legendary one.
Why the Rest Matters
Allow the ham to rest in its aluminum pan for 15 to 20 minutes before you even think about touching a knife. This serves two purposes:
- The Glaze Set: As the ham sits, the sugars in your glaze will cool slightly and thicken, turning from a liquid into a sticky, professional-looking lacquer that clings to the meat.
- Moisture Redistribution: Even though the ham is precooked, the muscle fibers still react to heat. Resting allows the juices to settle back into the meat rather than running out onto your carving board.
How to Carve a Spiral Ham
One of the best things about a spiral-cut ham is that the “hard work” of slicing has already been done for you by the butcher. However, the slices are still attached to the center bone. To serve clean, uniform pieces, follow these steps:
- Identify the Bone: Look at the top of the ham to find the center bone.
- The Vertical Cut: Take a sharp carving knife and make one deep vertical cut from the top of the ham all the way to the bottom, right alongside the bone.
- The Release: As you make that cut, the spiral slices will naturally begin to fall away from the bone in perfect half-moons.
- Follow the Natural Seams: If the slices don’t fall away immediately, you can run your knife in a circular motion around the center bone to release them.
Serving Tip: The Pan Juices
Before you carry the platter to the table, take a spoon and drizzle those accumulated juices from the bottom of the aluminum pan over the freshly cut slices. That liquid is a goldmine of rendered ham fat, wood smoke, and your custom glaze.

Big Green Egg Smoked Spiral Ham
Ingredients
Ham Ingredients:
- 8-11 pound Spiral Sliced Ham
- 3 tbsp Yellow mustard, for binder
Rub Ingredients:
- 1 Cup Brown Sugar
- 1 Cup SuckleBusters Pecan BBQ Rub
- ¼ tsp Nutmeg
- 1 tsp Cinnamon
Glaze Ingredients:
- 1 bottle Store bought glaze or BBQ sauce, see options above
Instructions
- Mix the brown sugar, Pecan Rub, nutmeg, and cinnamon together until blended well
- Rub mix all over the spiral sliced ham sitting in aluminum pan
- Preheat your Big Green Egg to 250° set up for indirect cooking (smoking)
- Add chunks of apple and pecan wood
- Place the ham in the pan inside the Big Green Egg
- Smoke 2-3 hours applying the glaze every 30 minutes until the ham reaches 140° internally
- Let it rest for 5-10 minutes and serve
Nutrition information is automatically calculated, so should only be used as an approximation.


Just bought the egg. Need help
I’m here for you brother