
This post contains affiliate links. Please see our disclosure policy.
This past weekend wrapped up with my son, daughter, and their significant others coming over for an afternoon of games, cigars, and BBQ. To feed all those hungry faces, I knew I wanted to serve Pulled Pork, but I ran into a classic pitmaster’s dilemma: I didn’t have the 12+ hours required for a traditional low and slow cook.
Instead of ordering pizza, I decided it was time to put a popular technique to the test: Hot and Fast Pulled Pork, often called “Turbo” cooking in the Big Green Egg community.
There is always a healthy debate in the BBQ world about whether cranking the heat sacrifices quality for speed. However, when you have a house full of people and a shrinking clock, the “Turbo” method is a game-changer. By running the Egg at a higher temperature, you can power through the stall and deliver incredible results in a fraction of the time. I wanted to judge the results for myself, and let’s just say, the empty plates spoke for themselves.
So sit back, grab a cold PBR, and enjoy this guide to mastering Big Green Egg Hot and Fast Pulled Pork.
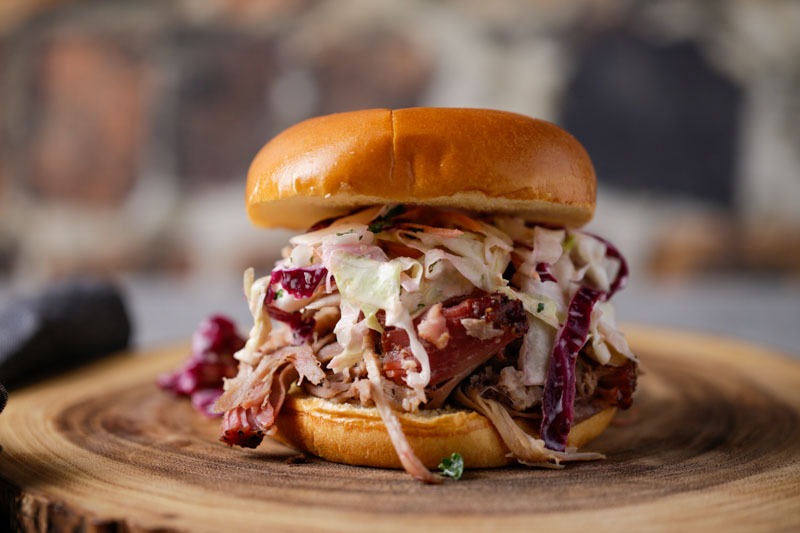
Table of Contents
- Step 1: The Injection (Moisture Insurance)
- Step 2: Trimming and the Crosshatch Cut
- Step 3: The Binder and the Rub
- Step 4: The Big Green Egg Setup
- Step 5: The Cook (Setting the Bark)
- Step 6: The First Three Hours (Bark and Moisture)
- Step 7: The Wrap (Powering Through the Stall)
- Step 8: The “Butter” Test and the Finish
- Step 9: The Rest and the “Bone Pull”
- Step 10: Chopping and Serving
- The Final Verdict: Why Turbo Wins
- Hot and Fast Pulled Pork: Big Green Egg Recipe
Get My NEW Book
The Ultimate Big Green Egg Cookbook

Step 1: The Injection (Moisture Insurance)
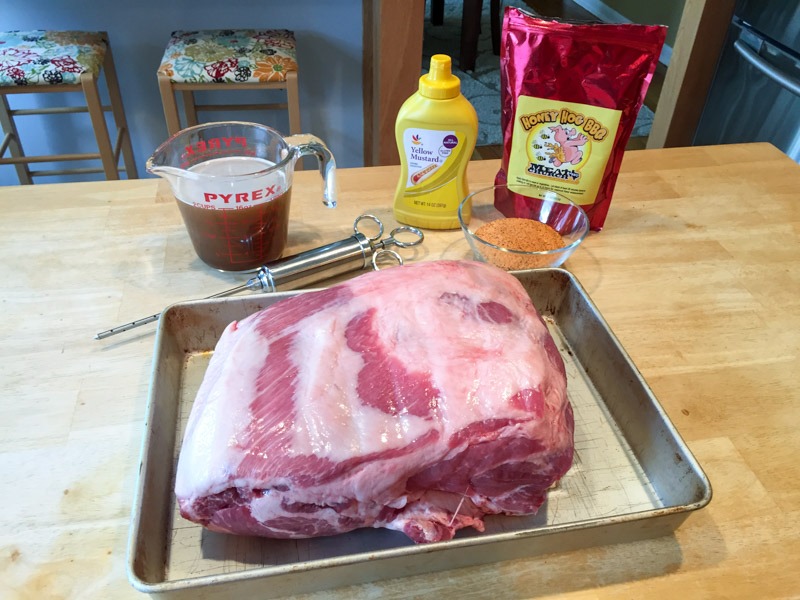
Because this “Turbo” method uses a higher heat source over a shorter time window, I wanted to give this Boston Butt every advantage to stay juicy. When you are pushing the temperature, injecting the meat becomes your best insurance policy against a dry result. It ensures that the pork remains succulent from the inside out while the bark is setting on the exterior.
For this cook, I used a classic, balanced injection:
- Apple Juice: For a touch of natural sweetness and acidity.
- Water: To help carry the flavors deep into the muscle.
- Sugar & Salt: To act as a quick brine, locking in the juices.
- Worcestershire Sauce: For that deep, savory umami punch.
Simply mix these ingredients until the sugar and salt are fully dissolved, then inject the liquid into the thickest parts of the butt in a grid pattern. You’ll see the meat “plump up” as it takes on the moisture.
Step 2: Trimming and the Crosshatch Cut
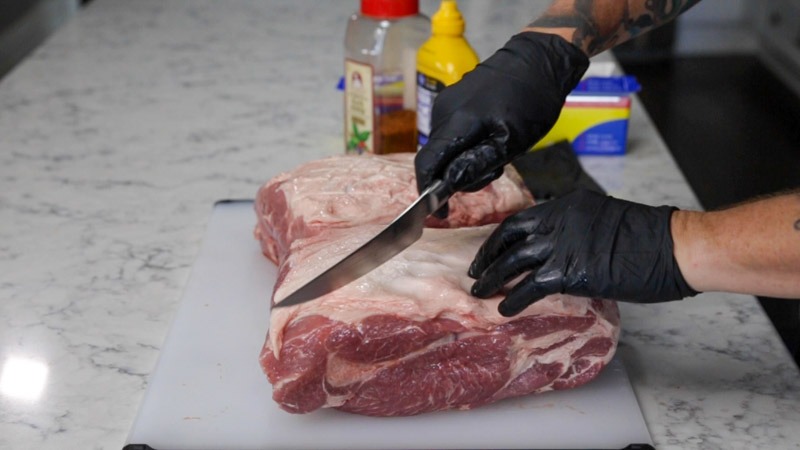
Before the rub goes on, it is time to prep the surface of the meat. When cooking “Hot and Fast,” how you handle the fat cap makes a big difference in the final texture. I start by trimming away any heavy, loose pieces of fat or “silver skin” from the bottom and sides. You want a streamlined piece of meat that allows the smoke to penetrate evenly.
Once trimmed, I use a sharp knife to score the remaining fat cap in a crosshatch pattern. I cut about an inch apart, going just deep enough to reach the meat but not through it.
There are two major benefits to the crosshatch cut:
Bark Surface: It creates more surface area and “nooks and crannies” for your BBQ rub to settle into. Instead of a flat sheet of fat, you get crispy, seasoned cubes of bark that add incredible flavor to the final pull.
Fat Rendering: At 350°F, those squares allow the fat to render down more effectively, basting the meat as it cooks.
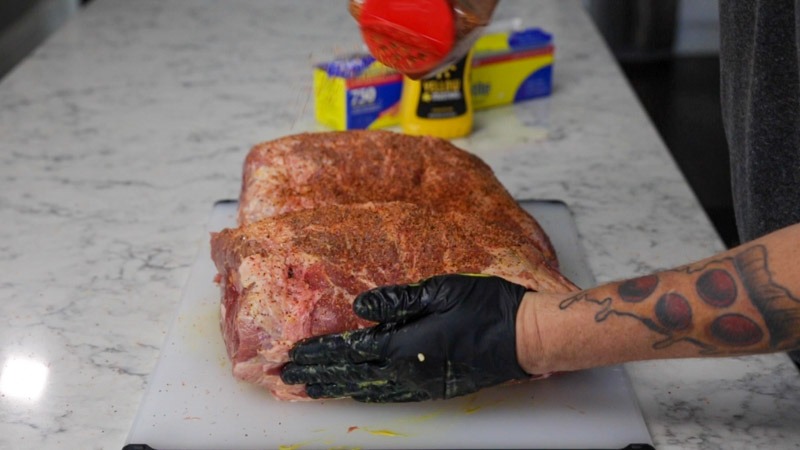
Step 3: The Binder and the Rub
With the trimming and scoring complete, it is time to build that flavor profile. To start, I slathered the Boston Butt with a light coating of Yellow Mustard. Don’t be intimidated if you aren’t a mustard fan; it serves strictly as a binder to help the seasoning stick and disappears during the cook, leaving behind a beautiful crust.
For the seasoning, I used Meat Church Honey Hog BBQ Rub. This rub is a fan favorite for a reason as it has a perfect honey-sugar base that caramelizes beautifully, even at “Turbo” speeds.
Other Great Options
If you don’t have Honey Hog on hand, you can easily swap it out based on what is in your pantry:
- Store-Bought Alternatives: Lane’s BBQ Spellbound or Killer Hogs The BBQ Rub are both excellent choices that handle higher heat well without burning.
- The DIY Route: If you want to mix your own, a classic “6-3-2-1” ratio works perfectly for pork:
- 6 parts brown sugar
- 3 parts kosher salt
- 2 parts paprika
- 1 part black pepper (add a dash of garlic powder and cayenne for extra kick)
Whatever rub you choose, apply it generously to all sides. Be sure to work the seasoning down into those crosshatch scores you made in the fat cap. This ensures that every bite of pulled pork is packed with flavor.
Step 4: The Big Green Egg Setup
Now it is time to get the Egg ready for some high-heat action. Unlike a traditional cook where we aim for 225°F, we are going to push the envelope here to save time.
The Wood: I recommend using Hickory or Pecan chunks. Since the meat will be on the grill for less time, these stronger woods ensure you still get that deep, smoky “low and slow” flavor.
The Configuration: Set up your Big Green Egg for indirect cooking using the ConvEGGtor (Plate Setter) with the legs facing up.
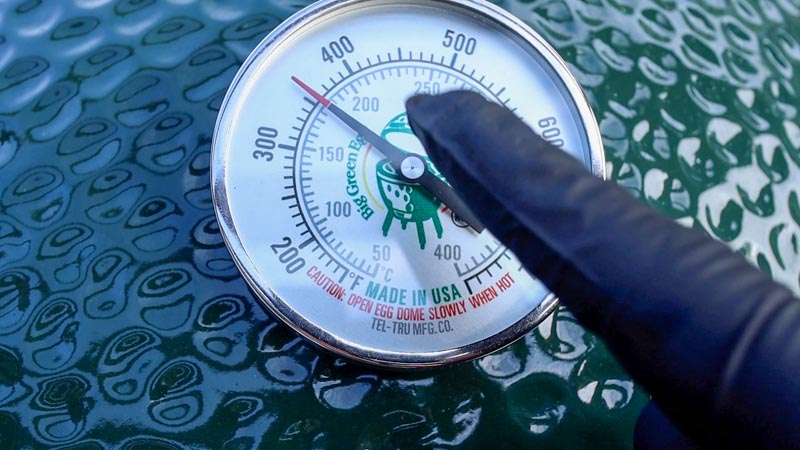
The Temperature: Target a steady 350°F. This is the sweet spot for a “Turbo” cook; it is hot enough to render the fat quickly but not so hot that you’ll scorched the sugar in your rub. Once you see that clean blue smoke dancing out of the daisy wheel, you know the Egg is stabilized and it is time to put the butt on.

Step 5: The Cook (Setting the Bark)
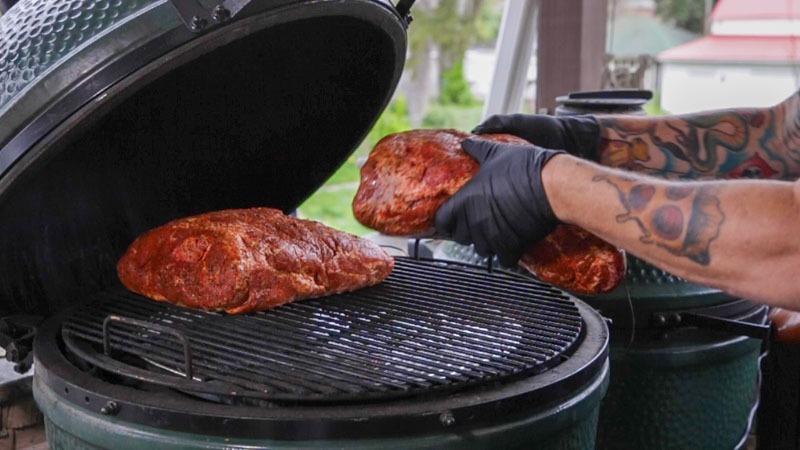
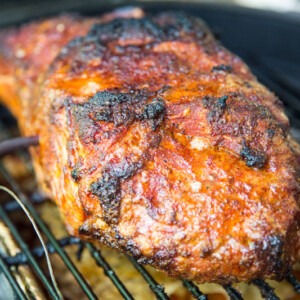
Place the Boston Butt on the grate with the fat side down. While many people debate fat side up versus down, when you are cooking “Turbo” at 350°F, the fat cap acts as a crucial heat shield. Placing it down protects the delicate meat from the direct radiant heat of the ConvEGGtor, ensuring the bottom of your pork doesn’t get tough or scorched while the rest of the roast cooks.
By flipping the butt this way, those crosshatch scores you made earlier still work their magic by allowing the fat to render and pull away from the meat efficiently, even while facing the heat source.
Close the dome and let the Big Green Egg do the work. In this first phase of the cook, we are looking for bark development. At these higher temperatures, the bark will set significantly faster than a traditional low and slow cook. Resist the urge to peek; keeping the dome closed maintains the convection environment needed to power through the first half of the cook.
Step 6: The First Three Hours (Bark and Moisture)
With the Egg locked in at 350°F, let the pork ride for about 3 hours, or until your internal meat probe measures 165°F. This is the critical window where that “Turbo” heat is working to build a deep, dark bark and render those outer layers of fat.
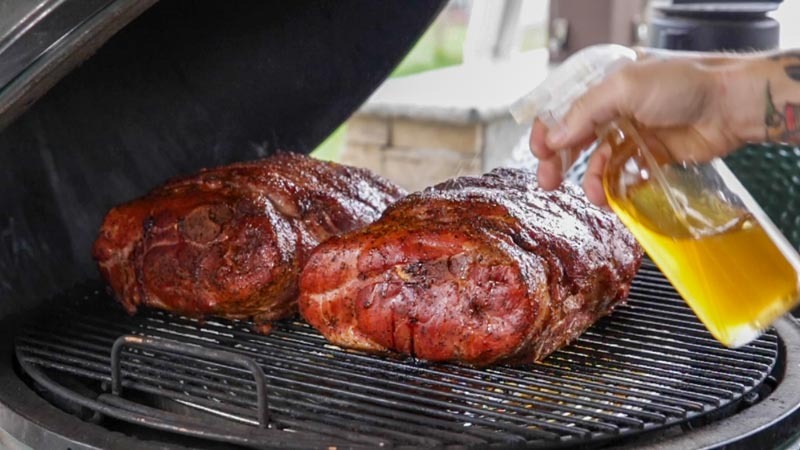
To keep the exterior from drying out during this high-heat phase, I make sure to maintain a consistent misting schedule:
- The Spritz: I use a 50/50 mix of Apple Juice and Apple Cider Vinegar. The juice provides sugars for a better bark, while the vinegar adds the acidity needed to cut through the heavy fat of the Boston Butt.
- The Cadence: I check the pork every hour to give it a quick misting. This not only keeps the meat moist but also helps the smoke “stick” to the surface, enhancing that beautiful mahogany color.
By the time you hit that 165°F mark, the bark should be well-set and the meat should be ready for the next phase: the wrap.
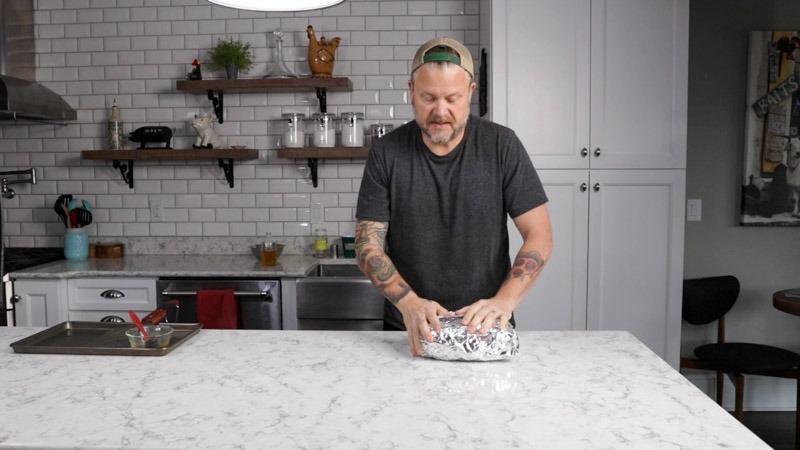
Step 7: The Wrap (Powering Through the Stall)
Once your internal probe hits that 165°F mark, the bark should be firm and dark. Now it is time to use the “Texas Crutch” to ensure the meat stays succulent while we power through the final stretch.
Carefully remove the Boston Butt from the Egg and place it on a large double layer of heavy-duty aluminum foil. Before sealing it up, add a small amount of apple juice (about 1/4 to 1/2 cup) into the foil. This creates a braising environment that helps tenderize the connective tissue even faster.
Wrap the foil as tightly as possible to avoid any steam escaping. Place the bundled pork back on the Big Green Egg, fat side down, and let it ride for another 2 hours. At 350°F, this internal braise works quickly. You are looking for an internal temperature of 195°F before you even think about checking for doneness.
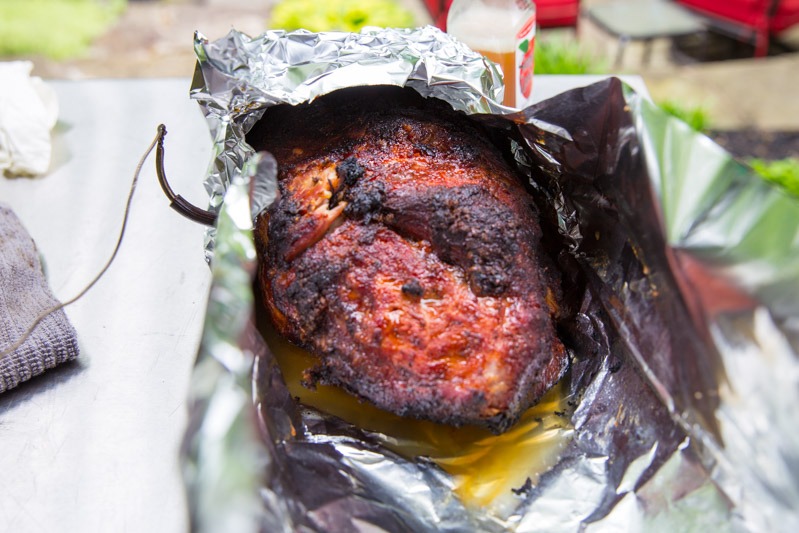
Step 8: The “Butter” Test and the Finish
When the thermometer hits 195°F, start checking the pork for “probe tenderness.” You aren’t just looking for a number; you want your temperature probe to slide into the meat with absolutely zero resistance… like you are sticking it into a tub of softened butter.
If it feels a little tight, give it another 15 minutes. Even with the “Turbo” method, every piece of meat is different. Once it hits that buttery consistency (usually between 195°F and 203°F), it is time to pull it off the heat.
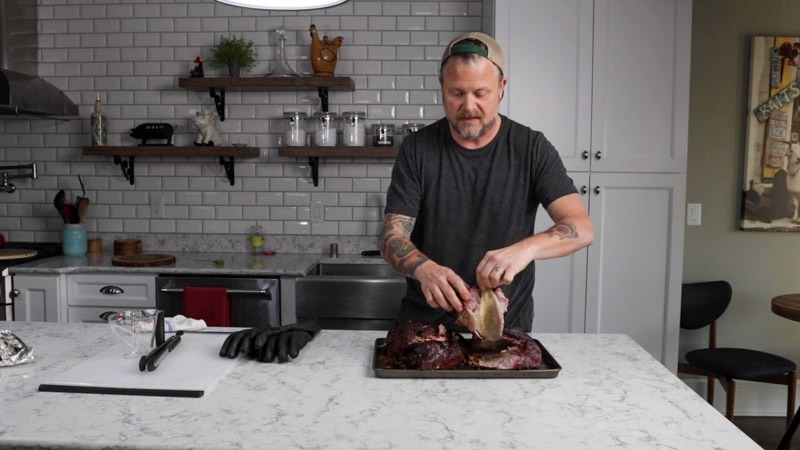
Step 9: The Rest and the “Bone Pull”
Once the pork reached that perfect level of tenderness, I removed it from the Big Green Egg. Now, I cannot stress this enough: do not skip the rest. I let the Boston Butt rest in the foil for a full hour. This allows the muscle fibers to relax and reabsorb those delicious juices that were pushed to the surface during the high-heat cook.
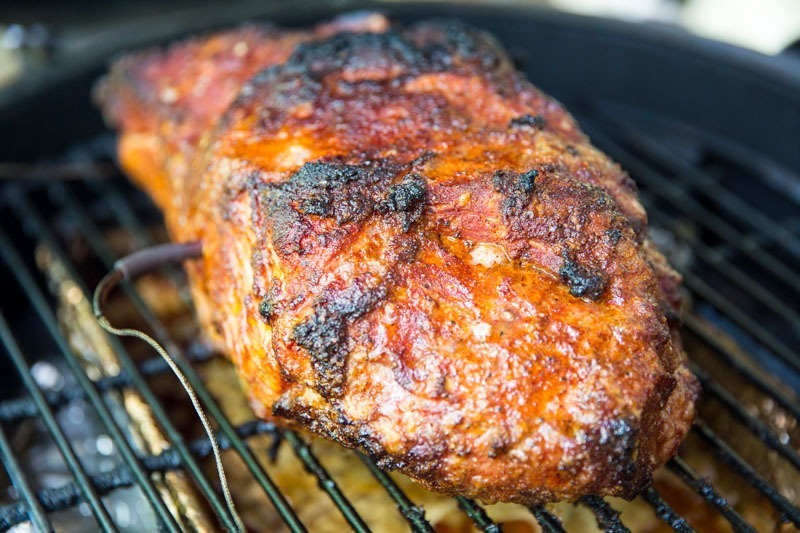
After an hour of anticipation, it was time for the moment of truth. I reached in and gave the shoulder bone a gentle tug. As you can see, it slid right out with absolutely no resistance!
That clean bone pull is the universal sign of a perfectly cooked pork butt. I was honestly thrilled that this “Turbo” method worked exactly as designed. It proved that you can shave hours off your cook time and still achieve that succulent, fall-apart texture that every BBQ lover dreams of.
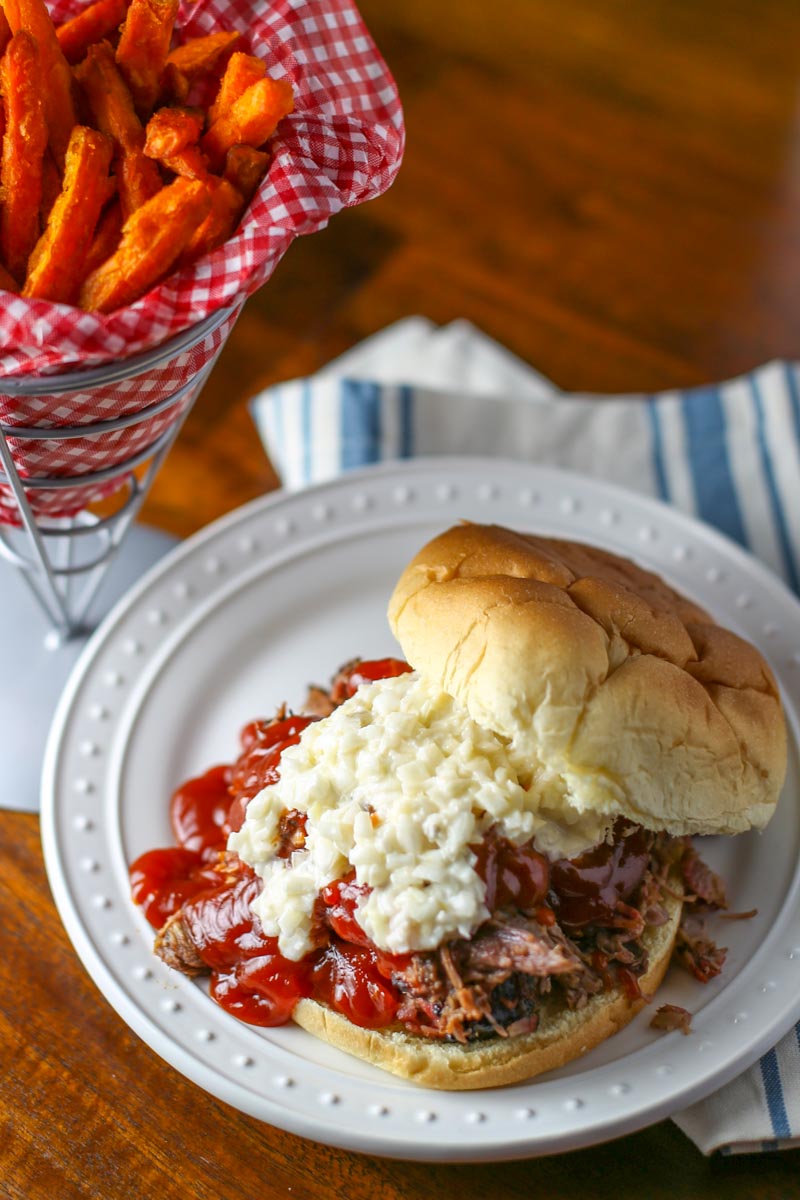
Step 10: Chopping and Serving
With the bone out of the way, it was time for the best part. I pulled the pork into a nice, consistent pile, making sure to incorporate those crunchy, seasoned bits of bark throughout.
One of the biggest myths about “Turbo” cooking is that you lose out on that classic BBQ appearance. However, as you can see in the photos, I still got a beautiful, vibrant smoke ring on this Boston Butt. Even with the shorter cook time, the Big Green Egg and the hickory chunks delivered that deep, smoky penetration we all look for.
I piled the pork high on toasted buns for sandwiches, served alongside some extra BBQ sauce and a cold beer. It was the perfect end to an afternoon of games and cigars.

The Final Verdict: Why Turbo Wins
If you have been hesitant to try the “Hot and Fast” method, let this be your sign to go for it. This cook proved that you don’t need to stay up all night to get competition-quality results. By using a quality injection, a solid binder, and the fat-side-down “heat shield” technique, you can deliver a world-class meal in about six hours.
The next time you have a house full of hungry faces and a limited time window, fire up the Egg, lock in that 350°F, and get ready to be the hero of the backyard.
Hot and Fast Pulled Pork: Big Green Egg Recipe
Equipment
- 1 Meat injector
Ingredients
Meat Ingredients:
- 8-10 pound Bone-in Boston Butt, (pork shoulder)
- 2-3 tbsp Yellow mustard
- 3/4 cup BBQ rub, e.g., Meat Church Honey Hog
Injection Ingredients:
- 1 cup apple juice
- 1/2 cup water
- 2 tbsp sugar
- 2 tbsp kosher salt
- 1 tbsp Worcestershire
Spritz Ingredients:
- 1/2 cup Apple juice
- 1/2 cup Apple cider vinegar
Instructions
- Trim and Score: Trim away loose fat or silver skin. Use a sharp knife to score the fat cap in a 1-inch crosshatch pattern, cutting just down to the meat.
- Inject the Meat: Whisk the injection ingredients until the sugar and salt are dissolved. Inject the liquid into the Boston Butt in a grid pattern every inch.
- Apply Binder and Rub: Slather the entire butt with a light coat of yellow mustard. Generously apply the BBQ rub to all sides, ensuring it gets into the crosshatch scores.
- Prepare the Big Green Egg: Set up your Big Green Egg for indirect cooking with the ConvEGGtor (legs up). Add Hickory or Oak wood chunks. Stabilize the temperature at 350°F.
- The Clean Smoke: Wait for the "billowy" white smoke to turn into a thin, translucent blue. This signals the Egg is ready.
- The Cook (Phase 1): Place the pork on the grate fat side down to protect the meat from the heat source. Close the dome.
- The Spritz: Every hour, mist the pork with the Apple Juice/Vinegar mix to maintain moisture and build the bark.
- The Wrap: When the internal temperature reaches 165°F (usually around the 3-hour mark), remove the pork. Place it on a double layer of foil, add 1/4 cup apple juice, and wrap tightly.
- The Cook (Phase 2): Return the wrapped pork to the Egg (fat side down). Continue cooking for approximately 2 more hours until the internal temperature reaches 195°F–203°F.
- The Butter Test: The pork is done when your temperature probe slides in and out of the meat with no resistance, like softened butter.
- The Rest: Remove the pork from the Egg and let it rest, still wrapped, for at least 1 hour (In a cooler wrapped with towels for up to 4 hours).
- Pull and Serve: Remove the bone (it should slide out clean!). Chop or shred the meat, mixing in the crispy bark from the fat cap. Serve on toasted buns.
Nutrition information is automatically calculated, so should only be used as an approximation.


great website, I have had my BGE for approx 4 years and love it. However, I am always open to new and different recipes. Yours are awesome.
Thanks!
James thank you for the comment and the kind words. I love cooking on the BGE and sharing the experience with good people just like you!
First I am new to the green egg, ?I have watched several videos cooking pork butt or as some say pork shoulder, some place it fat side up others flat side down, does it make a difference? I am going to cook my first pork shoulder tomorrow (scared to put it on tonight as is my first cooking)…
Thanks in advance for your comments.
I prefer fat side down as that insulates the meat from the heat source during a long cook. Good luck with the cook as I am sure you will do great.
This my second time using the high heat method on the BGE and I can’t say enough about how well this turned out! Thanks! ??
Once I discovered this method I don’t cook Boston Butt any other way! Thanks for the comment!!!
Chris, what pound butt was yours I’m assuming the time would increase somewhat depending on weight of butt. Looks delicious am trying this Saturday.
It was an 8 pound butt. Yes time will vary but if you follow instructions and cook to temp you’ll be good! Thank You!
Hi, Thanks much for writing about this “High heat” method. Elsewhere I have heard it called “Turbo.” I have yet to try it, but would appreciate your answer to my question that really puzzles me. After hearing “Low and Slow extolled, all my life, as the ONLY way to authentic Q do you really get as good (tender, moist, smoky, good bark if you don’t wrap) as the old low and slow method? If so, I can’t figure why I would ever go back to low and slow again.
Have you tried this without wrapping – just keeping the butt unwrapped until it is finished (I like 203 degrees) so as not to soften the bark? Thanks much! I really look forward to hearing from you Just found your site! Jim Burgin
Jim these are all great questions. To be honest since learning about “turbo” cooking a Boston butt I haven’t done one low and slow any more. I have not tried it without wrapping as I believe you need this more than ever with higher heat i.e. The Texas crutch is what helps get the tender pork with higher heat shorter cook.
Tried this method and I am very impressed.
Followed your directions and it Worked out great. Highly recommended.
Thanks James! It’s hard to gonna know to low and slow after trying this method!
How did the bark turn out with this method? I too am a long time advocate of low and slow, but have been looking for a more practical, quicker solution that takes much less time. Could you describe a little bit more about how the bark compared and also, how easy was it to pull? I see you chopped it up, but was that because it wouldn’t pull easily?
Many thanks for a great post!
This method works great! The bark turns out delicious and the meat pulls easily. I do both methods but the turbo is worth a try!
Chris. What is the rule on injecting pork butt? How many injections and what spacing is needed ?
There is no real rule to injecting. I make the injection recipe and randomly insert the needle in the pork until the injection is all gone. It is good to do this in a pan so the drippings don’t go all over your counter.
No rule… just inject until the liquid is gone. Try to disperse the injections through the meat as to not overload a certain area. It is useful to inject the meat while it is in a pan as the juices will surely run out.
Thank you so much for this recipe for a quicker but no less flavorful smoked pork butt on the Big Green Egg. My husband recently won an Egg in a work raffle and we have never had a smoker. I’ve also never used an injector! Your instructions and photos were super helpful, and our pork butt was incredible.
Welcome to the BGE family! Thanks for the kind words 🙏
350 vs 325. I’ve done both, and 325 just prolongs the cook with little value added. Maybe if you’re in a BBQ competition 325 is where it’s at, but 350 gives me roughly a cook time of 1.5 hours per lb of butt and a taste that cannot be beat. Internal temperature over 205 and the pull is easy and amazing. I use a simple rub of brown sugar, paprika, salt, and pepper, and I don’t trim any fat. Fat side down over a pan full of water under the grate (I have to refill it halfway through the cook). It’s so easy and it comes out amazing. That’s it.
I can’t wait to try the miso salmon plank recipe. Thanks for the website!
Thanks Eric! Let me know how the Salmon turns out.