
This post contains affiliate links. Please see our disclosure policy.
There is a reason Garlic Parmesan is a staple on every wing menu in the country. It is a timeless combination that offers a savory, salty, and rich alternative to the standard buffalo sauce. When you cook these wings on the Big Green Egg, the smoke adds a layer of complexity that you simply cannot get from a deep fryer.
Whether you are hosting a massive game day event or just looking for a solid weekend cook, this recipe delivers that classic flavor with a perfectly crispy finish. I have refined my process to ensure the garlic is punchy and the parmesan creates a delicious, salty crust on the skin.
So, let’s get the charcoal lit and the temperature stabilized. Grab an ice-cold Stella Artois and enjoy this updated guide to making the best Garlic Parmesan Chicken Wings on your Big Green Egg.
Table of Contents
Get My NEW Book
The Ultimate Big Green Egg Cookbook

Step 1: Prep and Seasoning
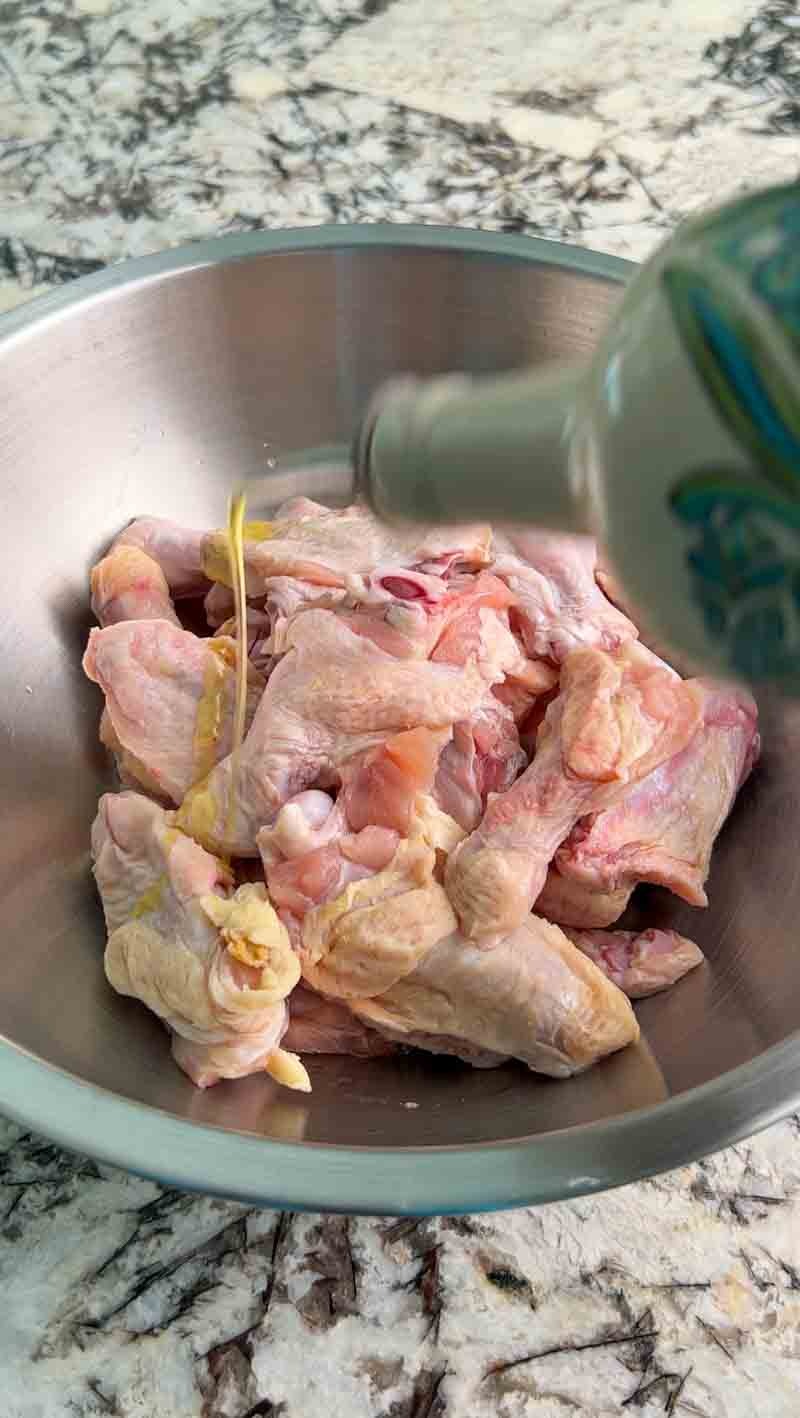
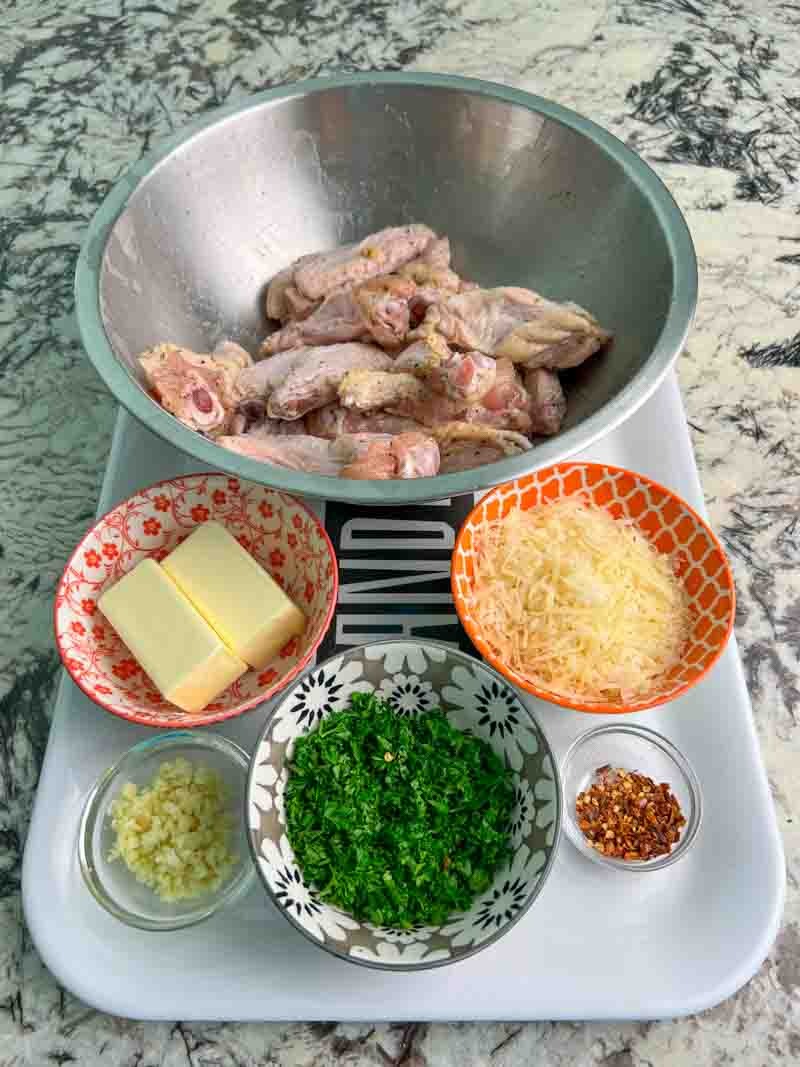
Start by separating the drums from the flats and placing them in a large bowl. To get that signature base layer of flavor started, add a light coating of olive oil as your binder. This helps the seasoning stick and jumpstarts the browning process on the Big Green Egg.

For the seasoning, you want a savory, garlic-forward profile. Here are a few ways to go:
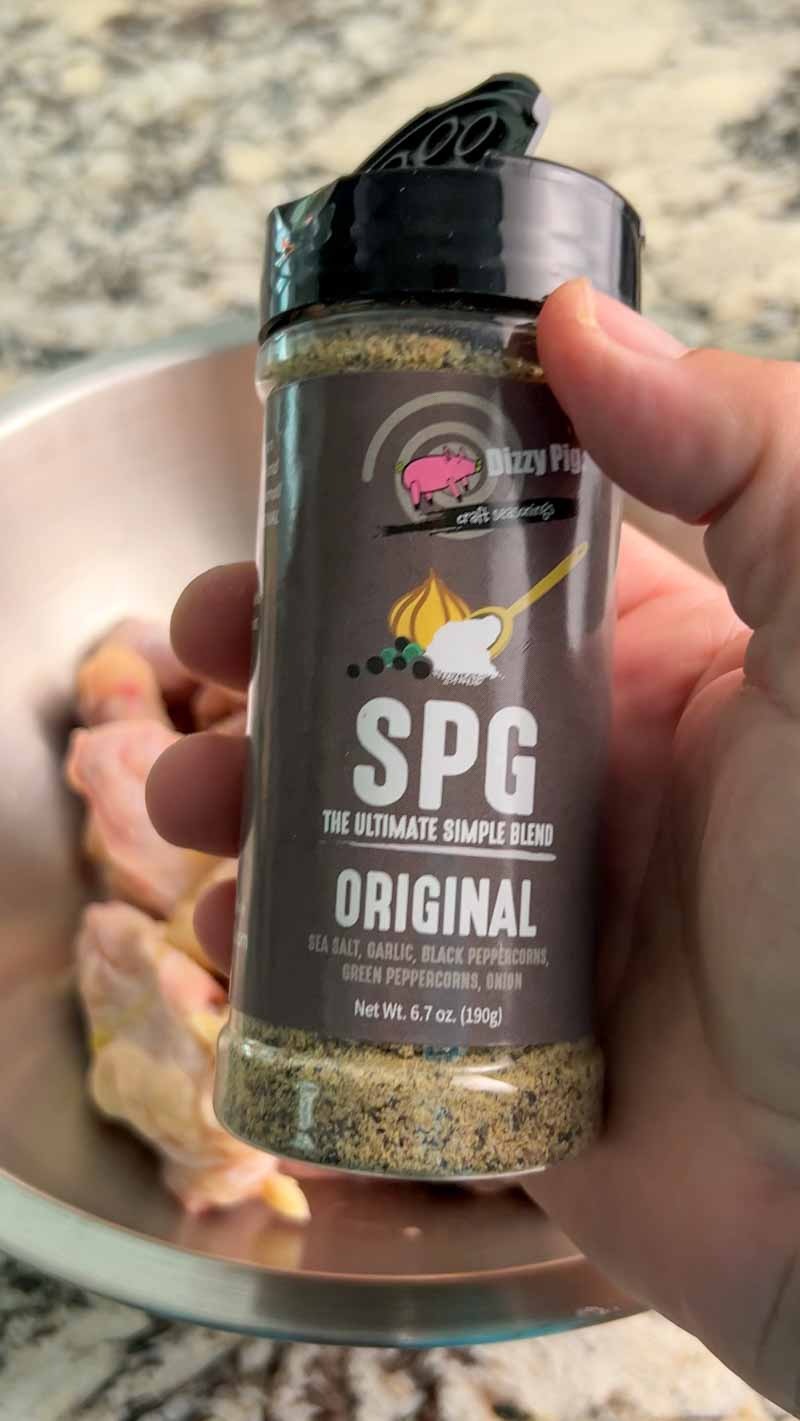
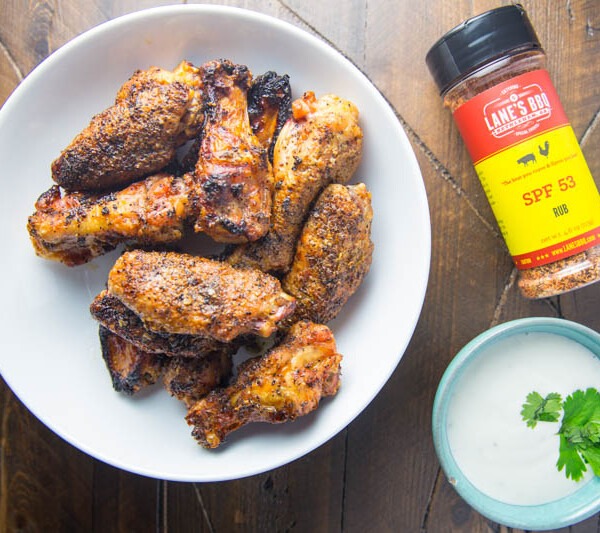
- The Professional Choice: I personally use Dizzy Pig SPG Rub. It is a high-quality blend of salt, pepper, and garlic that provides the perfect foundation without overpowering the Parmesan.
- Other Commercial Options: If you have it on your shelf, Lane’s BBQ Garlic² is an incredible option for double the garlic punch. Meat Church Holy Cow also works well if you want a more pepper-heavy “Texas style” base.
- The DIY “House” Blend: If you want to mix your own, combine 1 tablespoon Kosher salt, 1 tablespoon coarse black pepper, and 1 tablespoon granulated garlic.
Mix the wings well to ensure every piece is thoroughly coated. Once seasoned, set the wings to the side. This brief resting period allows the seasoning to adhere to the skin while you focus on the grill.
Step 2: The Big Green Egg Setup
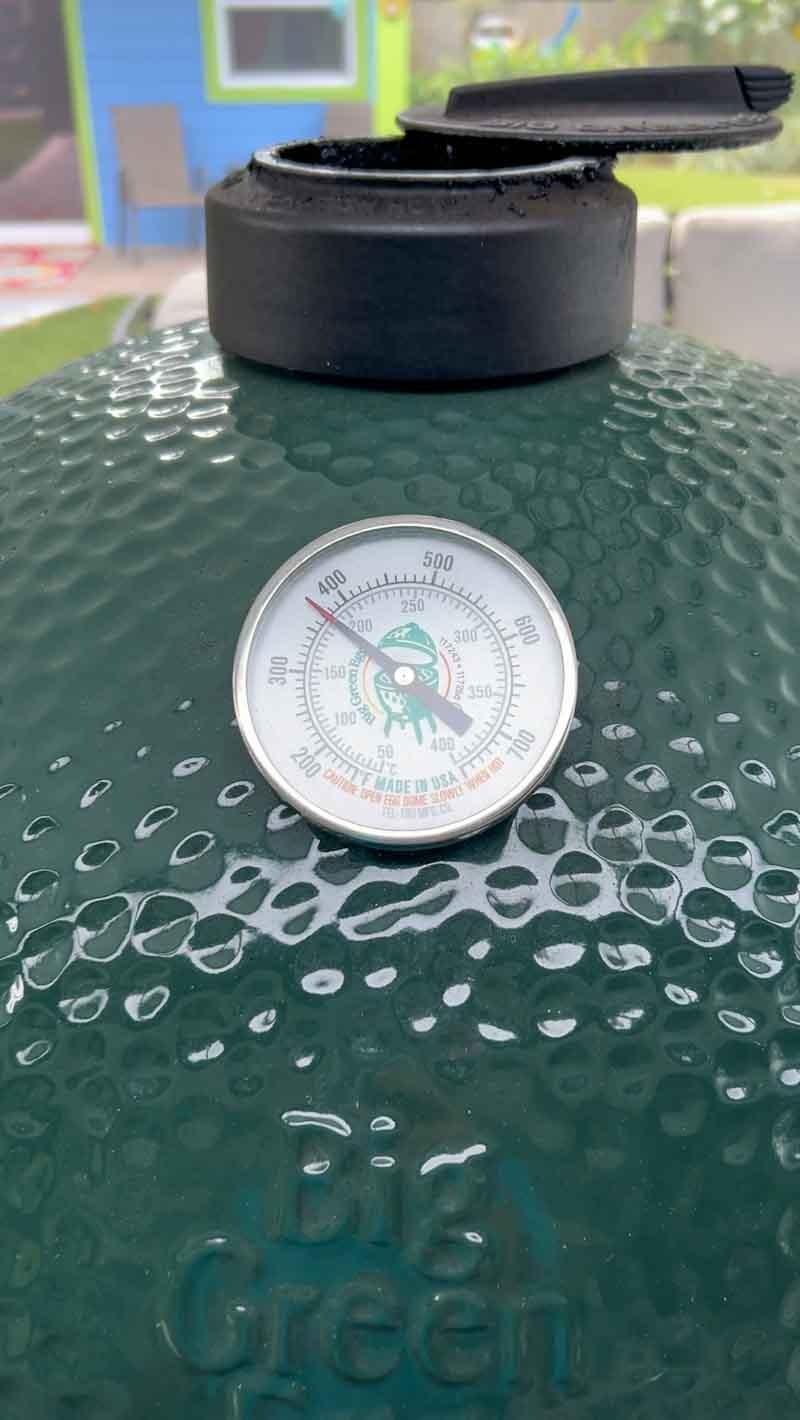
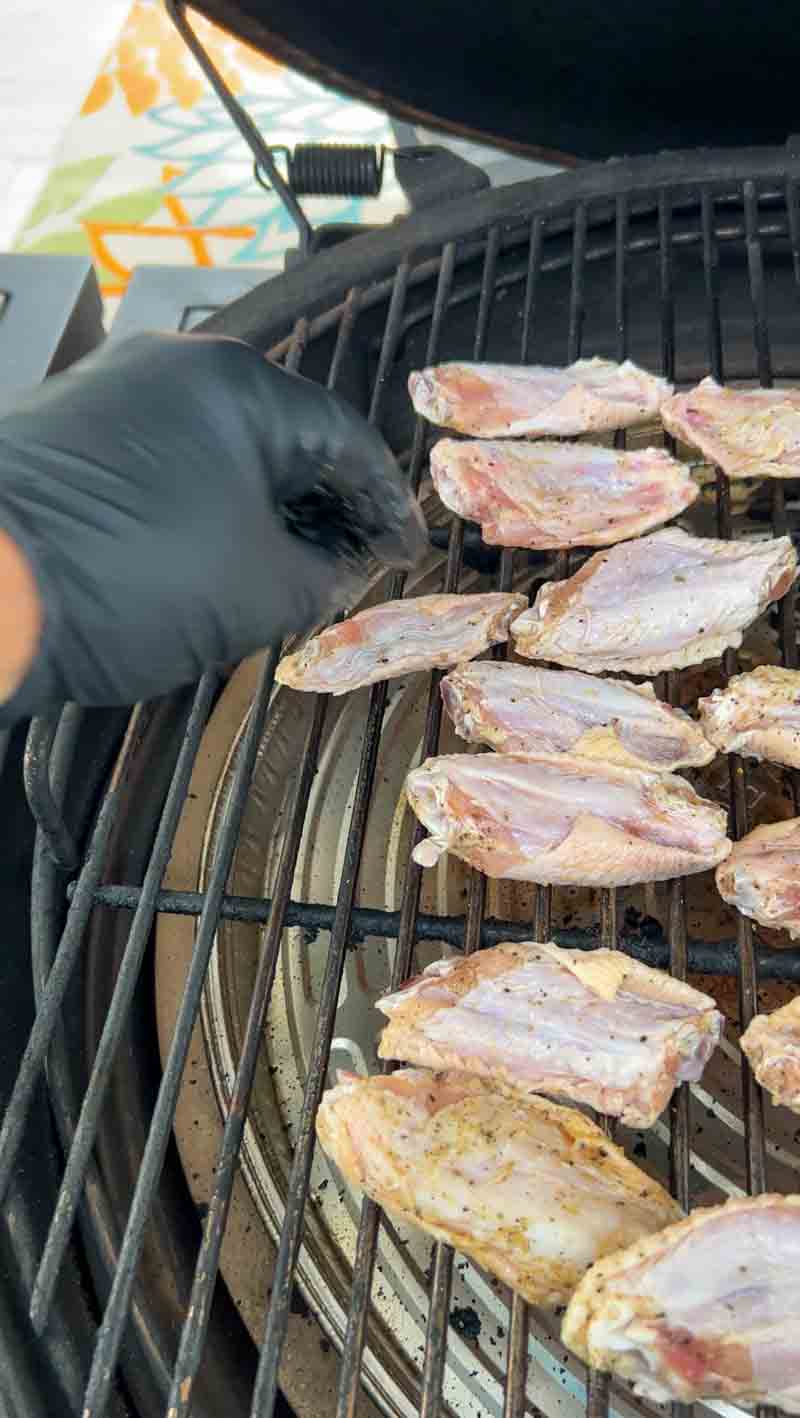
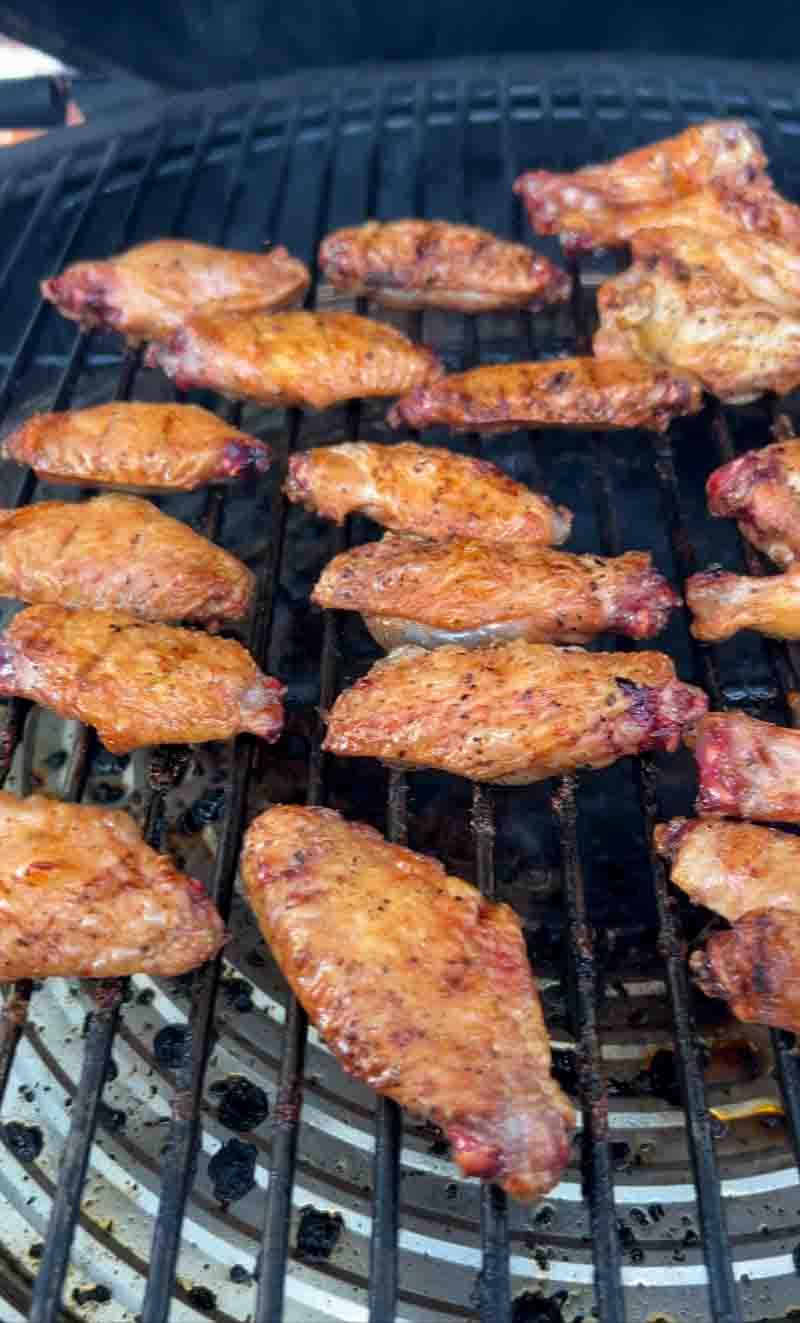
For this cook, the goal is a consistent roast that results in a perfectly crispy exterior. Prepare your Big Green Egg for indirect grilling by inserting the convEGGtor in the legs-up position. This creates the convection-style heat necessary to cook the wings evenly without the flare-ups of a direct flame.
Light your lump charcoal and bring the Egg up to a steady 375°F. This temperature is the sweet spot for wings because it is high enough to render the fat and crisp the skin effectively while ensuring the meat remains juicy. Once the temperature has stabilized and the airflow is set, you are ready to get the wings on the grid.
Step 3: Prepping the Garlic Parmesan Sauce
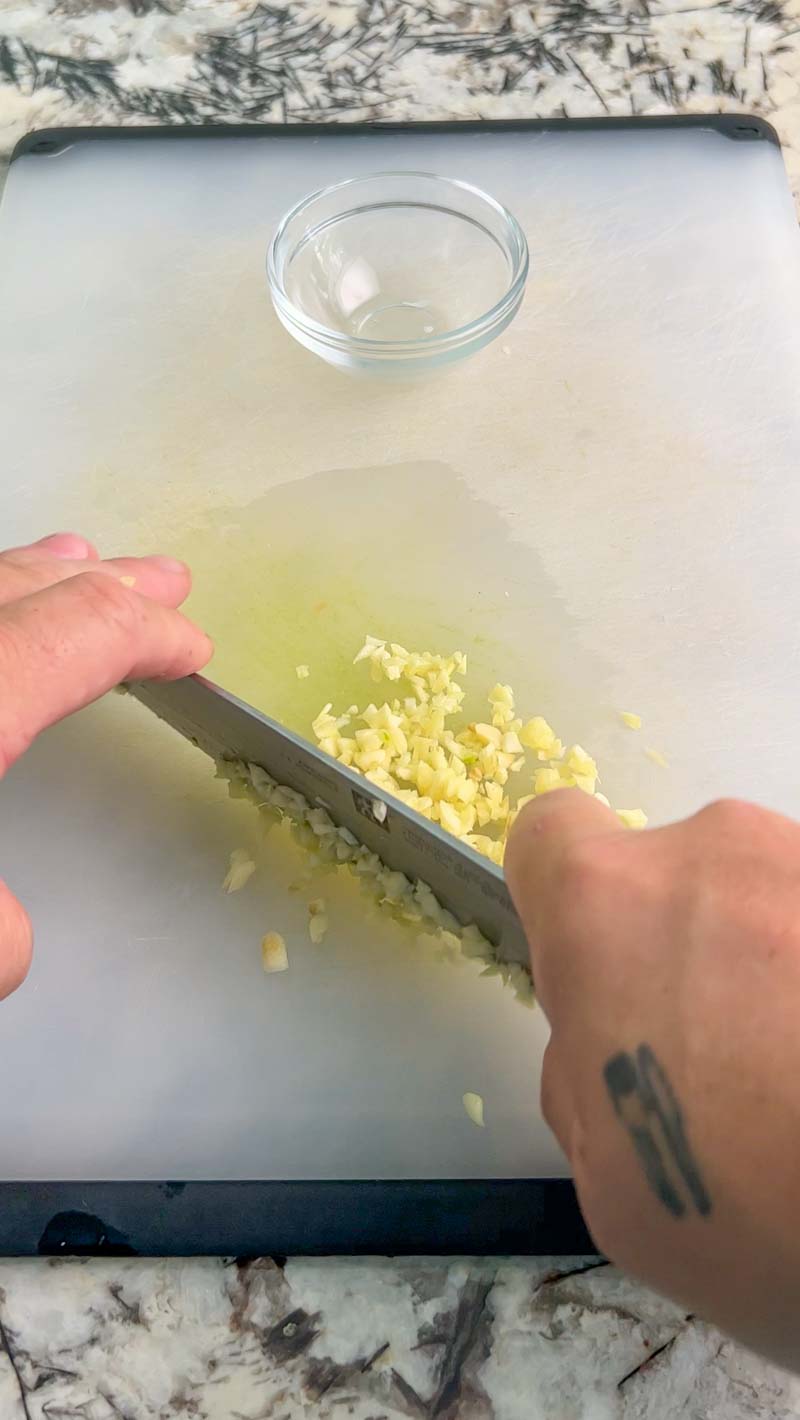
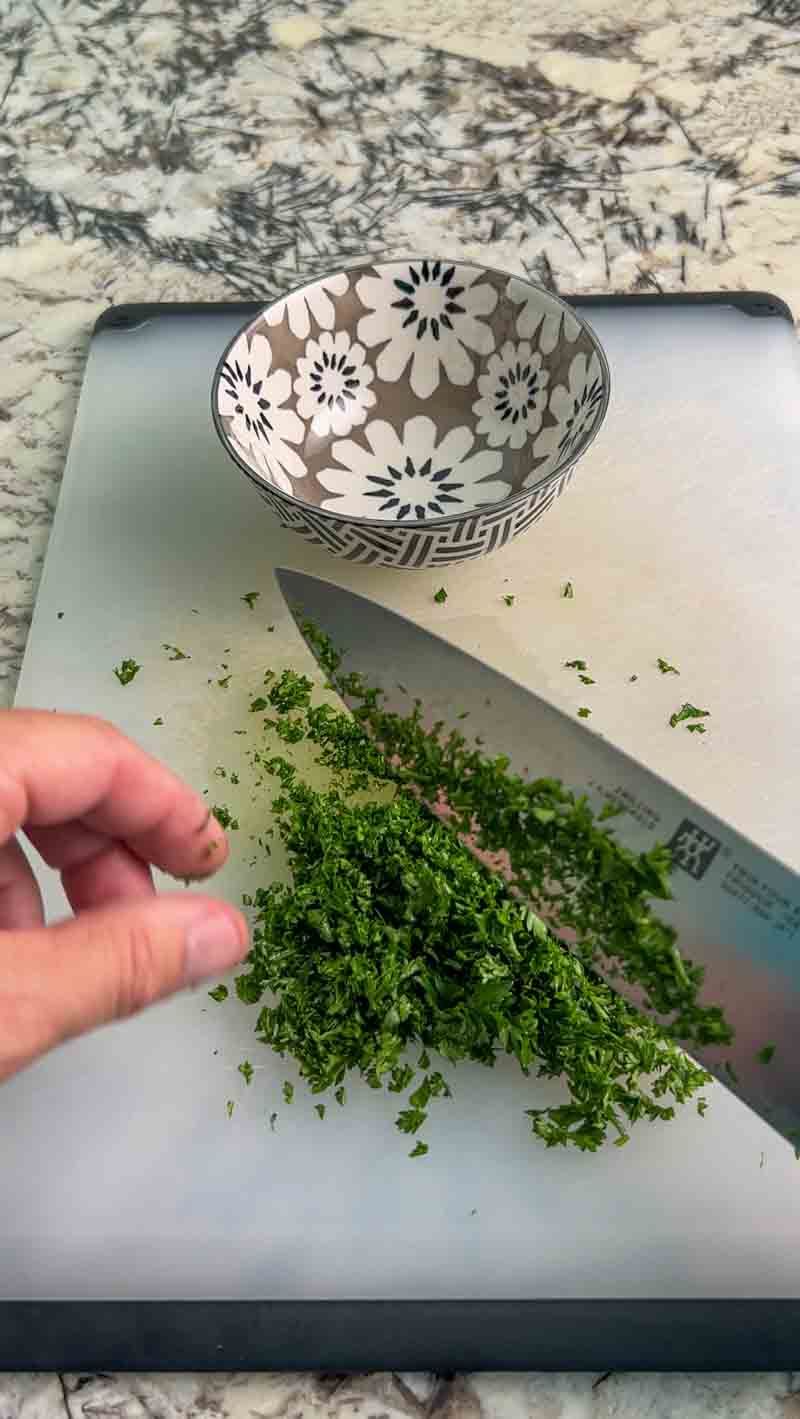
While the Big Green Egg is preheating and stabilizing, it is time to prep your sauce components. This is a “fresh” sauce, so having everything measured and chopped ahead of time is key to ensuring the garlic stays bright and the parsley stays vibrant.
Start by finely chopping your fresh garlic and Italian flat-leaf parsley. You want a fine mince on the garlic so it distributes evenly across every wing, while the parsley provides a fresh, herbaceous pop against the rich cheese. Set these aside in small prep bowls.
Next, measure out your Parmesan cheese and red pepper flakes. For the best results, use a high-quality, aged Parmesan and grate it finely so it melts slightly upon contact with the hot wings. The red pepper flakes are optional, but they add a subtle background heat that balances the saltiness of the cheese. Having these ingredients staged and ready to go ensures you can toss the wings the moment they come off the grill while they are at their peak temperature.
When you have all your ingredients assembled and the Big Green Egg is holding steady at 375°F, it is time to cook the wings! This is where the magic happens as the indirect heat transforms that seasoned skin into a golden, crispy crust.
Place the wings on the grid, leaving enough space between each piece for the air to circulate freely. Close the dome and let the convection heat go to work. I recommend checking them around the 25-minute mark to give them a flip. This ensures the bottom side gets just as much heat as the top, leading to an even crunch all the way around.
You are looking for a total cook time of about 45 to 50 minutes. While 165°F is the standard safety mark, I like to let these go until they hit an internal temperature of 185°F to 190°F. This extra time allows the fat to fully render out of the skin, giving you that satisfying “snap” when you take a bite, while the meat remains incredibly tender.
Step 4: Cooking the Wings
Before you load the grill, make sure the temperature of the Big Green Egg is stable at 375°F. A steady temperature is the key to a predictable cook and ensures the skin crisps up without the seasoning burning.
Place the wings on the grid and close the dome. You are going to cook the wings for 50 minutes to an hour total time. About halfway through the cook, I recommend opening the dome and flipping the wings. This simple step ensures that the convection heat hits both sides of the wing evenly, giving you a uniform color and texture.
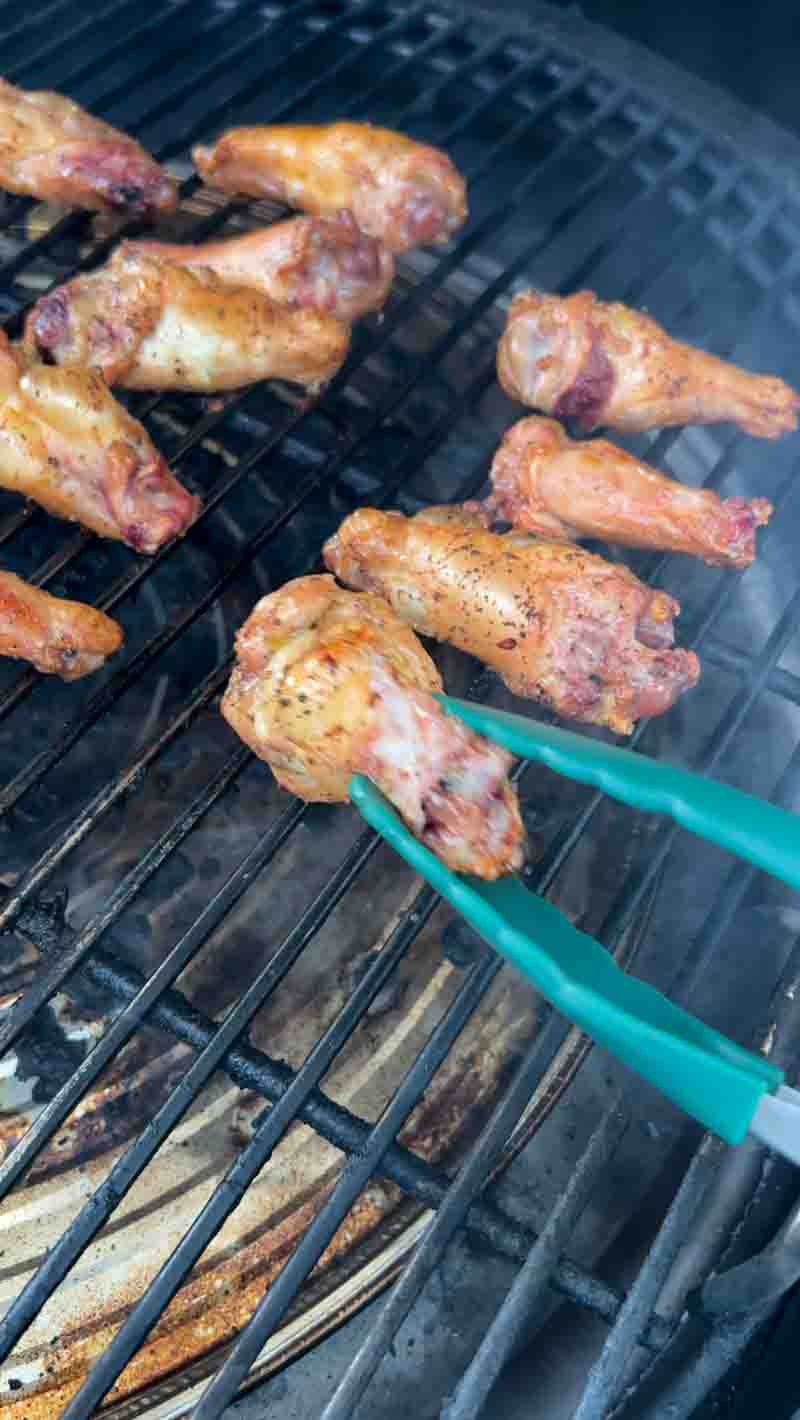
As you approach the hour mark, keep an eye on the skin. You are looking for a deep golden-brown color and a firm texture. By the time they have been on for 50 to 60 minutes, the internal temperature should be in that 185°F to 190°F range, which is the sweet spot for a wing that pulls cleanly away from the bone.
To ensure the wings cook evenly, flip them halfway through the cook, which should be right around the 30-minute mark.
Using a pair of long-handled tongs, quickly turn each wing to expose the underside to the rising heat. This is a critical step because it prevents one side from becoming overly dark while the other remains soft. By flipping them, you allow the rendered fat to move and the skin on both sides to achieve that desired golden-brown crunch.
Work efficiently during the flip to keep the dome open for as little time as possible. This helps maintain the internal temperature of the Egg and keeps your cooking environment stable for the final stretch.
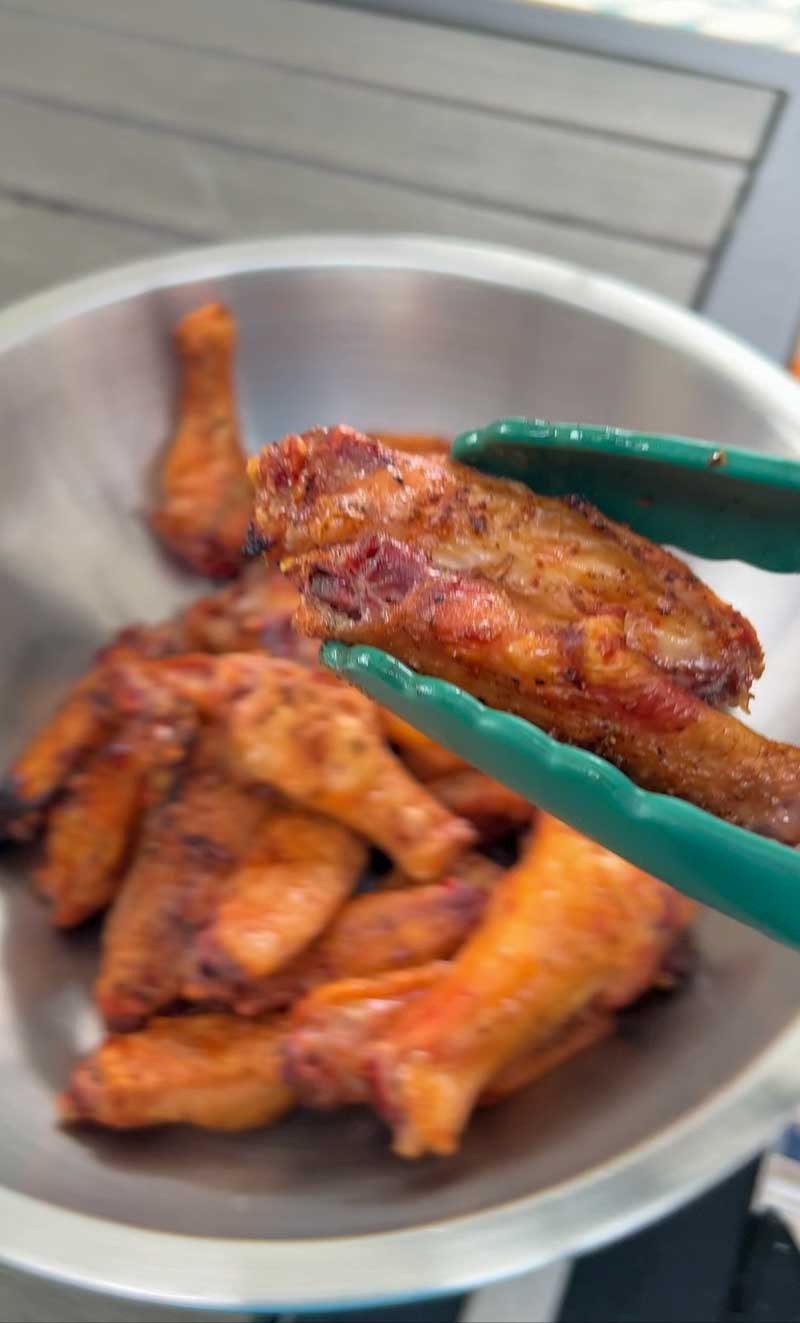
Step 5: Pulling the Wings
After another 25 minutes of cooking, it is time to check your progress. Open the dome and inspect the wings. At this stage, you are looking for a deep, dark brown color and skin that feels firm and crispy to the touch.
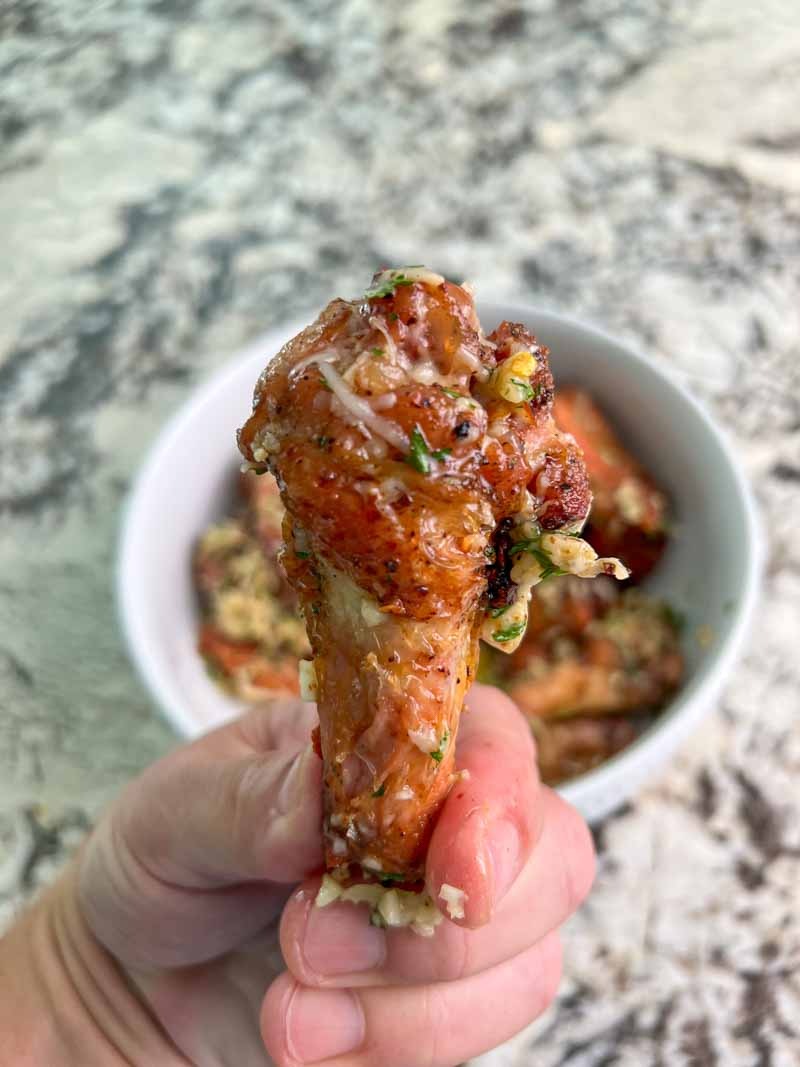
Use an instant-read thermometer to check the internal temperature. If the wings measure between 175°F and 185°F, they are ready to pull off the Big Green Egg. While poultry is safe at 165°F, taking wings into this higher range is the secret to getting that perfect “bite through” skin and meat that effortlessly pulls away from the bone.
If they haven’t quite reached that color or temperature, give them another five minutes. Once they hit the mark, remove them from the grid and get them ready for the final flavor explosion.
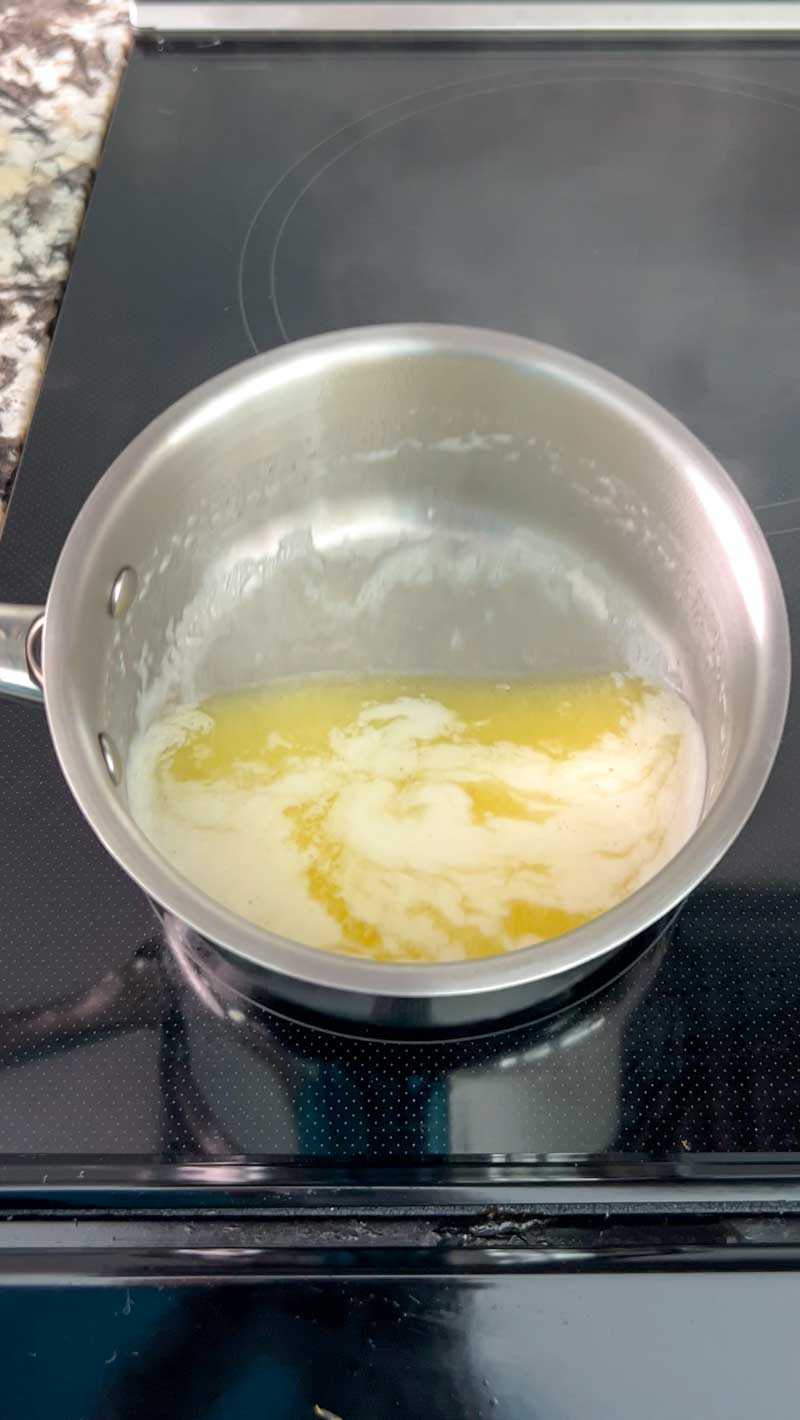
Step 6: The Butter Toss
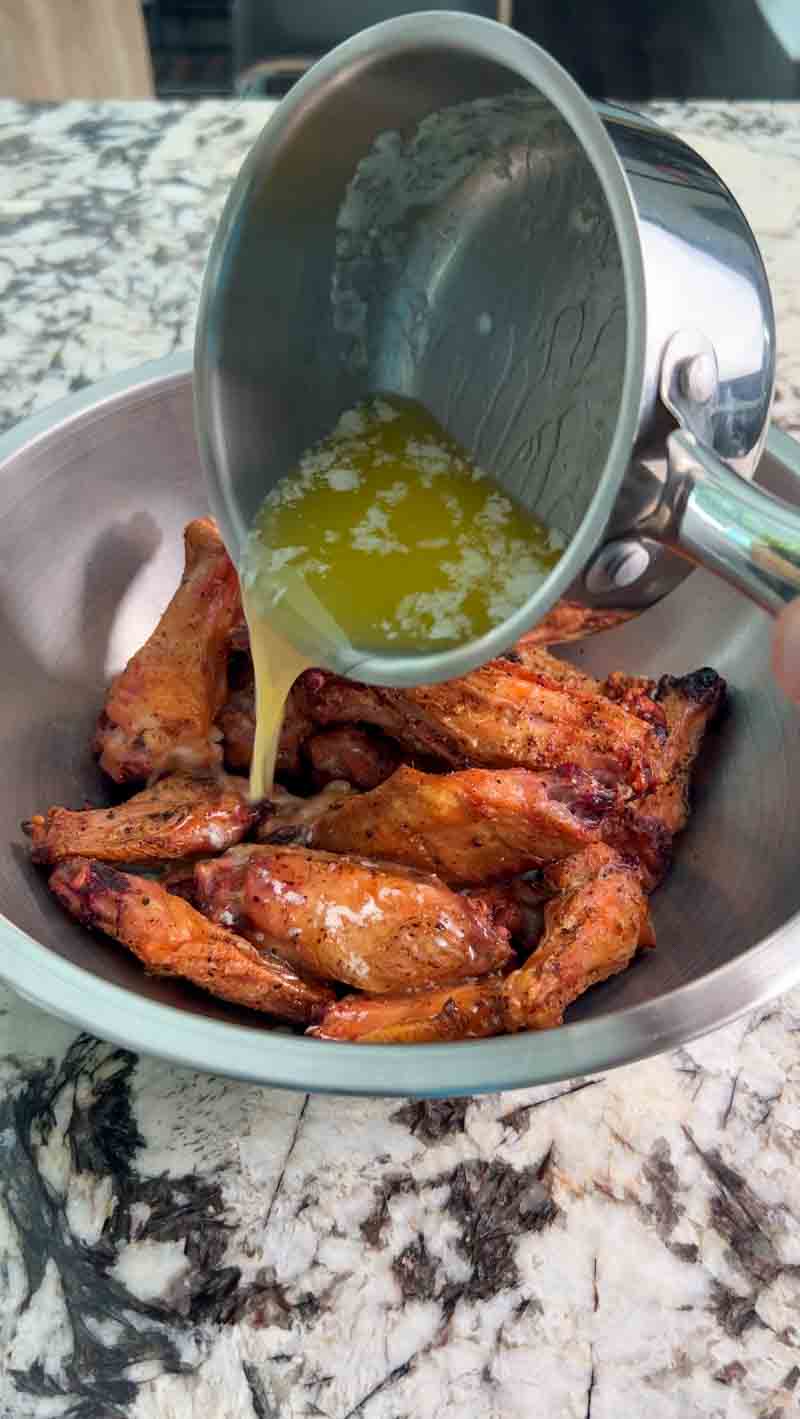
While the wings are finishing up on the Big Green Egg, you can get a head start on the final coating. In a small saucepan over low heat, melt one stick of butter. Keeping this step synchronized with the end of the cook ensures the butter is warm and fluid the moment the wings come off the grill.
Once you have pulled the wings from the Egg and placed them in a large bowl, immediately pour the melted butter all over the chicken wings. The heat from the wings and the warm butter will work together to create a perfect surface for the dry ingredients to adhere to.
Toss the wings gently to make sure every drum and flat is fully lubricated with the butter. This provides the rich, velvety base that allows the garlic and parmesan to stick to every nook and cranny.
Step 7: The Final Flavor Toss
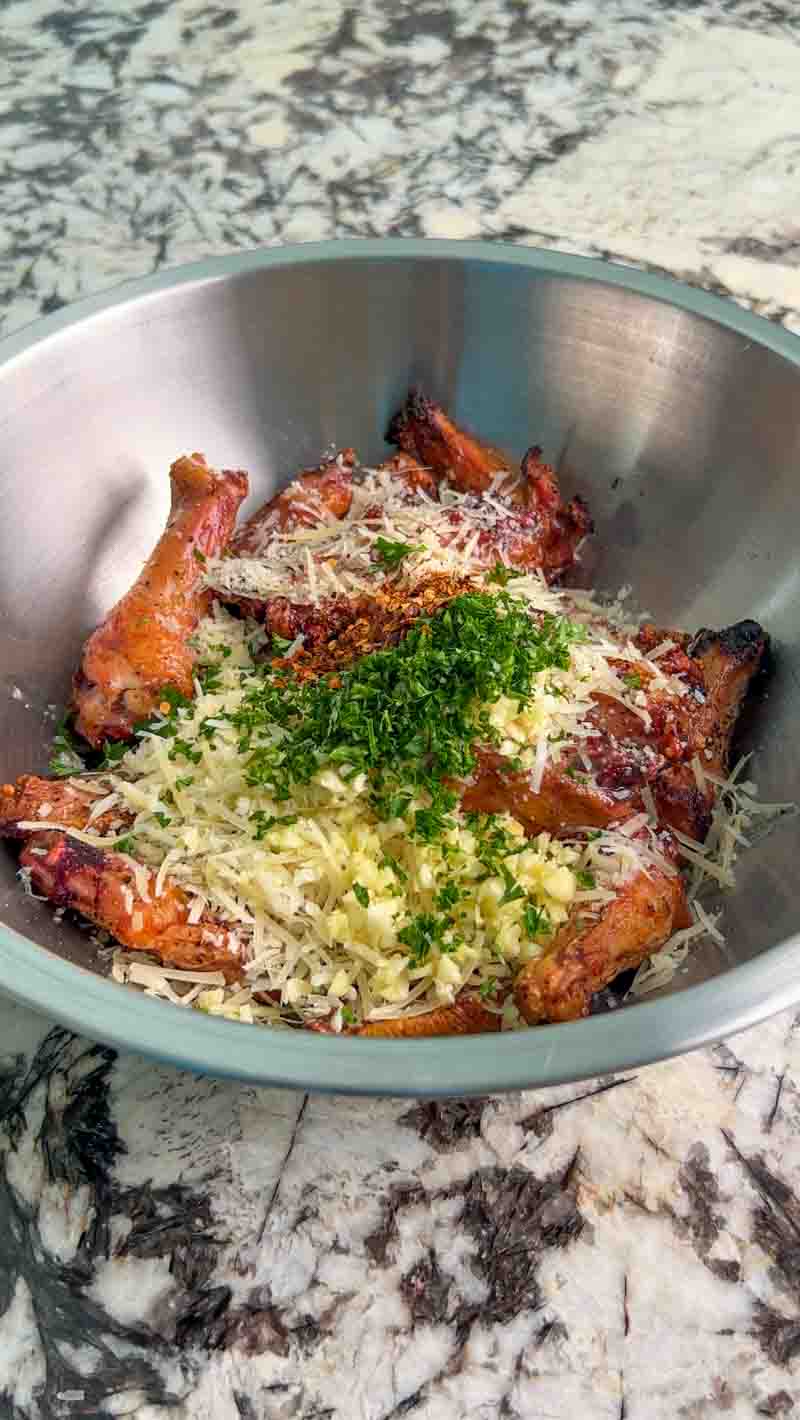
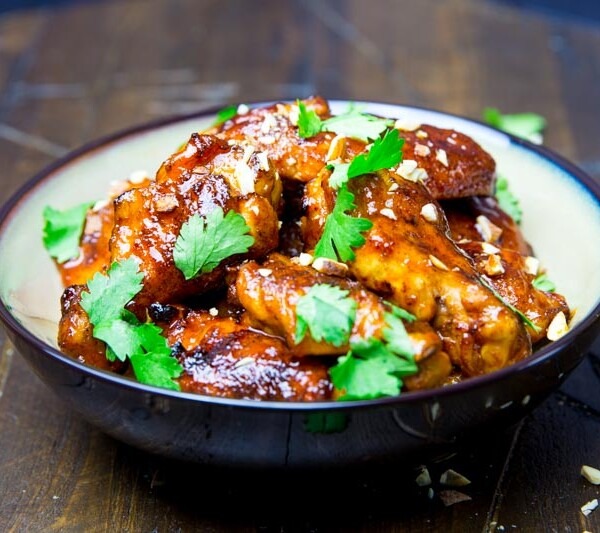
Now comes the best part. While the wings are still glistening from the melted butter, add the parmesan cheese, parsley, garlic, and red pepper flakes to the bowl.
Toss everything together vigorously. The residual heat from the wings will slightly mellow the raw garlic and help the parmesan cheese adhere to the skin, creating a beautiful, savory crust. The fresh parsley adds a pop of color and brightness, while the red pepper flakes provide just enough zip to cut through the richness of the butter and cheese.
Make sure every wing is heavily coated in that garlic-parm goodness before moving them to a serving platter.

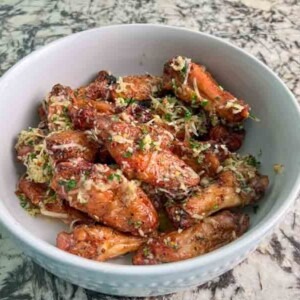
Crispy Garlic Parmesan Chicken Wings: The Ultimate Big Green Egg Recipe
Ingredients
Wing Ingredients:
- 3-4 pounds Chicken Wings, flats and drums separated
- 2 tbsp Olive Oil, for binder
- 1/4 cup SPG Rub
Sauce Ingredients:
- 1 stick Unsalted Butter
- 1/2 cup Parmesan Cheese, finely grated
- 5 cloves Garlic, minced
- 2 tbsp Fresh Italian Parsley , minced
- 2 tsp Red Pepper Flakes, optional
Instructions
- Season the Wings: Place the separated wings in a large bowl. Add the olive oil and your chosen rub. Mix well until every wing is evenly coated. Set aside while you prep the grill.
- The BGE Setup: Prepare your Big Green Egg for indirect grilling with the convEGGtor (legs up). Stabilize the temperature at 375°F.
- Prep the Sauce: While the Egg preheats, mince the garlic and parsley. Measure out the parmesan and red pepper flakes. Melt the stick of butter in a small saucepan.
- The Cook: Place the wings on the grid. Close the dome and cook for 50 to 60 minutes total.
- The Flip: At the 30-minute mark, open the dome and flip the wings to ensure an even crisp on both sides.
- The Pull: Check the wings after about 55 minutes. When they are dark brown, crispy, and measure between 175°F and 185°F internally, remove them from the Egg.
- The Final Toss: Place the hot wings in a large bowl. Pour the melted butter over them and toss. Add the parmesan, parsley, garlic, and red pepper flakes. Toss again until fully coated and serve immediately.
Nutrition information is automatically calculated, so should only be used as an approximation.


do you recommend dry brining like you other wing recipes?
You absolutely can!
Do you use one of those conveggtor indirect things some recipes call for? Or a drip pan?
Yes to both!
Absolutely the best wings I have ever had.
Thank you 🙏
First off, love your site, recipes, dizzy products…everything. Been following since I got my BGE. I was curious, if I made these a good 4-5 hours before serving in a warming tray..any dos/donts? I know hardened butter can look unappetizing, and cheese might look melty. For a tailgate situation where less items is crucial. Thanks!
Thanks for the kind words and follow! I haven’t tried this before so am curious as to the outcome when you try.