
This post contains affiliate links. Please see our disclosure policy.
They say all good things come to those who wait, and in the world of outdoor cooking, patience is usually the secret ingredient. For two years, the classic book Charcuterie: The Craft of Salting, Smoking, and Curing sat on my shelf, waiting for me to finally dive into the art of sausage making. This weekend, I finally cracked it open to master a staple of bold, spicy flavor: Smoked Mexican Chorizo Sausage.
While most people are familiar with the bright red, unctuous pork sausage found in grocery stores, nothing compares to the depth of flavor you get when you make it from scratch. There are two primary styles of this sausage: the Spanish version, which is cured with garlic and smoked paprika, and the Mexican version, which is fresh and heavy on chili peppers and vinegar.
In this guide, I am focusing on the Mexican style but adding a signature twist by bringing it to the backyard. By using the Big Green Egg, we are adding a layer of authentic wood smoke that transforms this traditional recipe into something truly elite. Whether you are stuffing links or making patties, this method ensures a result that is far superior to anything you can buy at the store.
So, sit back, grab an ice-cold Tecate with a lime, and enjoy this guide to making the best Smoked Mexican Chorizo Sausage on your Big Green Egg.
Table of Contents
- Step 1: Ingredients and Preparation
- Step 2: Prepping the Pork and the “Deep Chill”
- Step 3: The Grind
- Step 4: The Primary Bind
- Step 5: Preparing the Casings and Loading the Gun
- Step 6: Stuffing the Links
- Step 7: Creating the Links
- Step 8: Setting Up the Big Green Egg
- Step 9: The Sear and Finish
- The Final Result
- The Final Verdict: How to Use Your Smoked Chorizo
- Smoked Mexican Chorizo Sausage: A Big Green Egg Guide Recipe
Get My NEW Book
The Ultimate Big Green Egg Cookbook

The Difference Between Spanish and Mexican Chorizo
Before we get the pork ground and the spices mixed, it is important to understand what makes Mexican Chorizo unique:
- The Spices: Unlike the paprika-heavy Spanish version, Mexican chorizo relies on a blend of dried chilies, vinegar, and warm spices like cinnamon and cloves.
- The Texture: It is typically a “fresh” sausage, meaning it isn’t cured or dried for long periods.
- The Smoke: While Mexican chorizo is often cooked in a skillet, smoking it low and slow on the Big Green Egg adds a rugged, campfire dimension that perfectly balances the acidity of the vinegar.
Step 1: Ingredients and Preparation
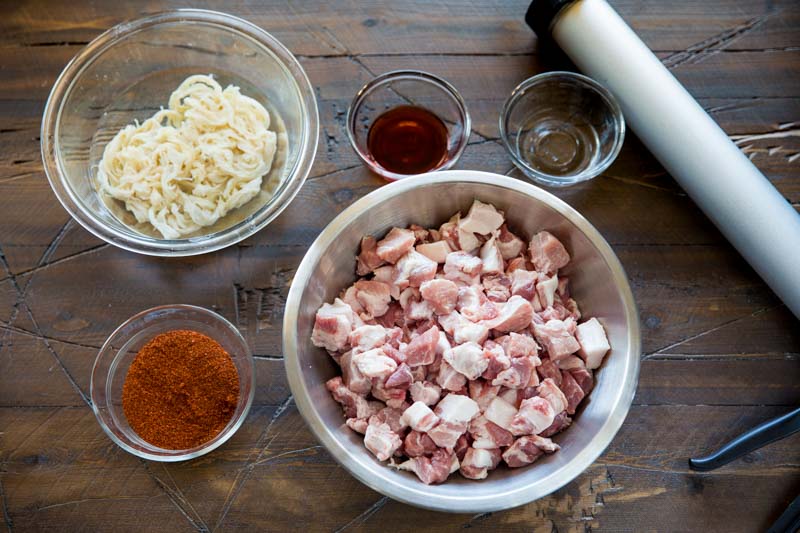
Making sausage from scratch might seem intimidating, but the ingredient list for this recipe is remarkably straightforward. The key is starting with high-quality pork and a spice blend that provides that signature “punch” Mexican chorizo is known for.
What You’ll Need
- The Meat: Boston Butt (Pork Shoulder). This is the gold standard for sausage because it has the ideal natural fat-to-lean ratio (roughly 80/20). This ensures your chorizo stays juicy and doesn’t dry out on the Big Green Egg.
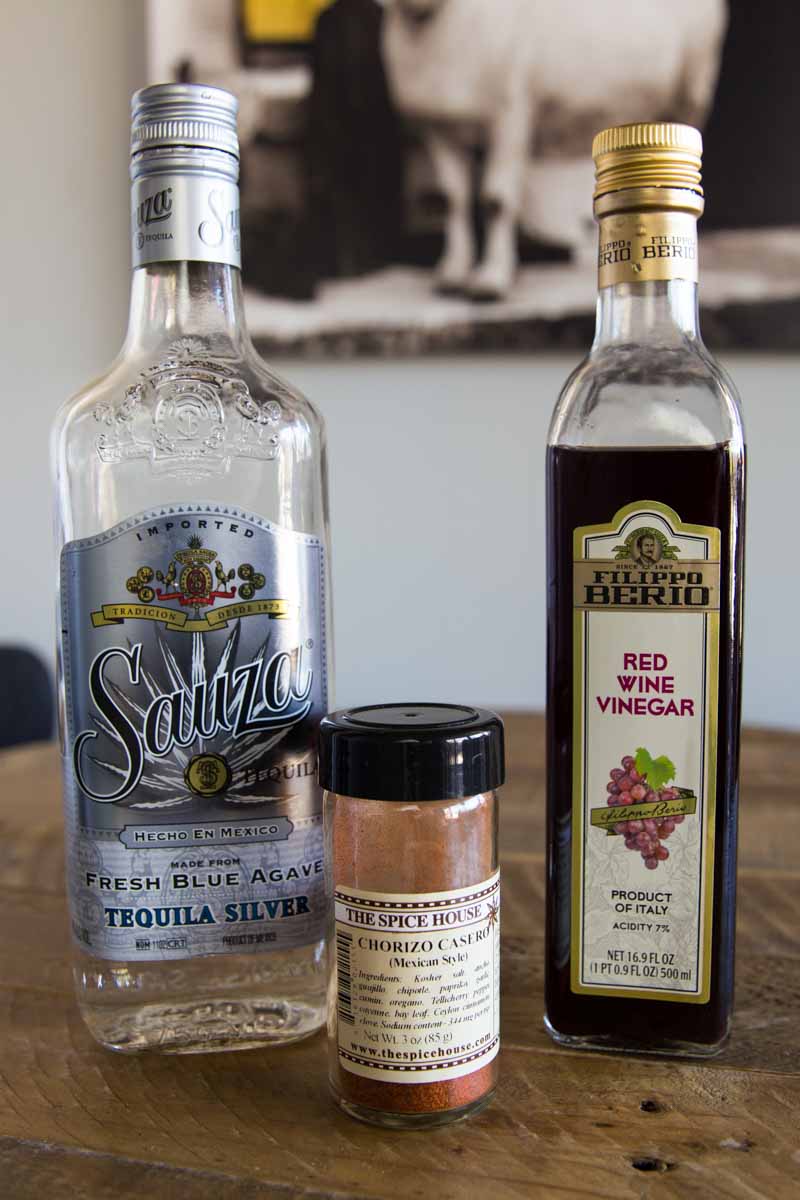
- The Liquid: A combination of red wine vinegar and tequila. The vinegar provides the traditional tang that defines Mexican style, while the tequila adds a bright, agave-based complexity that pairs beautifully with smoke.
- The Casings: Use high-quality sausage casings, making sure to soak them in water for at least an hour before you start. This makes them pliable and easier to work with during the stuffing process.
- The Seasoning: For that deep, vibrant red color and complex heat, I use a Mexican Sausage Seasoning mix.
Buddha’s Spice Breakdown: If you are building your own rub, aim for a blend of Kosher salt, ancho, guajillo, and chipotle chiles. Balance that heat with earthy garlic, cumin, oregano, and Tellicherry black pepper. For that “authentic” finish, don’t forget a pinch of cayenne, bay leaf, and the warm notes of Ceylon cinnamon and clove.
Pro Tip: Keep it Cold
Before you even think about grinding the meat, make sure the pork and your equipment (grinder head, blade, and plates) are ice cold. Put the cubed Boston butt in the freezer for about 30 to 45 minutes until it is firm but not frozen. This prevents the fat from smearing, which is the secret to a professional, “tight” sausage texture.
Step 2: Prepping the Pork and the “Deep Chill”
Once you have your Boston butt trimmed, it is time to prepare the meat for the grinder. The texture of your Smoked Mexican Chorizo depends entirely on how you handle the fat during this stage.
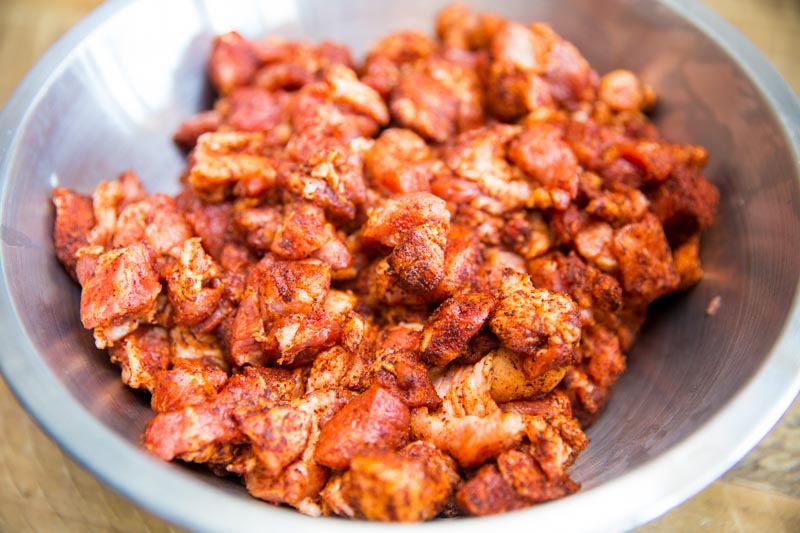
Cube and Season
Chop the pork into small, uniform cubes (roughly one inch). Place the cubes into a large bowl and mix well with the chorizo seasoning. By seasoning the meat before it goes through the grinder, you ensure that every morsel of pork is infused with those smoky chiles and warm spices.
The Freezer Technique
After seasoning, place the bowl of meat in the freezer for one hour until the pork is just starting to freeze on the edges.
- Why this matters: When the meat and fat are soft, the grinder blade can “smear” the fat instead of cutting it. This leads to a mushy, crumbly sausage.
- The Result: Chilling the meat until it is firm allows the grinder to create clean, distinct pieces of fat and lean meat. This also prevents the pork from getting stuck or gumming up the internal parts of your grinder.
Buddha Note: While the meat is chilling, put your grinder’s metal throat, tray, and cutting blades in the freezer as well. In the world of sausage making, cold is your best friend.
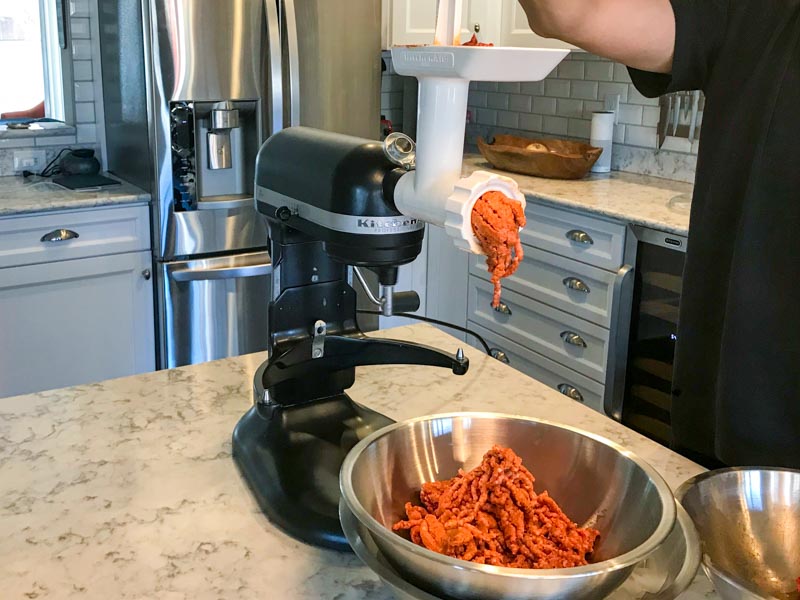
Step 3: The Grind
With your meat properly chilled and your equipment ice cold, it is time to transform the seasoned cubes into sausage.
The Small Die Advantage
Take the slightly frozen seasoned meat and run it through a meat grinder using a small die. * Why the small die? Mexican chorizo is known for its relatively fine, uniform texture compared to more rustic, chunky sausages like Italian or Bratwurst. Using the small die ensures that the fat and spices are distributed evenly, creating a consistent flavor in every bite.
- Maintain the Temperature: Work quickly during this process. If you have a large batch of meat, keep half of it in the freezer while you grind the first portion. You want the meat to come out of the grinder looking like distinct “noodles” rather than a soft paste.
Check the Texture
As the meat passes through the small die, you will notice the chiles and spices fully integrating with the pork. The friction of the grind will naturally warm the meat slightly, which is why starting with semi-frozen cubes is so critical. If at any point the meat begins to look mushy or “greasy,” stop immediately and put the meat and the grinder parts back in the freezer for twenty minutes.
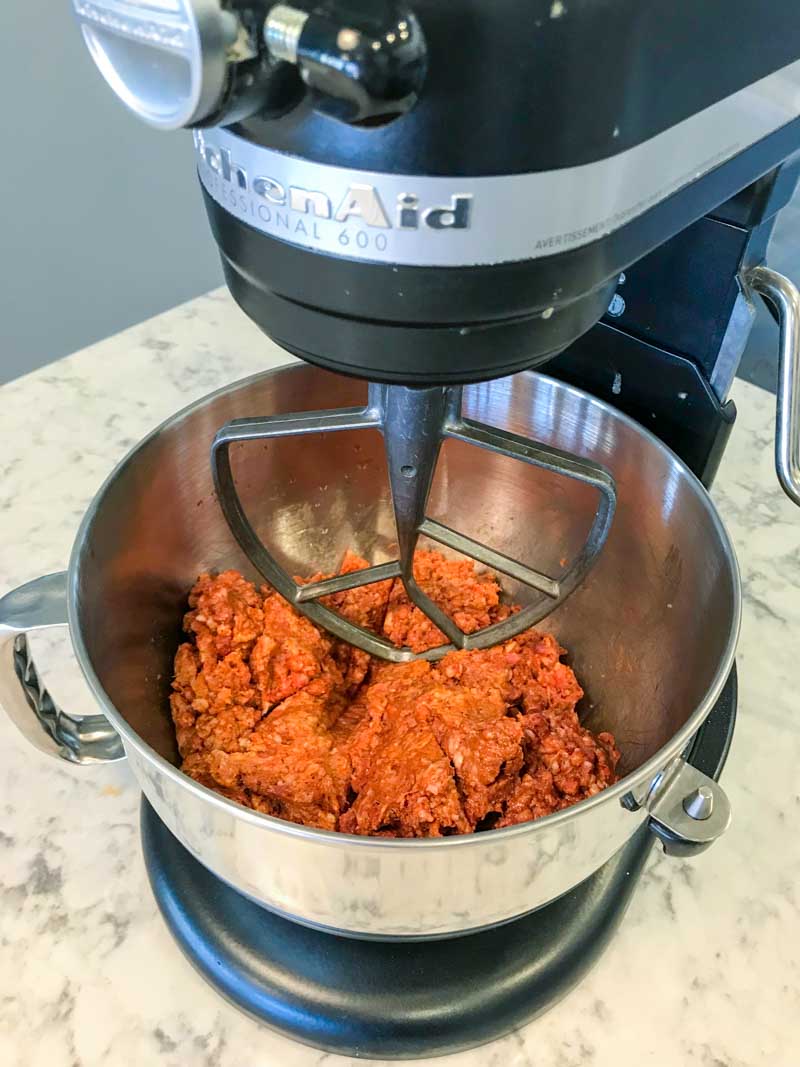
Step 4: The Primary Bind
Now that the meat is ground, it is time to add your liquids—the tequila and red wine vinegar. 1. Incorporate the Liquids: Pour the tequila and vinegar over the ground pork. 2. The Mix: Use your hands (or a stand mixer on low speed) to mix the sausage vigorously for about 1 to 2 minutes. 3. The Goal: You are looking for the meat to become “tacky” or “sticky.” This is called the primary bind. It ensures the sausage holds its shape and retains its juices when it hits the heat of the Big Green Egg.
Step 5: Preparing the Casings and Loading the Gun
Now that your pork mixture is well-mixed and tacky, it is time to get ready for stuffing. Since we are making links, we need to transition the meat into the casings smoothly.
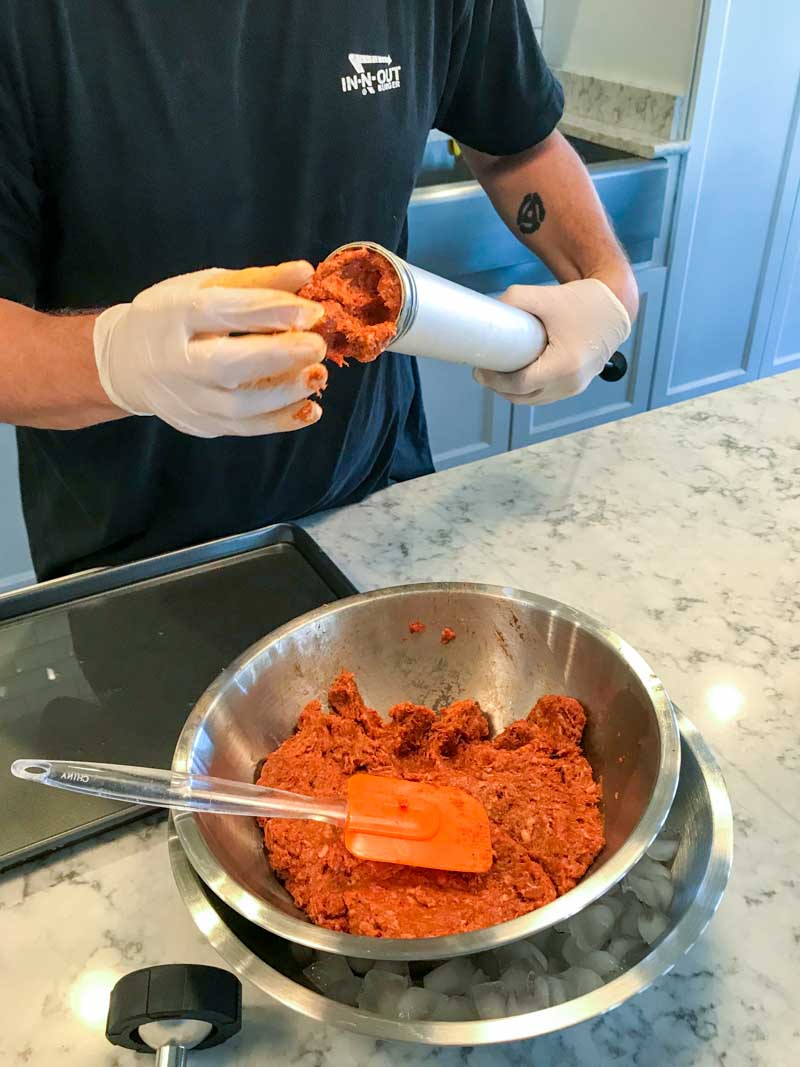
Loading the Jerky Gun
While many people use a dedicated vertical stuffer, a Jerky Gun is a fantastic tool for smaller batches. Load your Jerky Gun with the seasoned ground pork mixture, making sure to pack it in tightly.
- Avoid Air Pockets: As you fill the tube, use a spoon or your thumb to press the meat down. This eliminates air pockets, which can cause the casing to burst or create “dead spots” in your sausage links.
Rinse the Casings
Before you slide the casings onto the nozzle, rinse them thoroughly with cool water. * The Internal Rinse: Run a bit of water through the inside of the casing as well. This removes any excess salt from the curing process and acts as a lubricant.
- The Benefit: A wet casing slides onto the stuffing horn much easier and stretches without tearing as it fills with the chorizo.
Step 6: Stuffing the Links
With your casing rinsed and your gear ready, it is time to start the stuffing process. Twist one end of the sausage casing to seal it, then slide the open end over the nozzle of the Jerky Gun. Gently press the trigger to release the ground pork mixture into the casing, using your other hand to guide the sausage as it fills. Aim for a consistent, even fill, ensuring the casing is plump but still has enough “give” to be twisted into individual links later.
Buddha Note: Lessons from the Prep Table
I will be honest: this was the trickiest part of the entire process. I dealt with several split casings that forced me to stop and start over. At this stage, I am not sure if the culprit was the brand of casing, the pressure from the Jerky Gun, or simply my own technique.
My takeaway: Sausage making is a craft that requires a “feel” for the tension of the casing. If you have experience with this and have mastered the art of the perfect fill without the heartbreak of a burst casing, please share your tips in the comments below! I am eager to refine this for the next batch.
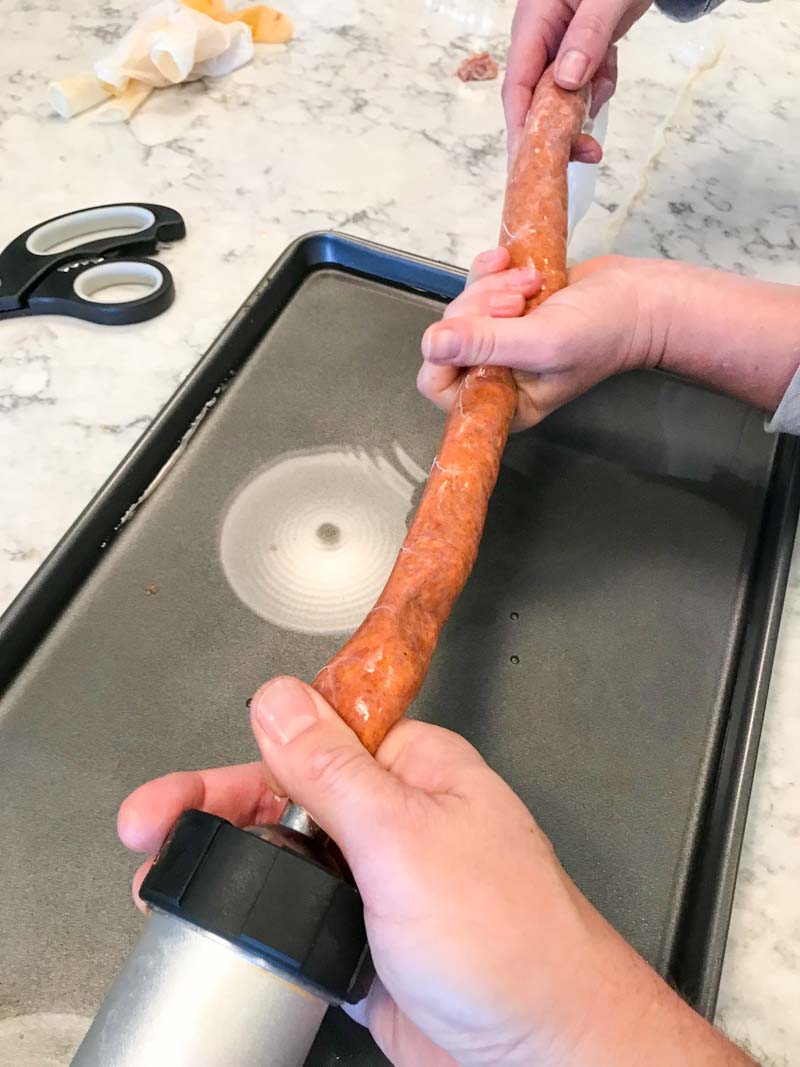
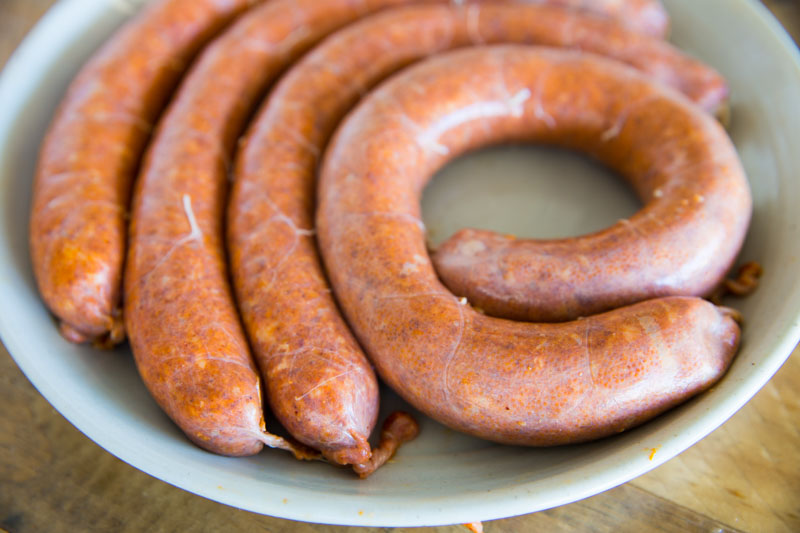
Step 7: Creating the Links
Now that you have one long coil of sausage, it is time to turn them into individual links. Twist the sausage into 6–10″ lengths and tie off the ends using a simple knot or some kitchen twine.
- The Technique: To prevent the casings from unwinding, twist the first link forward (away from you) and the next link backward (toward you). Alternating the direction of the twists “locks” them in place.
- The Air Check: If you notice any small air bubbles under the casing, use a sterilized needle or a sausage pricker to give them a tiny poke. This prevents the sausage from bursting when the air expands under the heat of the Big Green Egg.
Step 8: Setting Up the Big Green Egg
With the links tied and ready, it is time to transition to the smoke phase. Unlike a quick sear, we want to gently infuse the pork with wood flavor without rendering out all the fat too quickly.
The Low and Slow Configuration
Prep your Big Green Egg for indirect cooking using the convEGGtor (Plate Setter). You want to stabilize the temperature at a low 200°F. This lower temperature ensures the sausage cooks through evenly while absorbing the maximum amount of smoke.
Choosing Your Wood
For Mexican Chorizo, you want a smoke profile that complements the chiles rather than competing with them. Use a light fruit wood for the smoke, such as Apple. Why Apple? It provides a mild, sweet aroma that plays perfectly with the acidity of the red wine vinegar and the warmth of the cinnamon in the rub.
- Alternatives: Cherry wood is another fantastic option if you want to enhance the deep red color of the chorizo, or Pecan if you want a slightly nuttier finish.
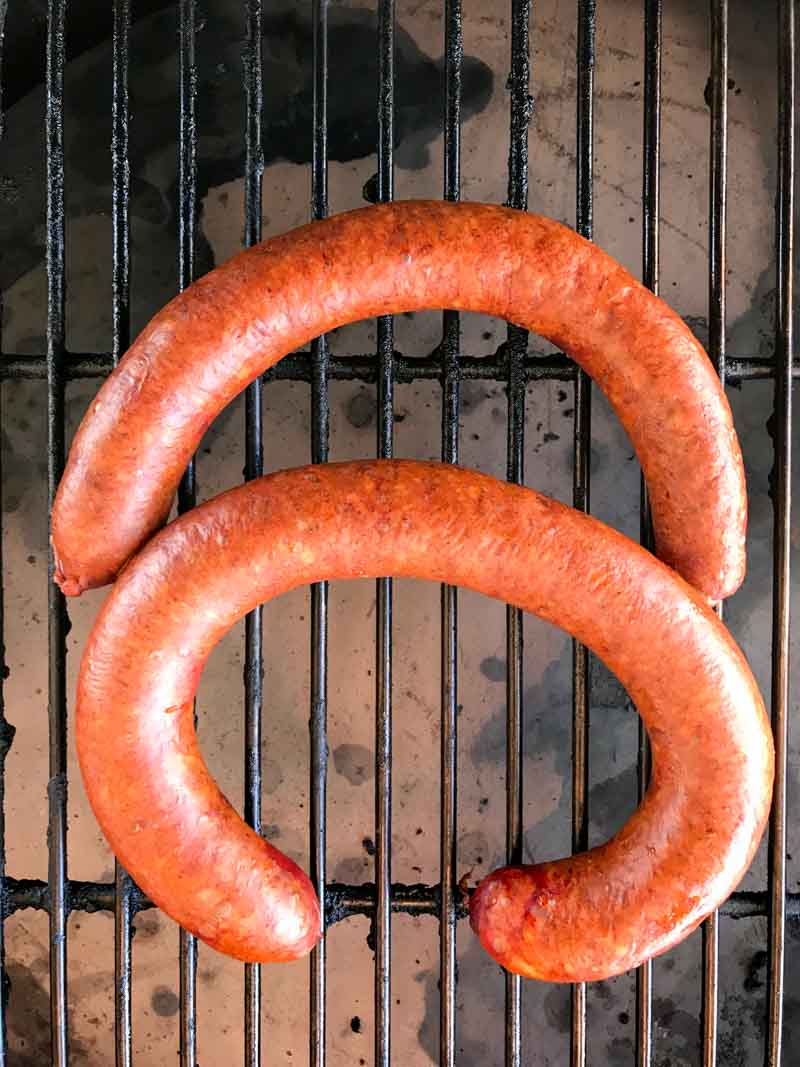
The Smoke Process
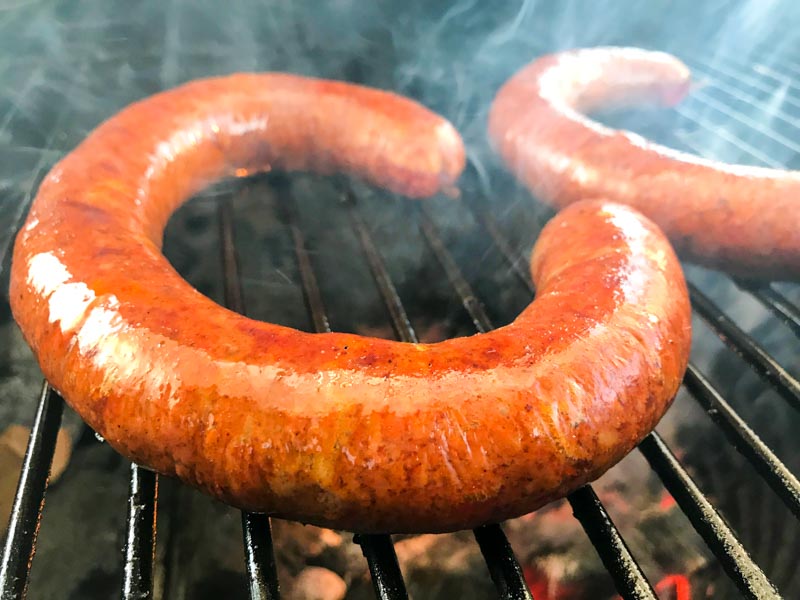
Place the links on the grate, making sure they aren’t touching so the smoke can circulate around the entire casing. Close the dome and let the Big Green Egg work its magic. You are looking for an internal temperature of 160°F. This usually takes about 60 to 90 minutes at this lower temperature, giving you plenty of time to prep your tacos or sides.
Step 9: The Sear and Finish
Precision is key when finishing fresh sausage. You want to ensure the interior is juicy while the exterior has that signature “snap” and a bit of char.
The Temperature Pull
Monitor your links closely. Once the Chorizo measures 150°F, remove it from the Big Green Egg. At this point, the meat is nearly finished and has absorbed all the sweet apple wood smoke it needs.
Adjust Your Setup
Working quickly, set your environment for direct cooking. Carefully remove your convEGGtor (using heat-resistant gloves) to expose the glowing coals. This transition allows you to move from a gentle roast to a high-heat finish.
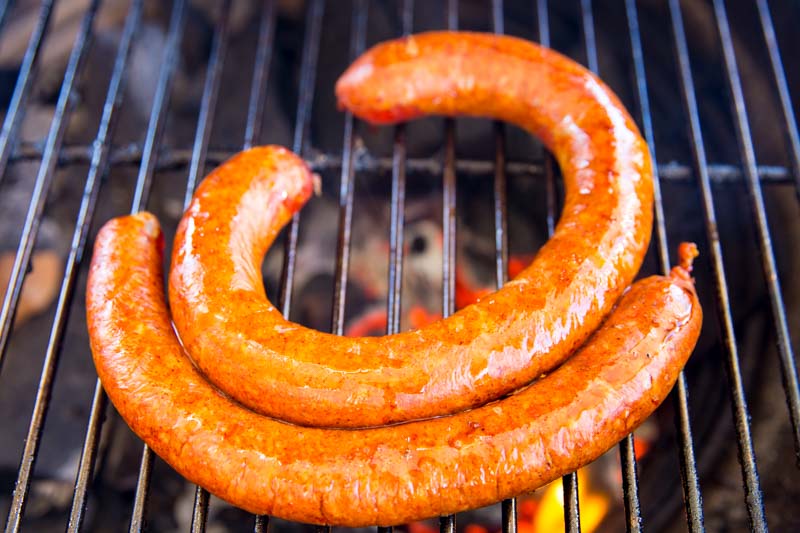
The Finishing Touch
Top the sausages off over direct heat before serving. Place the links directly over the fire for just a minute or two per side.
- The Goal: You are looking to crisp up the casing and add a touch of flame-kissed char.
- The Target: This final sear will carry the internal temperature up to the safe and succulent 160°F mark.
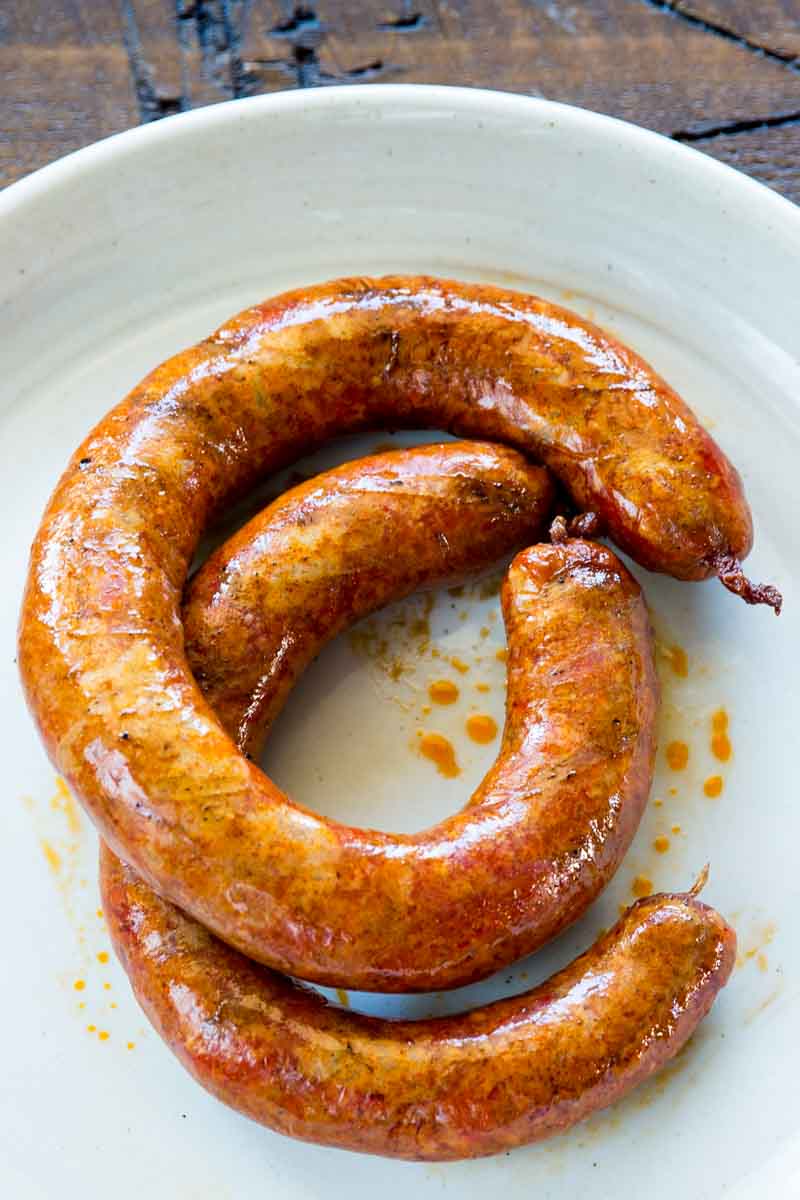
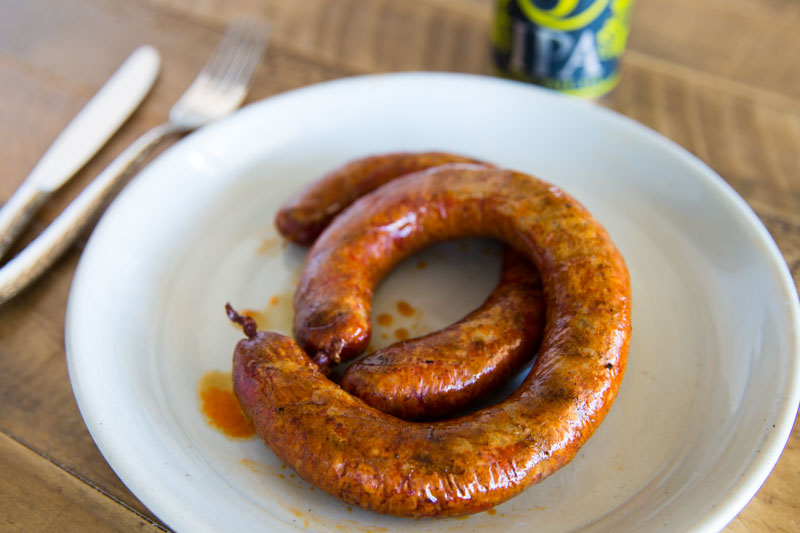
The Final Result
Homemade Smoked Mexican Chorizo is a game-changer. By taking the time to grind your own Boston butt, seasoning it with a complex blend of chiles, and finishing it with the perfect balance of smoke and fire on the Big Green Egg, you have created something far superior to any store-bought alternative.
The texture is firm yet juicy, the heat is balanced by the acidity of the vinegar, and that hint of tequila adds a sophisticated layer of flavor that makes this recipe a standout.
The Final Verdict: How to Use Your Smoked Chorizo
Making your own Smoked Mexican Chorizo is a labor of love, and the reward is a versatile protein that can elevate almost any meal. Because we finished these with a direct sear, they have a fantastic snap that works beautifully in various dishes.
Serving Suggestions
- The Ultimate Breakfast Taco: Crumble a link into a hot skillet with some diced potatoes, then fold into a warm flour tortilla with scrambled eggs and salsa verde.
- Chorizo Fundido: Slice the links into rounds and stir them into a cast-iron skillet filled with melted Oaxaca or Monterey Jack cheese. Serve with sturdy tortilla chips for the perfect Big Green Egg appetizer.
- Elevated Burgers: Use the smoked chorizo as a topping for a classic beef patty, adding a slice of avocado and a dollop of chipotle mayo.
- The “BGE” Platter: Serve the links whole alongside some grilled peppers and onions, a side of cilantro lime rice, and an extra-cold Tecate.

Smoked Mexican Chorizo Sausage: A Big Green Egg Guide
Ingredients
- 3 # Boneless Boston Butt
- 3 Tbls Chorizo Mexican Sausage Seasoning
- 5 1/2 tsp Red Wine Vinegar
- 5 1/2 tsp Tequila
- Sausage Casings
Instructions
- Chop the pork in to small cubes
- Add the seasoning to the chopped pork, mix well
- Put the seasoned pork to the freezer for 1 hour
- Grind the seasoned pork mixture in to a bowl sitting on top of ice (to keep pork chilled)
- Add the tequila and vinegar, mix well
- Place mixture in Jerky Gun
- Rinse the sausage casings with cool water
- Tie one end of the casing and place the other end over the Jerky Gun
- Squeeze the pork mixture slowly in to the casing
- Tie off the sausages in 6-10″ lengths
- Preheat your Big Green Egg to 200° using indirect heat and Apple wood (for the smoke)
- Smoke the Chorizo until the internal temp measures 150° (about an hour)
- Top off over direct heat for a couple of minutes per side and serve
Nutrition information is automatically calculated, so should only be used as an approximation.


Now I want to make chorizo. My grandfather was a butcher for rhe A&P and would make sausage at home for Christmas dinner. This looks like how he use to do it. It was a long time ago (that magical time called “the 70’s”!) so I’m not really sure.
I lived through the 70’s so I know what you mean 🙂
Hello. Curious as to why you went with 1tbsp seasoning per pound while The Spice House instructions call for 2tbsp per pound. Thanks for the article!
It’s been so long I don’t remember exactly. However, the book probably called for X amount of seasoning and that’s what reference I used. Make sense?!
Use real intestines not propourted. Contact Marcacci Meats Vineland NJ. They’re family, tell em Sonny sent you.