
This post contains affiliate links. Please see our disclosure policy.
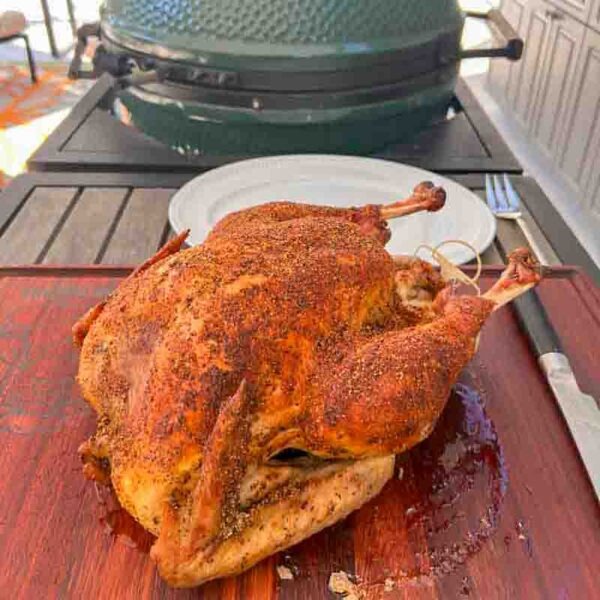
We have all been there: you spend over an hour hovering over the Big Green Egg, only to carve into a chicken that has beautiful flavor but skin as rubbery as a wet balloon. You have probably tried every “hack” in the book, from dusting the bird in baking powder to cranking the heat at the very end, usually with mixed results. But what if I told you there is a surefire, no-fail method to achieve shatteringly crispy skin and succulent meat every single time?
You have come to the right place. The secret isn’t a magic ingredient; it is a combination of the spatchcock technique and a few crucial prep steps that turn your ceramic grill into the ultimate poultry machine. I am going to walk you through my exact process for mastering the bird, ensuring that every bite has that perfect, golden-brown crunch you have been chasing.
So, let’s get that Egg stabilized, grab an ice-cold PBR, and dive into the masterclass for Crispy Spatchcock Chicken on the Big Green Egg.
(Note: If you are looking for a deeper smoke profile and a slower cook, be sure to check out my Smoked Spatchcock Chicken Recipe)
Table of Contents
Get My NEW Book
The Ultimate Big Green Egg Cookbook

How to Spatchcock a Chicken
While I recently tested several methods for achieving the perfect crunch, the winner was clear: a proper dry brine is the undisputed champion for crispy skin. But before we get to the seasoning, we have to talk about the foundation of this cook: the spatchcock technique.
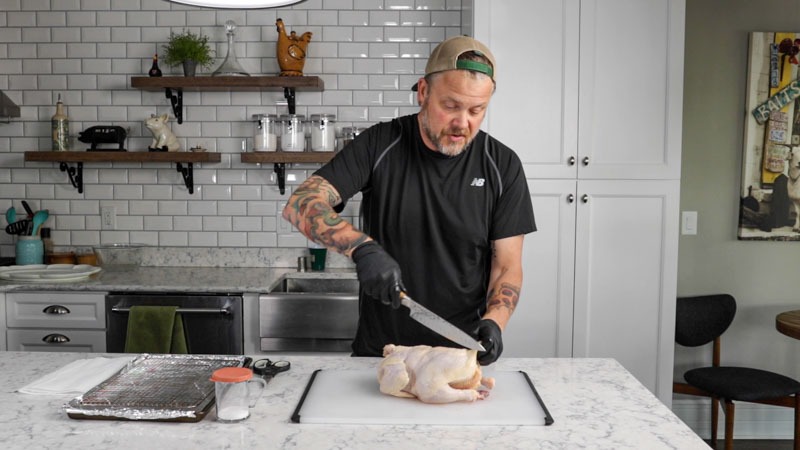
Spatchcocking, or butterflying the bird, is the absolute best way to cook a whole chicken on the Big Green Egg. By removing the backbone and laying the bird flat, you accomplish two major goals. First, you expose all of the skin to the heat at once, which is the only way to ensure every inch gets crispy. Second, it allows the dark meat and the white meat to finish at the same time, so you don’t end up with dry breasts or undercooked thighs.
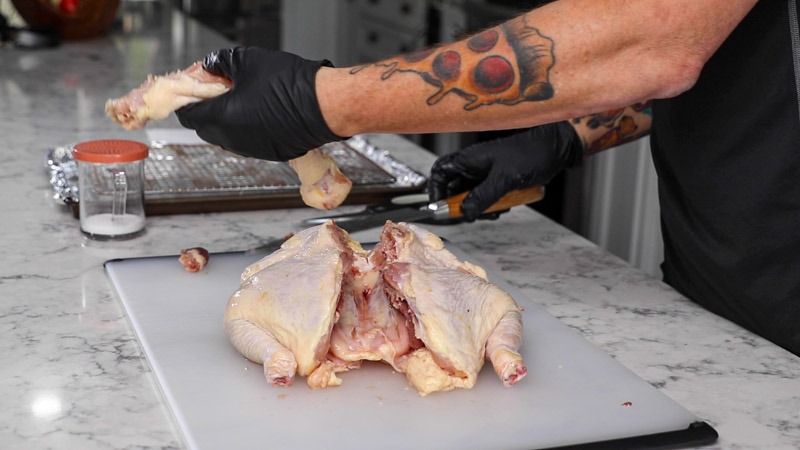
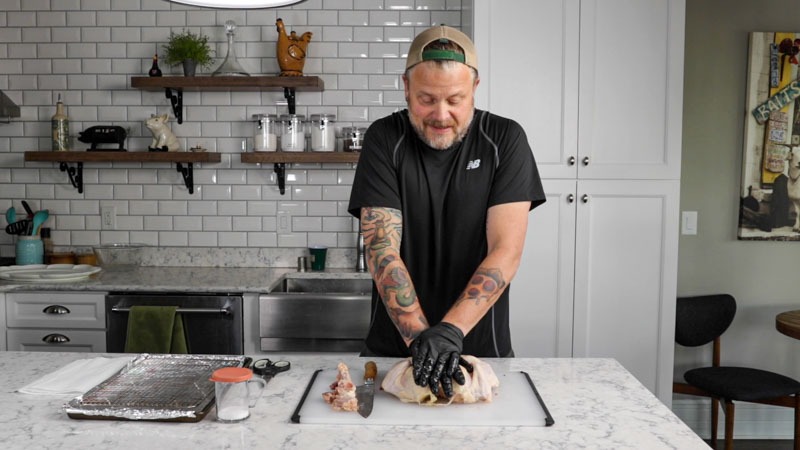
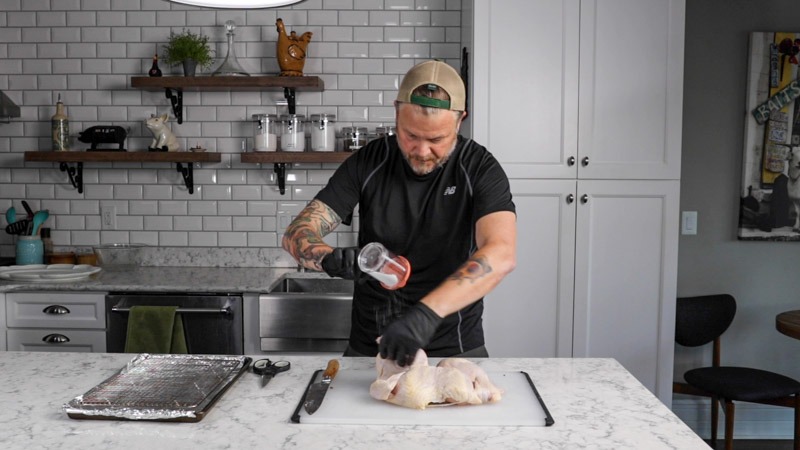
To get started, you will need a sturdy pair of kitchen shears or a sharp chef’s knife. Flip the chicken over so the breast is down and the backbone is facing you. Starting at the tail end, cut along one side of the backbone all the way to the neck. Repeat this on the other side to completely remove the bone. Once the backbone is out, flip the bird back over and press down firmly on the center of the breastbone with the palm of your hand. You should hear a distinct “crack” that is the sound of success. Your chicken is now flat, even, and ready for the next phase of the crispy skin process.
Spatchcock Success Tips
Safety First: Use a dedicated cutting board for raw poultry and wash your shears thoroughly after the job is done.
The Backbone: Don’t throw it away! Save that backbone in a freezer bag to make a rich homemade chicken stock later.
The “Crack”: Make sure the bird is truly flat. If it is still hunched up, it won’t cook evenly or get that uniform golden color.
Dry Brine Your Chicken
The real secret to skin that shatters like a potato chip is the dry brine. This technique is more about chemistry than just seasoning. When you sprinkle kosher salt over the surface of the chicken, it triggers a process that denatures the proteins in the skin and draws out deep-seated moisture. By pulling that water to the surface where it can evaporate, you are essentially “curing” the skin, which allows it to crisp up immediately once it hits the heat of the Big Green Egg.
To do this properly, apply an even layer of kosher salt across the entire skin side of your spatchcocked bird. You don’t need to bury it in salt, but make sure you have a consistent “light dusting” from the tip of the wings to the bottom of the drumsticks.
The Dry Brine Ratio
To get that signature crunch without over-salting the meat, follow this simple ratio for your spatchcock chicken:
- The Measurement: Use 1/2 teaspoon of Kosher salt per pound of chicken.
- 4 lb Chicken: 2 teaspoons Kosher salt
- 5 lb Chicken: 2.5 teaspoons Kosher salt
- 6 lb Chicken: 1 tablespoon (3 teaspoons) Kosher salt
Pro Tip: Apply roughly 75% of the salt to the skin side to maximize dehydration and the remaining 25% to the bone side for flavor. If you are using a standard table salt instead of Kosher salt, cut these measurements in half, as table salt is much denser and saltier by volume.
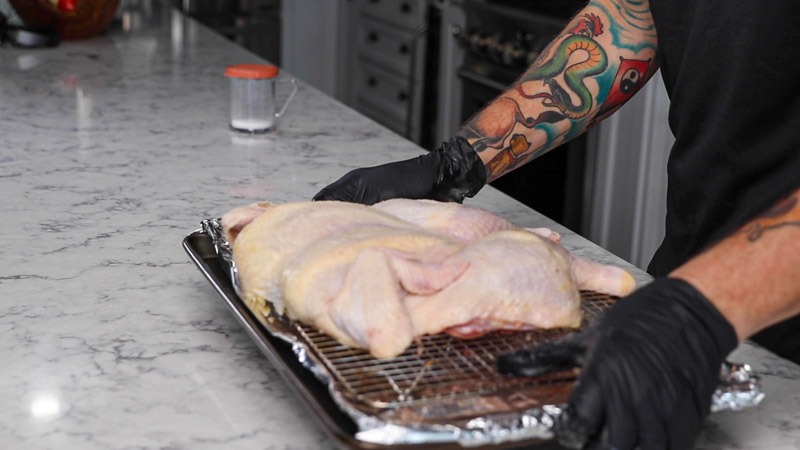
Once salted, place the chicken on a wire rack set inside a rimmed baking sheet. This part is crucial: put the tray in the fridge uncovered overnight. The cold, dry air of the refrigerator acts like a dehydrator. By leaving it uncovered, you allow that air to circulate around the bird, drying out the skin until it feels tacky and looks slightly translucent. By the time you are ready to cook the next day, the skin will be primed and ready to transform into a golden, crispy crust.
Dry Brine Essentials
Salt Choice: Use coarse kosher salt for this. The larger grains stay on the surface longer to do their work compared to fine table salt which can absorb too quickly and make the meat overly salty.
Airflow is Key: The wire rack is essential because it keeps the underside of the bird from sitting in its own juices, ensuring the whole bird dries out.
The Fridge Environment: Don’t cover the bird with plastic wrap or foil. You want the skin exposed to the air to achieve that leathery, dry texture.
Prep the Chicken
After 24 hours of patience, it is time to pull the bird from the refrigerator. When you look at the chicken, do not be alarmed by its appearance. You will notice the skin has turned a deep, dark yellow and feels very dry, almost like parchment paper.
This is the “aha!” moment. While a typical raw chicken looks pale and wet, this dehydrated, leathery texture is the absolute secret to crispy skin. Because you have successfully removed the surface moisture, the Big Green Egg does not have to waste energy evaporating water. Instead, the heat can immediately go to work rendering the fat and bubbling the skin.
Take the chicken out about 45 to 60 minutes before you plan to light the grill. Letting the bird sit on the counter to take the chill off ensures that the meat cooks evenly and the skin starts to sizzle the second it hits the heat. While the bird tempers, you can get your Big Green Egg stabilized and ready for action.
Visual Cues of a Perfect Dry Brine
The Transparency: You might even be able to see the meat through the skin more clearly than the day before.
The Color: A deep golden or amber hue across the breasts and thighs.
The Feel: The skin should feel tacky and tight against the meat, not slippery or slimy.
Season the Chicken
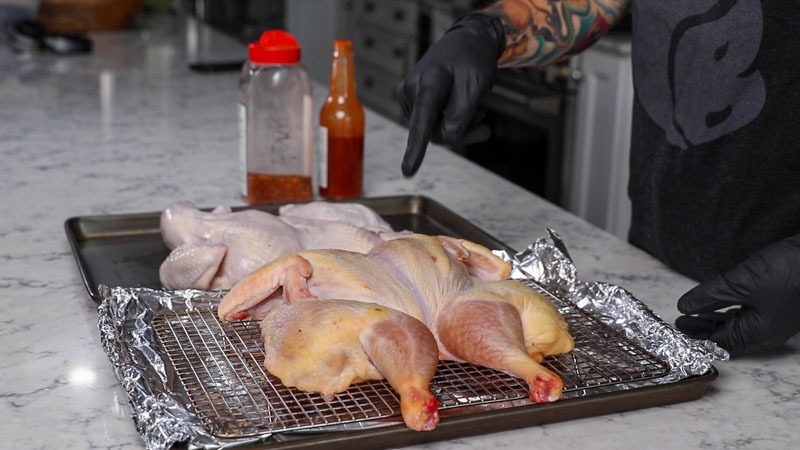
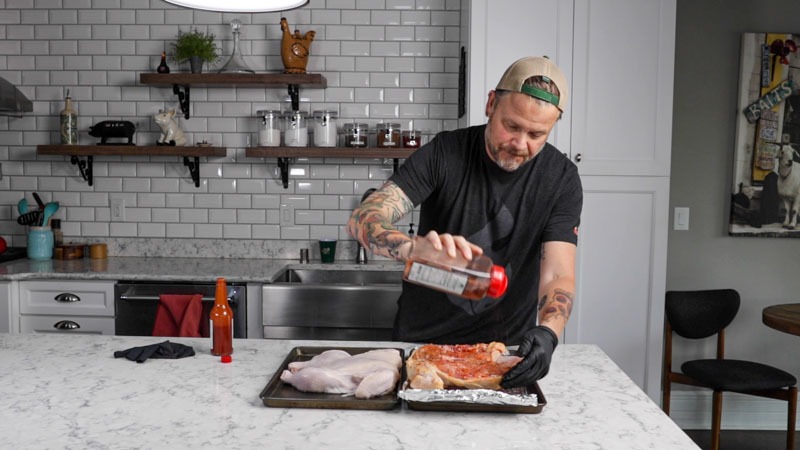
Now that the skin is perfectly prepped, it is time to layer on the flavor. Even though the skin is dry, we need a binder to ensure our seasoning sticks through the entire cook.
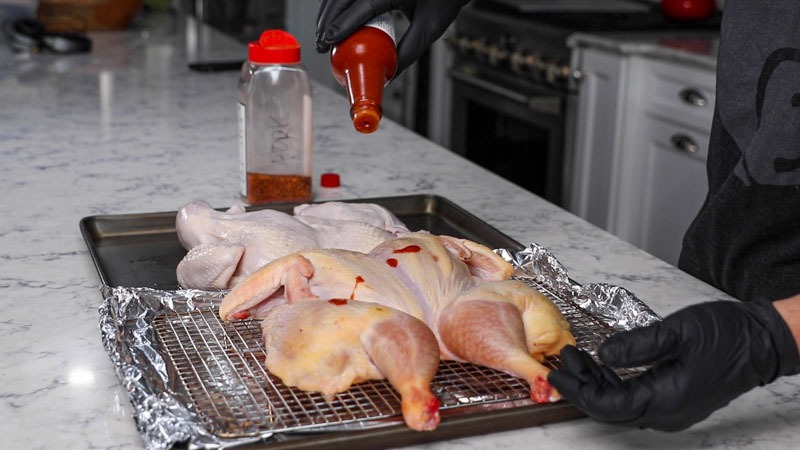
I like to use a light coating of hot sauce (like Crystal or Frank’s) as the slather. Don’t worry about the heat as the vinegar and peppers mellow out significantly on the grill, leaving behind a subtle tang that complements the smoke perfectly. If you aren’t a fan of heat, a thin layer of olive oil or yellow mustard works great too.
The Seasoning Strategy
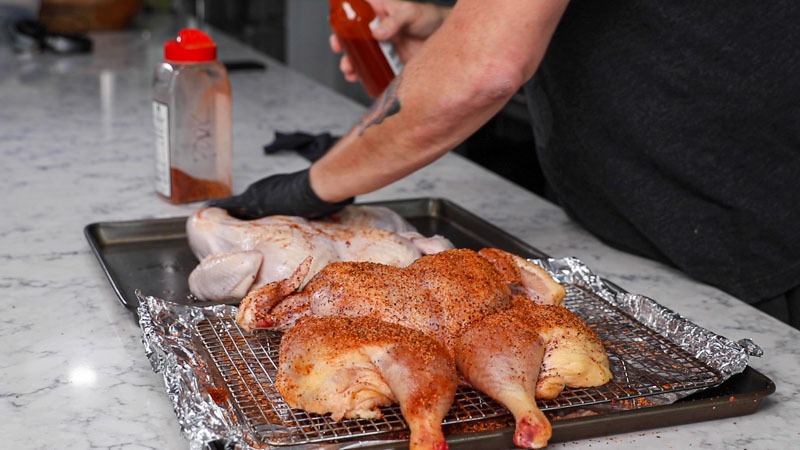
For a whole 4–5 lb spatchcock chicken, you will need approximately 3 to 4 tablespoons of rub to get full coverage.
- The DIY Mix: If you want to keep it classic, go with a generous blend of Smoked Paprika, Kosher Salt, and Coarse Black Pepper. The paprika is the secret to that deep, mahogany “BBQ color” while the pepper adds a nice crust.
- The BBQ Rub: If you are using a store-bought favorite, look for one that isn’t too heavy on sugar, as high heat can cause sugar to char before the skin is done.
Pro-Tip: The Salt Safety Check
Because we already applied a dry brine yesterday, you need to be mindful of your final seasoning. If your favorite BBQ rub has salt as the first ingredient, apply it a bit more sparingly. If you are making your own mix, go heavy on the paprika and pepper, but light on the additional salt. You’ve already done the hard work of seasoning the meat from the inside out; this step is all about the exterior bark and color.
Application Order:
The Heavy Coat: Dust the skin side generously. Let it sit for 10–15 minutes until the rub looks “wet” this means it has adhered to the bird and won’t blow off in the convection of the Egg.
Underside First: Flip the bird bone-side up. Apply your hot sauce binder and a light dusting of rub.
The Show Side: Flip it back over. Apply the binder to the skin, making sure to get under the wings and around the drumsticks.
Setting Up the Big Green Egg
While the rub is setting on the chicken, it is time to prep the Big Green Egg. For a spatchcock bird, we want to treat the Egg like a high-end wood-fired oven. The goal is consistent, indirect heat that circulates around the entire bird.
The Indirect Configuration
Start by lighting your lump charcoal. Once the fire is established, insert your ConvEGGtor (plate setter) with the legs facing up. This creates the thermal barrier needed to protect the bottom of the chicken from the direct flame, preventing the meat from drying out while the skin roasts. Place your stainless steel grate on top of the ConvEGGtor legs.
The “One Lump” Rule
For poultry, less is definitely more when it comes to smoke. I recommend adding just one medium-sized lump of smoking wood (like Hickory) directly onto the hot coals before you drop the ConvEGGtor in.
- Why Hickory? It provides a bold, classic aroma that stands up well to the paprika and hot sauce binder.
- The Clean Smoke: Wait until the smoke transition happens. You want to see “thin blue smoke” (or almost no visible smoke at all) rather than thick, billowing white clouds. This ensures a clean, sweet flavor rather than a bitter, ashy one.
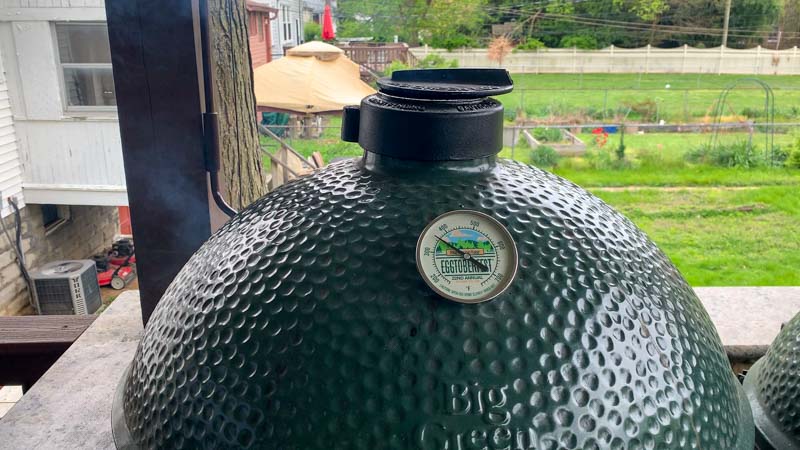
The Temperature Sweet Spot: 350°F
Adjust your top and bottom vents to stabilize the Egg at 350°F.
- Why this temp? At 225°F or 250°F (traditional “low and slow”), chicken skin becomes rubbery because the fat doesn’t render fast enough. At 350°F, you are high enough to sizzle and crisp the skin, but low enough that the meat stays incredibly juicy. It is the “magic number” for poultry.
Ready for the Bird
Once the Egg has held steady at 350°F for at least 15 minutes and the ceramic walls are heat-soaked, you are ready to cook. The air inside is now moving like a convection oven, which is exactly what that dry-brined skin needs to reach maximum crunch.
Using the EGGspander
To maximize the “convection effect” inside the Big Green Egg, I’m using the EGGspander System for this cook. By using the base of the EGGspander, I can raise the cooking grate up to the felt line (the top edge of the base).
Why Height Matters
Cooking higher in the dome is a game-changer for crispy skin. Heat reflects off the ceramic dome and radiates back down onto the bird. By lifting the chicken away from the ConvEGGtor and closer to that reflected heat, you are essentially putting it in a “vortex” of hot, moving air. This helps the skin on top of the breasts and thighs brown more evenly and reach that shatter-point crispiness faster.
Don’t Have an EGGspander? No Problem.
If you are using the standard internal setup, you can still get incredible results. Here are two ways to replicate this “high-dome” effect:
- The Plate Setter Flip: If you have the older style Plate Setter, ensure it is legs-up with the grate on top. While it sits lower than the EGGspander, the 350°F indirect heat will still do the job, it just might take a few extra minutes to get that deep color.
- The “Brick Trick”: You can safely raise a standard grate by placing three or four firebricks (ensure they are kiln-fired/rated for heat) on top of your ConvEGGtor and setting the grate on those. This gets your bird up into that “sweet spot” near the dome.
The Placement
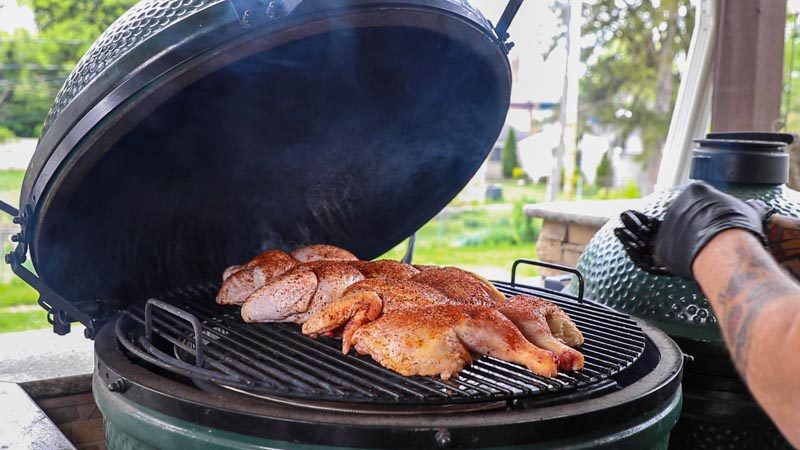
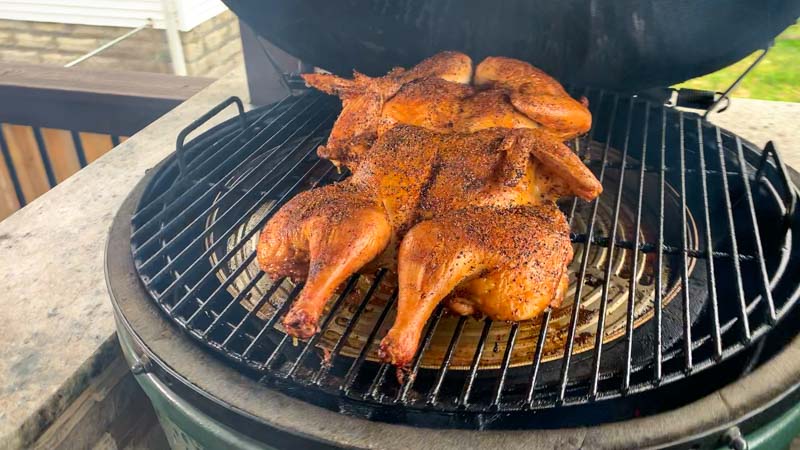
Once you see that clean, wispy blue smoke and your temp is locked in, place the chicken onto the center of the grate, skin-side up.
Pro Tip: I like to point the legs toward the back of the Egg. The back of the grill is typically the hottest spot because the air moves up and out toward the vent. Since dark meat (legs and thighs) can handle (and actually benefits from) higher temperatures than the delicate breasts, this orientation ensures the whole bird finishes perfectly.
Cooking the Spatchcock Chicken
One of the hardest parts of this cook is the waiting, but your patience will be rewarded. Leave the bird undisturbed for at least one hour. Resisting the urge to “peek” is vital; every time you open the dome, you lose that concentrated convection heat that is currently working to render the fat and crisp the skin.
The One-Hour Check-In
After 60 minutes, lift the lid for your first inspection. You should be greeted by a bird that has taken on a stunning, deep golden-mahogany color. This is where you get to perform the “crunch test.” When you tap the surface of the skin with your tongs or a finger, it shouldn’t feel soft or oily… it should feel firm, tight, and noticeably crispy.
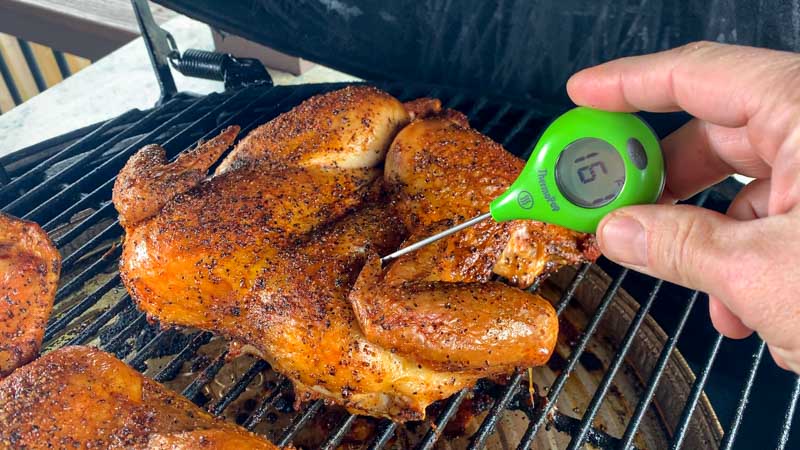
Probing for Perfection
While the skin might look done, we always cook to temperature, not just time. Around the 1 hour and 20 minute mark, it is time to check the internal temperature.
- The Target: You are looking for 165°F in the thickest part of the breast.
- The Tool: Use a reliable instant-read thermometer (I use my ThermoPop) to get a quick, accurate reading.
- The Dark Meat: Don’t worry if the thighs are reading higher (175°F–185°F). Dark meat is much more forgiving and actually tastes better when cooked to a higher temp, as it allows the connective tissue to fully break down.
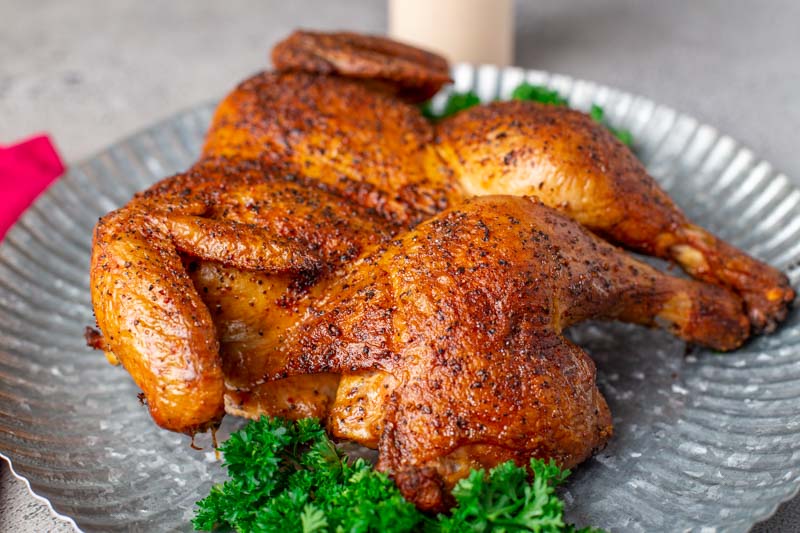
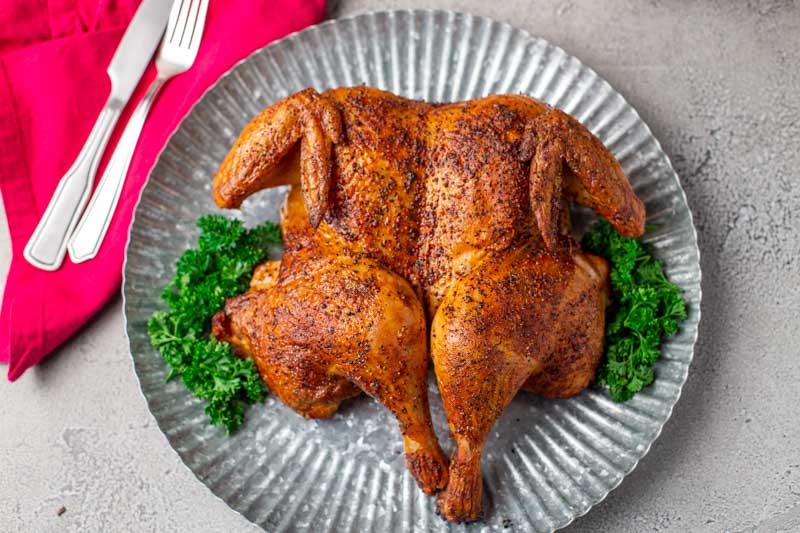
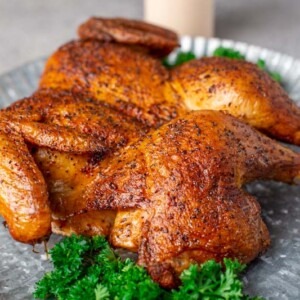
Once that breast hits 165°F, it’s time to pull the chicken off the Egg. The skin is at its peak, and the meat is at its juiciest.
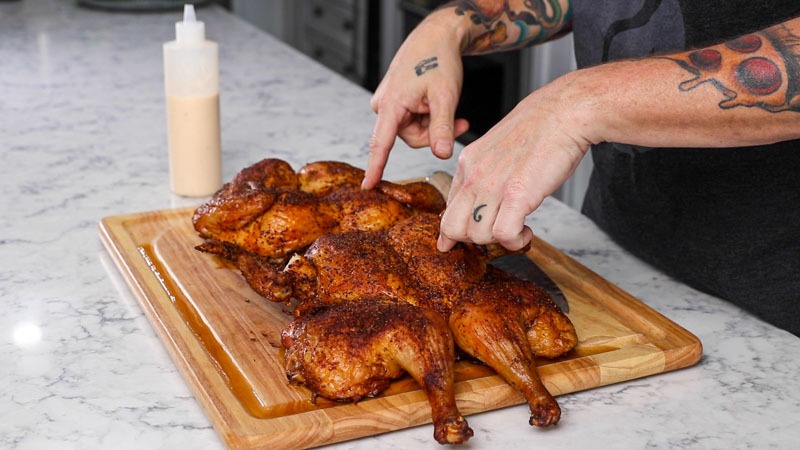
The Rest is Best
Don’t carve into it immediately! Move the chicken to a cutting board and let it rest for at least 10 to 15 minutes. This allows the juices to redistribute throughout the meat. If you cut it too soon, all that moisture will end up on the board instead of in your mouth.
The Finish: Carving the Chicken
The Final Verdict: Dry Brine for the Win
After putting these methods to the test, the results were undeniable. When comparing the two birds, the dry-brined chicken was far and above the winner. While the other bird was flavorful, the skin on the dry-brined chicken had that distinct, “shatter-on-impact” crunch that is so hard to achieve on a smoker. The overnight rest in the fridge isn’t just an extra step; it is the fundamental difference between a good chicken and a legendary one.
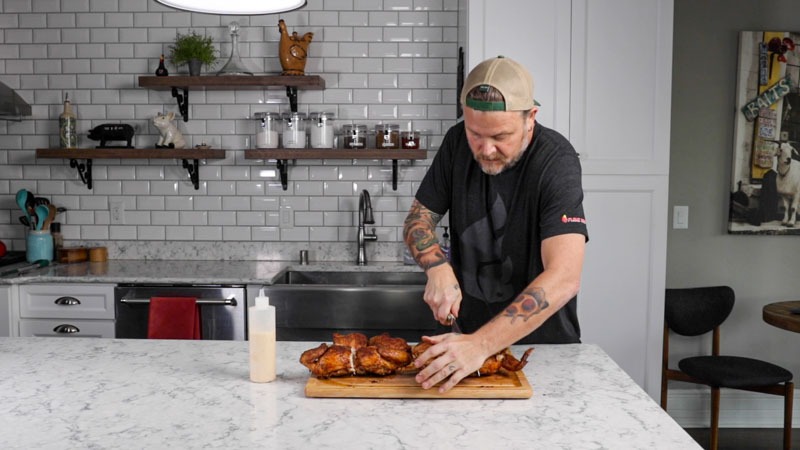
How to Carve a Spatchcock Chicken
Carving a flat chicken is actually much easier than carving a traditional whole bird. To ensure everyone gets their fair share of that crispy skin, follow these steps:
- Remove the Leg Quarters: Slice through the skin between the breast and the thigh. Pull the leg back and cut through the joint to remove the entire leg and thigh piece. You can then separate the drumstick from the thigh at the joint.
- Take Off the Wings: Pull the wings away from the body and cut through the joint.
- Carve the Breast: Find the breastbone in the center. Cut down one side of the bone, following the ribcage, to remove the entire breast in one piece. Repeat on the other side.
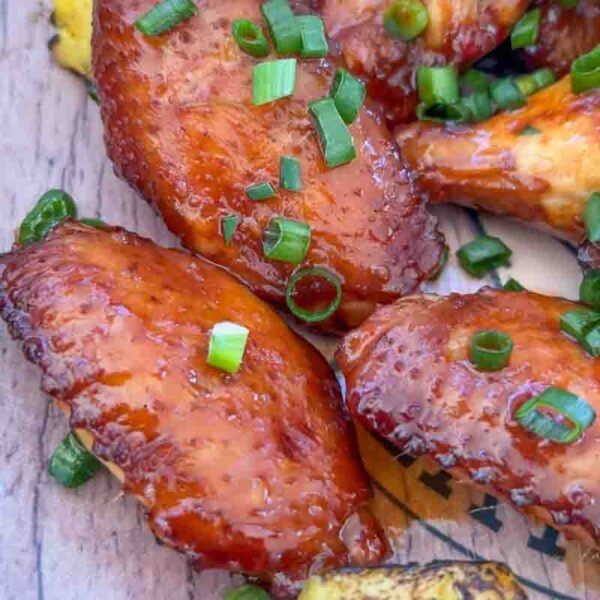
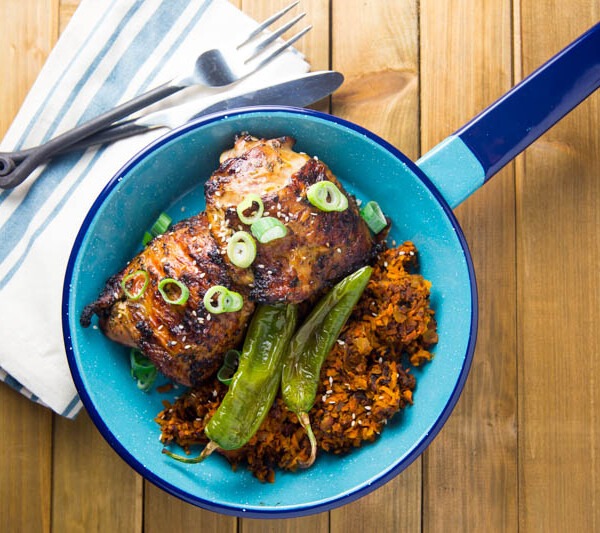
- Slice the Breast: Instead of serving one giant piece of white meat, slice the breast crosswise into thick strips. This ensures every slice has a strip of that golden-brown crispy skin attached.
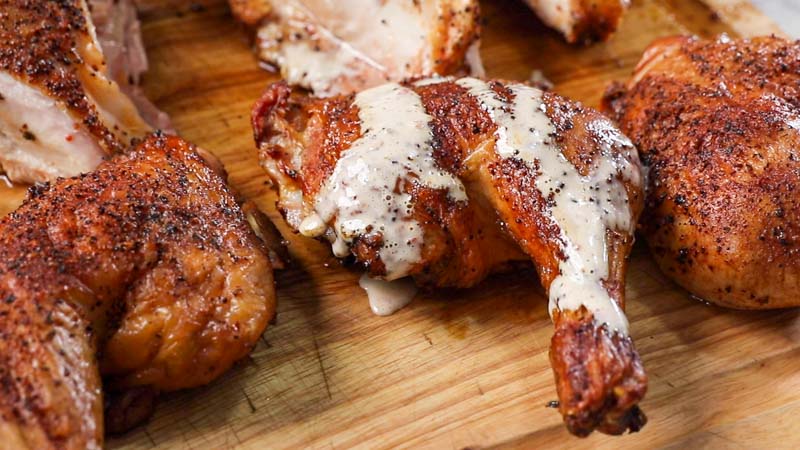
The Perfect Pairing: Spicy Alabama White Sauce
To take this meal over the top, I served this bird with a side of my homemade Spicy Alabama White BBQ Sauce. The cool, creamy base of the mayo combined with the tangy vinegar and a spicy kick of horseradish is the ultimate foil for the smoky, salty crunch of the chicken skin.
Whether you dunk the pieces or give the bird a light drizzle right before serving, the acidity of the sauce cuts through the richness of the chicken perfectly.
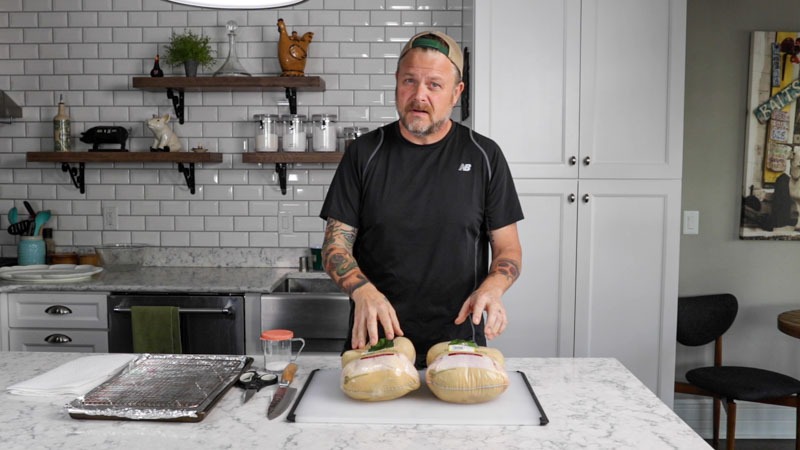
Crispy Spatchcock Chicken on the Big Green Egg
Ingredients
- 1 whole chicken, 4-5 lbs
- 2.5 tsp kosher Salt
- 1 tbsp hot sauce
- 4 tbsp of your favorite BBQ Rub, or a mix of Smoked Paprika, Kosher Salt, and Coarse Black Pepper
Instructions
- The day before you plan to cook, take the chicken out of the packaging
- Wipe down the bird with paper towels to dry skin off
- Remove the backbone and press down to break the breast plate
- Lay the chicken flat on a wire rack on top of a baking sheet
- Salt the skin of the chicken
- Place in the refrigerator uncovered overnight
- The next day preheat your Big Green Egg to 350° using an indirect setup
- Use 1 chunk of smoking wood
- Take the chicken out of the fridge and slather with a little hot sauce then apply rub
- Place the bird in to the Big Green Egg snd let cook for 1 hour 20 minutes
- When temp probe measures 165° in the breast it is time to pull
- Rest 5 minutes, carve, and enjoy
Nutrition information is automatically calculated, so should only be used as an approximation.


Just fixed this spatchcock chicken recipe for the second time. Turned out amazing again. Won’t fix chicken any other way. I used smoked paprika this time for a little extra smoky flavor with hickory wood. For those not so inclined to use a knife for the spatchcocking, use a strong scissors like I did, works well enough. Anyone who makes this recipe and does not use the Alabama white sauce, shame on you. Perfect compliment to poultry or pork!
Thanks for taking the time to leave such a kind note 🙏
Did two chickens yesterday using this recipe for Sunday dinner for my daughter and her family (two kids). It was the best chicken ever and my grand daughter declared me “the best chef” and all loved the white sauce.. this for sure will be in the rotation for a long time!
Hanks for posting Bill!